
Pomelo 0.41 · 2026-11-14
Pomelo is a lightweight, resource-friendly X11 desktop. It includes:
- A top menu bar, Dock, launcher and search.
- Settings, a file manager, terminal and text editor.
- A calculator, image viewer, paint app, media player, PDF reader and archive manager.
- Input methods (Zhuyin, Pinyin, Cangjie, Quick, Jyutping, Japanese, Korean, Vietnamese), screenshots and screen recording.
- The AI assistant Pomi, and its own login screen.
The whole desktop runs without GNOME and uses only a few dozen MB of memory when idle.
This manual explains how to install, use and remove Pomelo on Debian 13.
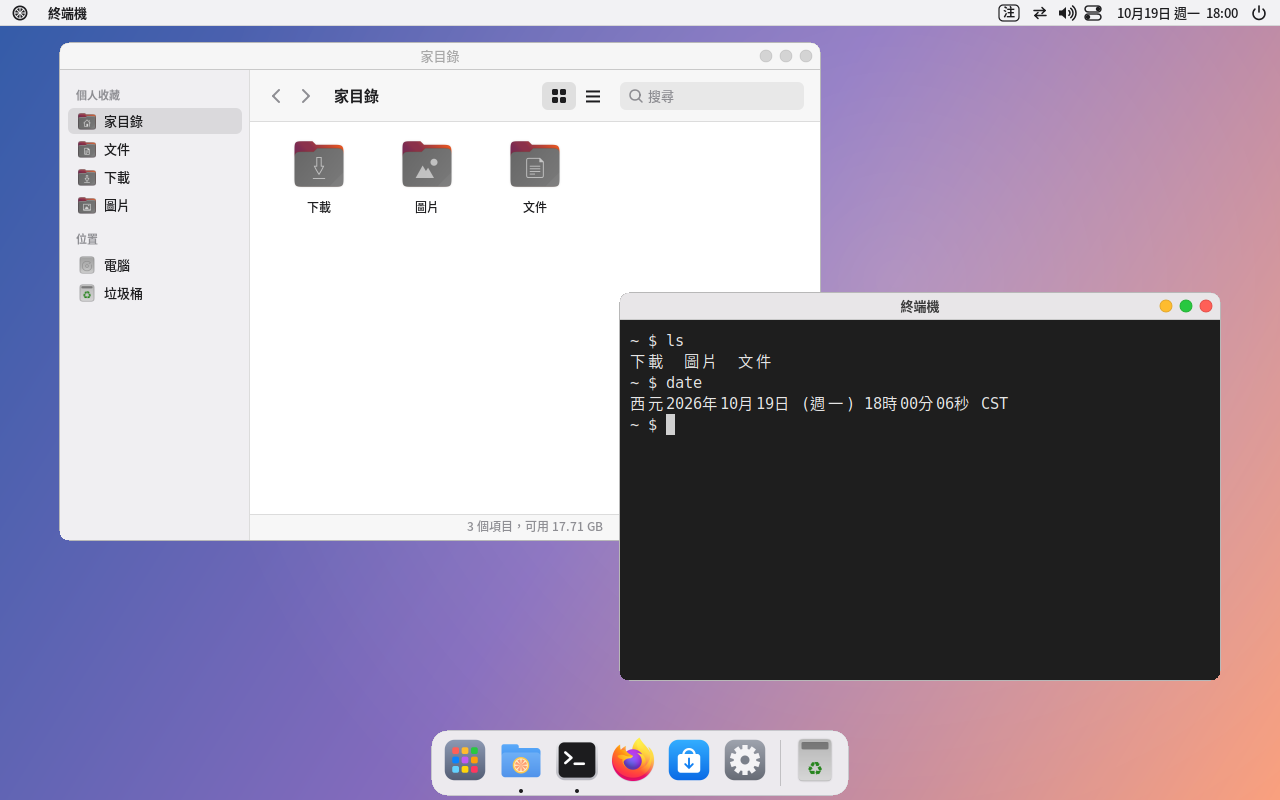
The screenshots in this manual were taken on Ubuntu; they look the same on Debian 13.
1. System requirements
- Computer: 64-bit x86 PC (amd64).
- Memory:
- 2 GB or more.
- 8 GB or more is recommended for the Pomi assistant; the light model uses about 1.3 GB while running.
- Display: with the Pomelo login screen, the display core is Pomelo's own Wayland compositor (pomelo-compositor): Wayland-capable programs such as GTK apps and Firefox display directly on Wayland (since 0.40), and so do Pomelo's settings apps, Control Center, notifications, launcher and lock screen (since 0.40); other programs (menu bar, Dock, file manager, terminal...) are shown through the built-in XWayland; when you pick Pomelo on your existing login screen (GDM and so on), it runs on the system's X11 (Xorg).
- Virtual machines (optional): the CPU needs hardware virtualization (Intel VT-x / AMD-V, turned on in the BIOS settings), otherwise it will be much slower; there must be enough memory for this computer and the virtual machine together (for example, to run a 4 GB virtual machine, 8 GB or more is recommended), and disk space depends on the size of the virtual disk.
- Containers (optional): Docker is installed separately from Pomelo; the "Containers" app has an "Install" button the first time you open it.
- System version: Debian 13 (trixie). To check your version:
cat /etc/debian_version(shows 13.x) - sudo: if you set a root password when installing Debian, your account cannot use
sudoby default. First switch to root withsu -, runusermod -aG sudo your-account, and log out and back in, and then you can usesudo(or just run the install commands as root).
2. Installation
Extract the package and go into the extracted folder:
tar xzf pomelo-0.41-debian13-amd64.tar.gz
cd pomelo-0.41-debian13
sudo apt install --no-install-recommends libwebkitgtk-6.0-4 gstreamer1.0-plugins-good gstreamer1.0-libav
sudo apt install ./*.deb
The first apt command installs Pomi Browser's web engine in a minimal way: Debian's WebKitGTK "recommends" a whole set of media plugins and image tools (ImageMagick, Ghostscript..., about 300 MB, which the browser doesn't use). The other packages are installed with their recommended packages as usual.
For the most minimal install (no recommended packages):
sudo apt install --no-install-recommends ./*.deb
Installing does not replace your current desktop or login screen. Your old desktop is still there, and you can choose which one to use when you log in.
Upgrading: download the new package and install it with the same commands. Your settings are kept.
The "development" folder in the package holds the header-file package (libpomelo-dev) for writing Pomelo programs; you don't need to install it for normal use.
3. First login
With your existing login screen
Log out, then choose the "Pomelo" session on the login screen:
- GDM (Debian's default): click your user name, then the gear icon at the bottom right, choose "Pomelo", and enter your password.
- LightDM, SDDM: choose "Pomelo" in the session menu on the login screen.
The login screen remembers your choice and goes straight to Pomelo next time.
Switching to the Pomelo login screen (optional)
Pomelo has its own login screen: a big clock, your avatar and your wallpaper as the background, using only about 2 MB of memory. Always try it first before switching:
sudo pomelo-dm-switch try      # try a Pomelo login screen on Ctrl+Alt+F7 without changing any settings
sudo pomelo-dm-switch on       # everything works: use it from now on
sudo pomelo-dm-switch off      # switch back to the original (GDM, LightDM, SDDM)
If you can't log in:
- Press Ctrl+Alt+F3 and log in on the text console.
- Run
sudo pomelo-dm-switch off. - Run
sudo rebootto restart.
The login screen's background, clock, text size, whether to show the user list, automatic login and the message at the bottom are all set in "Settings → Login Screen".
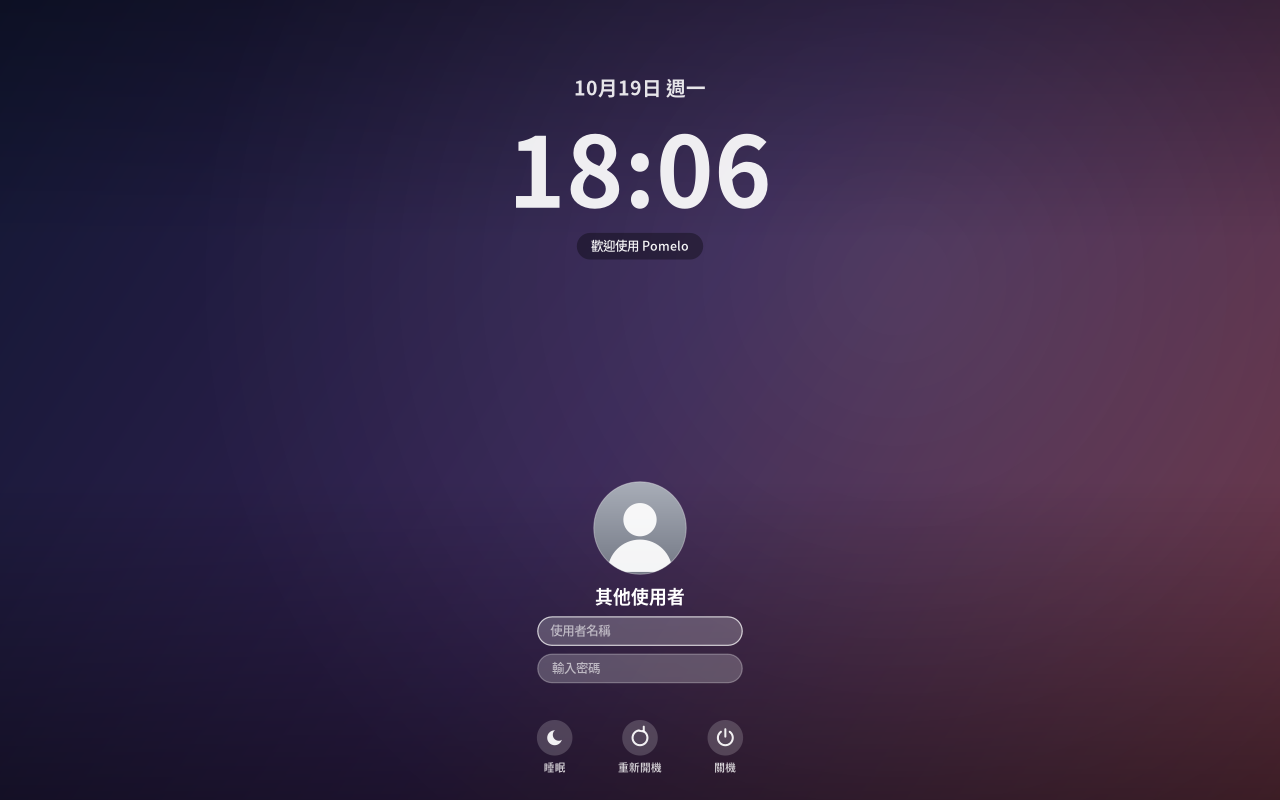
The Pomelo login screen on Debian 13 has so far only been tested in virtual machines; please use
tryfirst, and switch toononce you are sure you can log in normally.
4. Getting to know the desktop
- Menu bar (top of the screen)
- The Pomelo icon at the far left: About This Computer, Settings, Lock Screen, Sleep, Shut Down and so on.
- You can edit this menu yourself: right-click the icon → "Edit Menu…".
- You can add programs, websites or commands you use often.
- Name of the current program: click it to minimize, maximize or close the window.
- Status area on the right: input method (Zhuyin / English), external devices, network, volume, battery, clock, Control Center.
- Control Center lets you quickly switch Wi-Fi, Bluetooth, dark mode and Do Not Disturb, and adjust brightness and volume.
- Icons of programs running in the background (such as Telegram, Nextcloud, Slack, Discord) are here too: left-click usually opens the program, right-click shows its menu.
- The Pomelo icon at the far left: About This Computer, Settings, Lock Screen, Sleep, Shut Down and so on.
- Dock (bottom of the screen)
- Holds pinned programs and running programs.
- Right-click an icon to keep it in the Dock or remove it.
- Dragging: programs pinned to the Dock can be dragged left and right to change their order (other icons make room); drag one out of the Dock (a red cross appears on the icon's corner) and release to remove it from the Dock. Running programs that are not pinned, and the Trash, cannot be dragged. You can also drag a program into the Dock from the launcher or from "Settings → App Menu".
- The Trash is at the far right.
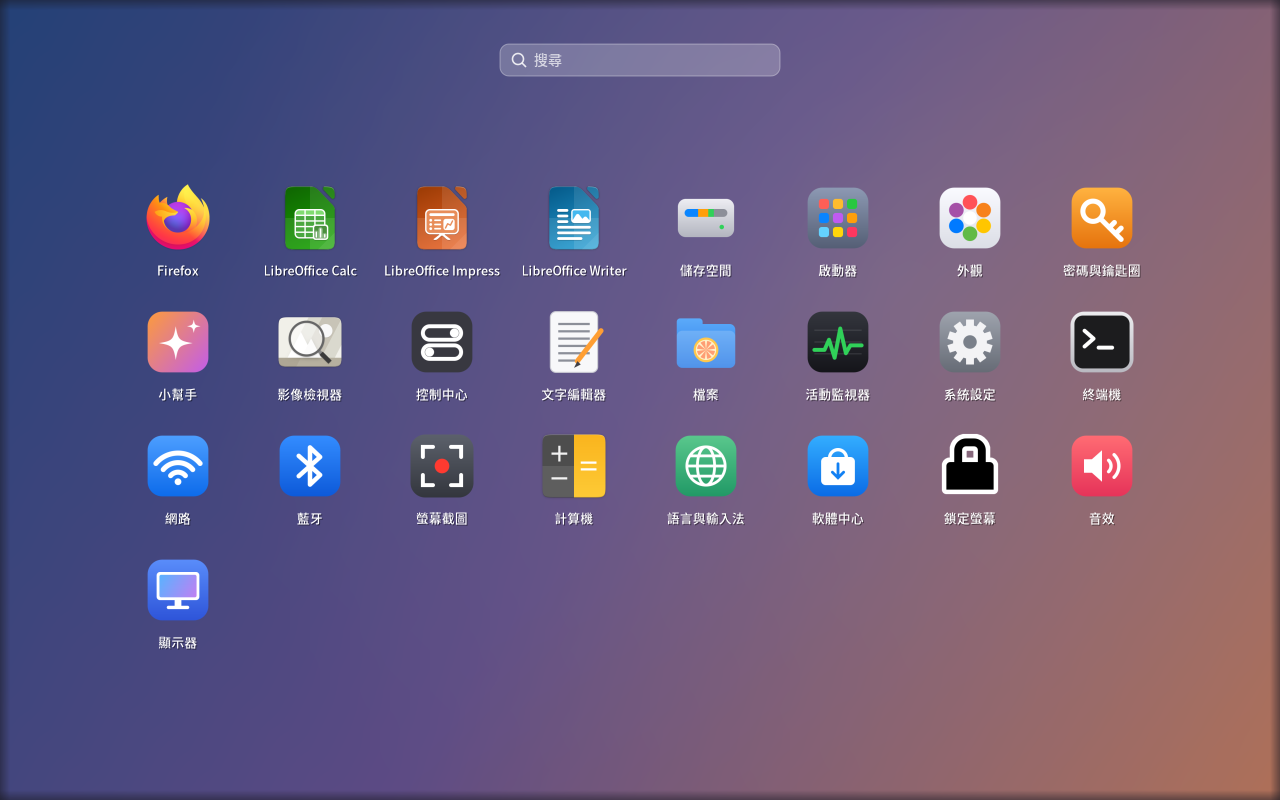
- Launcher (Super+A)
- Lists all programs and can search (typing searches across all categories).
- There are category tabs at the top: All, Utilities, Office, Documents, Entertainment, Productivity, Other (categories with no programs are hidden). Click with the mouse, or press Tab / Shift+Tab to switch. Programs are sorted automatically by their own type (for example, spreadsheets and presentations are Office; word processing, text editing and PDF reading are Documents; media and images are Entertainment; browsers, the assistant, containers and virtual machines are Productivity; files, terminal, software center and calculator are Utilities; the various settings pages are in Other).
- If you don't like the sorting: right-click an icon and pick a category from the list below (it gets a check mark and is remembered next time); choose "Automatic" to go back.
- Right-click an icon → "Edit…" to change its name or icon, or hide it from the list.
- Dragging: drag an icon onto a category tab at the top (the tab lights up) to change its category; drag it to another position inside a category tab (an insertion line appears) to change the order, which is remembered next time; drag it onto the Dock bar that appears at the bottom (it only shows while dragging) to keep it in the Dock. Releasing without dragging opens the program. Press Esc to cancel a drag. The "All" tab and typed search are sorted by name, so the order cannot be changed there.
- Right-click menu: Open, Keep in Dock / Remove from Dock, Edit…, Hide from Menu, Delete… (only for programs you added yourself; system programs are grayed out, so use "Hide from Menu"), Move to a category. Right-click on an empty area: "Add Program or Command…", "Edit App Menu…" (opens that page in Settings directly).
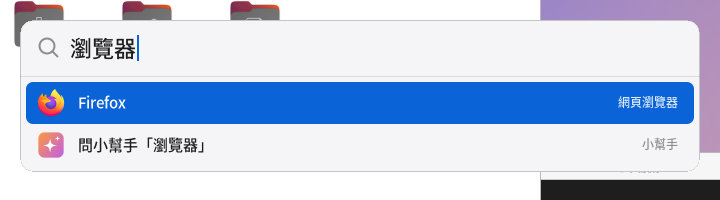
- Search (Super+Space)
- Type to find programs, files and commands, or do math directly.
- After typing a question, choose "Ask the assistant" to hand it to Pomi.
- Desktop (on the wallpaper)
- Right-click to change the background picture, adjust appearance, desktop and Dock, display settings, or open the terminal or Settings.
- Windows
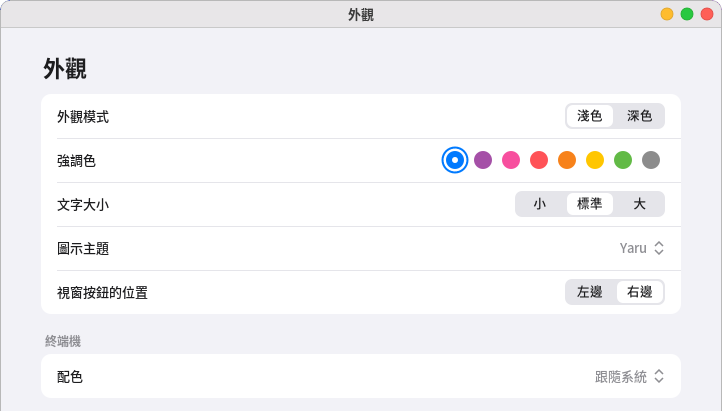
- The minimize, maximize and close buttons are at the top right. To move them back to the left: "Settings → Appearance → Window button position".
- Double-click the title bar to maximize or restore.
- Super+Tab shows all windows.
Super is the Windows key on your keyboard.
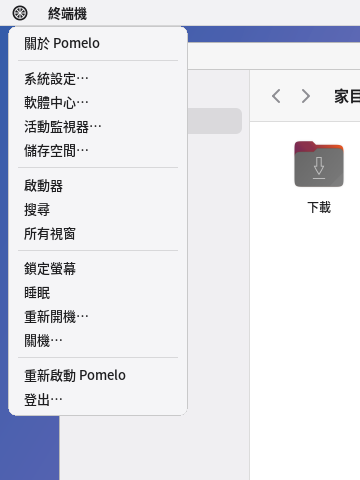
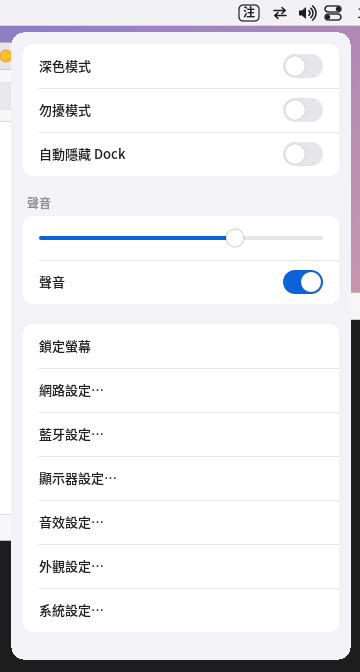
Left: the Pomelo menu at the top left. Right: Control Center.
Multiple desktops (virtual desktops)
Pomelo has 4 desktops by default (you can change it to 2–10 in "Settings → Multiple Desktops"). Each desktop has its own set of windows, and when you switch you only see the windows of that desktop; the menu bar, Dock, wallpaper, Pomi and notifications are present on every desktop. A window's maximized state, full screen and position are kept separately for each desktop, and each desktop also remembers which window you used last.
- See which desktop you are on: there is a row of small dots in the middle of the menu bar (the long one is the current desktop). Click a dot to switch, scroll the wheel over the dots to go to the previous / next one, click the small square at the far left to open the Desktop Overview, and right-click for a list of desktops.
- New windows appear on the current desktop (dialogs follow their parent window). You can change this in settings to "put windows of the same program on the same desktop".
- Switch animation: the windows of the old and new desktops slide left and right for about 0.2 seconds; if it makes you dizzy or your computer is slow, you can turn it off in settings.
- Dock: by default it shows (and marks as running) only the windows of the current desktop; after you turn on "Dock shows windows from all desktops" in settings, clicking a program on another desktop switches there automatically. Right-click a Dock icon to "Move to Desktop N" or "Show on All Desktops" for its windows.
- Alt+Tab switches only between windows on the current desktop by default; turn on "Alt+Tab also switches to windows on other desktops" in settings to include them.
| Key or gesture | Action |
|---|---|
| Ctrl+Alt+← / Ctrl+Alt+→ | Go to the previous / next desktop (does not wrap around at the ends) |
| Super+1–9 | Jump straight to desktop 1–9 |
| Super+Alt+1–9 | Move the current window to that desktop (by default you follow it; settings can change this to stay on the original desktop) |
| Ctrl+Alt+Shift+← / → | Move the current window to the previous / next desktop |
| Super+Tab, Super+E or Ctrl+Alt+↑ | Desktop Overview (press again or Esc to leave) |
| Swipe left or right with three or four fingers on the touchpad | Switch desktops following your fingers; swipe up with three fingers to open the Desktop Overview |
| Right-click a window title bar | "Move to Desktop 1 / 2 / 3…" (the current desktop is checked and can't be chosen), "Move to New Desktop", "Show on All Desktops", "Close Window" |
To move a window to a desktop, use Super+Alt+number, not Super+Shift+number: Super+Shift+3 / 4 / 5 are already the screenshot shortcuts. The terminal's original "Super+1–9 jumps to tab N" is replaced by desktop switching; for tabs, use Ctrl+Tab, Ctrl+PageUp / PageDown, or click the tab.
Desktop Overview: each desktop is drawn as a small desktop containing live miniature views of its windows (not still images; videos and terminals keep moving), and the current desktop has a blue outline. Click a small desktop to switch to it; click a window thumbnail to switch to the desktop it is on and bring it up; drag a window thumbnail onto another desktop to move it there; the "New Desktop" button below adds one (up to 10); right-click a small desktop for "Close This Desktop" (it must be empty first, and later desktops move up to fill the gap); right-click a window thumbnail for the "Move to Desktop" menu. Arrow keys + Enter and number keys 1–9 can also select; Esc leaves.
The assistant can be spoken to or typed to: "switch to the second desktop", "move this window to desktop three", "which desktop am I on", "next desktop", "show all desktops", "new desktop", "show this window on all desktops".
Command line (for scripts): pomelo-msg workspace goto 2, next, prev, move 3 (the window follows; add --stay to not follow), stick / unstick / toggle-stick, add, remove N, current (prints the current desktop), count; pomelo-msg overview toggles the Desktop Overview.
Desktops are numbered from 1. For X11 programs (such as wmctrl and xdotool), Pomelo also provides the EWMH standard _NET_NUMBER_OF_DESKTOPS, _NET_CURRENT_DESKTOP, _NET_WM_DESKTOP (0xFFFFFFFF = all desktops) and _NET_DESKTOP_NAMES,
so commands such as wmctrl -s 1 and wmctrl -r :ACTIVE: -t 2 work as usual.
Multiple monitors: all screens switch desktops together (every screen shows the same desktop number). The Desktop Overview appears on the screen where the mouse is. After logging in again or restarting, windows are not restored to their desktops (the windows are closed anyway); during a session, the desktop each window is on is always remembered. The old X11 window manager (pomelo-wm) has no multiple desktops.
5. Keyboard shortcuts
| Key | Action |
|---|---|
| Super+Space | Search (programs, files, commands; you can type Chinese) |
| Super+A | Launcher (all programs) |
| Super+Tab | Desktop Overview (all desktops and windows; see "Multiple desktops" above) |
| Ctrl+Alt+← / → | Switch to the previous / next desktop (Super+1–9 to jump directly, Super+Alt+1–9 to move the window there) |
| Alt+Tab | Switch windows (only on the current desktop by default) |
| Super+Return | Terminal |
| Super+Q | Close window |
| Super+M | Minimize |
| Super+↑ / Super+↓ | Maximize / restore |
| Super+← / Super+→ | Snap to left / right half |
| Super+Ctrl+F | Full screen |
| Super+L | Lock screen (if the screen shows only a dark background with no password box, press any key and it appears) |
| Super+Shift+Space | Call the assistant Pomi |
| Super+Shift+V | Talk to Pomi by voice (sent automatically when you finish speaking) |
| Super+Shift+3 | Capture the whole screen (saved to "Pictures") |
| Super+Shift+4 | Drag to select an area to capture (press Space to click a window instead) |
| Super+Shift+5 | Screenshot and recording toolbar |
| Add Ctrl while capturing | Copy to the clipboard only, without saving a file |
| Play / pause, previous, next keys on the keyboard | Control the media player |
| Calculator key on the keyboard | Open the calculator |
| Super+Shift+R | Restart Pomelo (when the menu bar or Dock has problems) |
| Super+Shift+Q | Log out |
Terminal: Ctrl+Shift+C / Ctrl+Shift+V to copy and paste (after selecting text, you can also paste by pressing the middle mouse button), Ctrl+Shift+T for a new tab, Ctrl+Shift+N for a new window, Ctrl+Shift+plus / minus / 0 to zoom text in and out, Ctrl+Shift+K to clear the screen. Right-click opens a menu with all of the above, and you can also open the current folder in the file manager; when the selected text is a web address, you can open the link directly. When a program inside the terminal (such as vim or htop) wants to use the mouse itself, right-click goes to that program; in that case, hold Shift and right-click to get the terminal's menu.
6. Settings
Open it from the Pomelo menu at the top left → "Settings..." (it is also in the desktop right-click menu). Text fields in the settings apps (Wi-Fi password, web address, name...) support Ctrl+C / Ctrl+V for copy and paste; right-click gives Cut, Copy, Paste and Clear All (password fields allow paste only). The contents are:
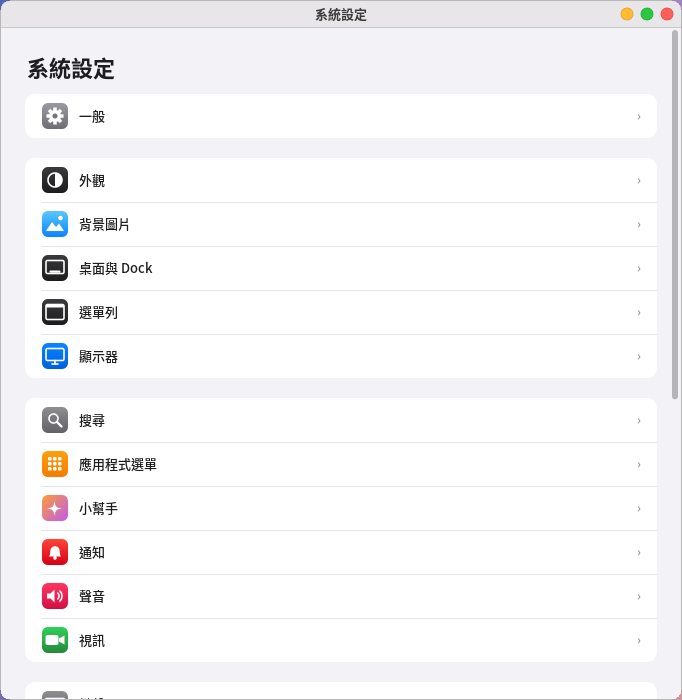
- General: About This Computer, Software Update, Storage, Date & Time, Device Management.
- Host Doctor (formerly Health Check): check the whole computer at once, see history trends, diagnose why it got slow, and a security overview (see "Host Doctor and health check" below). The "Health Check" page has been merged into Host Doctor, and its entry in Settings opens it directly.
- Appearance: dark mode, accent color, text size, window button position, window shadows and animations.
- "Window shadows and animations" is built in: since 0.35 Pomelo's display core (pomelo-compositor) draws them directly, so windows have soft shadows and rounded corners,
and fade in and out when windows and menus open and close. It is always on and picom does not need to be installed.
Only on the older X11 path (pomelo-wm, for example with another login manager or startx) is this a switch: the first time you turn it on, it installs
picom (you enter your password); to adjust it yourself, copy
/usr/share/pomelo/picom.confto~/.config/pomelo/picom.confand edit it.
- "Window shadows and animations" is built in: since 0.35 Pomelo's display core (pomelo-compositor) draws them directly, so windows have soft shadows and rounded corners,
and fade in and out when windows and menus open and close. It is always on and picom does not need to be installed.
Only on the older X11 path (pomelo-wm, for example with another login manager or startx) is this a switch: the first time you turn it on, it installs
picom (you enter your password); to adjust it yourself, copy
- Background, Desktop & Dock, Menu Bar (including editing the Pomelo menu at the top left).
- Displays: resolution, rotation, multi-screen arrangement. If you don't press "Keep" within 15 seconds after a change, it is reverted automatically.
- External monitors: plugging one in while logged in turns it on: if it has been set up before, the remembered arrangement is used; if not, it is placed next to the main display (on the left, above or below if the right is taken). When it is unplugged, windows that were on that screen move back to the main display.
- Every screen has a menu bar; the Dock normally stays on the main display, and moving the mouse to the bottom of another screen moves the Dock there.
- Search, App Menu (edit the programs shown in the launcher and search; see usage below), Assistant, Notifications.
- App Menu: on the left are the categories (All, Utilities, Office, Documents, Entertainment, Productivity, Other, Hidden, each with a program count), and on the right are the programs of that category;
the top right switches between List and Icons views, the top left can search, and the Dock area at the bottom is the programs currently pinned to the Dock. Everything can be done by dragging:
- Drag a program onto a category on the left → change its category (dragging onto "Hidden" hides it from the menu; dragging from "Hidden" onto a category unhides it and puts it in that category).
- Drag to another position within the same category (a blue insertion line appears) → change the order; the launcher's category tabs follow this order too; programs not arranged are sorted by name after them.
- Drag onto the Dock area at the bottom → keep in Dock; drag left and right within the Dock area → change position; drag out of the Dock area → remove from Dock. The Dock changes immediately.
- While dragging there is a translucent icon that follows the cursor, a target that lights up, an insertion line and a small label explaining what happens on release; press Esc to cancel.
- Right-click (on a program): Open, Edit… (Enter), Rename… (F2), Copy as Custom Program, Keep in Dock / Remove from Dock, Hide from Menu / Unhide, Move to a category (the current one is checked), Restore to System Default (only shown for system programs you changed), Delete… (Delete key; only programs you added can be deleted, with a confirmation first, and its Dock, category and order settings are cleared too; system programs are grayed out, so use "Hide from Menu" instead). On an empty area: Add Program or Command… (Ctrl+N), Show Hidden Programs, Restore All… (names, icons, hidden state, categories and order of all programs return to system defaults; programs you added and the Dock are left alone). On a category on the left: Sort by Name (clears the custom order); on "Hidden": Unhide All. In the Dock area: Move Left, Move Right, Remove from Dock, Restore Default Dock, Clear Dock.
- Keyboard: arrow keys move the selection, Home / End, Enter to edit, F2 to rename, Delete to hide (for programs you added it deletes, with confirmation first), Ctrl+N to add, Esc to cancel a drag or clear the selection.
- Adding: "Add…" at the top right or Ctrl+N; fill in the name, command (required), description, icon, category, "launcher tab" and whether to run in a terminal; after saving it appears in the launcher and search.
Programs you add are stored in
~/.local/share/applications/pomelo-custom-*.desktop(marked withX-Pomelo-Custom=true); the name and command cannot be blank or contain control characters such as line breaks. Changing a system program (name, hidden state, category…) only puts a copy in your own folder and leaves the system files alone; "Restore" simply deletes that copy. - Currently there are only the six categories above; you can't create new categories.
- Stored in
~/.config/pomelo/settings.conf:launcher.cat.<program ID>(category 0–5; absent means automatic),launcher.order.<0–5>(program IDs of that category, comma-separated, placed first),dock.apps(programs pinned to the Dock; written as-when all are removed),appmenu.grid(1 = icon view).
- App Menu: on the left are the categories (All, Utilities, Office, Documents, Entertainment, Productivity, Other, Hidden, each with a program count), and on the right are the programs of that category;
the top right switches between List and Icons views, the top left can search, and the Dock area at the bottom is the programs currently pinned to the Dock. Everything can be done by dragging:
- Sound, Video (camera), Keyboard, Mouse & Touchpad, Screen Time.
- Users & Groups, Login Screen, Printers & Scanners, Network, Bluetooth, Power.
Settings that need administrator rights pop up a password dialog.
Network, enterprise Wi-Fi and VPN
Settings → "Network": at the top are network adapters (wired, Wi-Fi), and below are VPN and nearby Wi-Fi in that order; every item has a right-click menu (adapter: Details; Wi-Fi: Connect, Forget This Network; VPN: Connect / Disconnect, Auto-connect, Edit, Delete).
- Enterprise Wi-Fi (WPA-Enterprise): networks in the list marked "Enterprise" with 802.1X written below them, which you sign in to with a company or school account. The first time you click one it opens a settings page: EAP method (PEAP or TTLS), phase 2 authentication (MSCHAPv2 or PAP), identity, password, anonymous identity (optional), and the server certificate (CA) — choosing the certificate file from your network administrator is the safest; if you choose "Don't verify", someone could impersonate this network to steal your password, so the screen warns you in red and asks once more when you press Connect. If the connection fails (for example, a wrong password), no wrong settings are left behind, and after fixing it you can try again right away.
- VPN: WireGuard and OpenVPN are supported (L2TP, PPTP and IPsec are not; VPNs of these kinds already in NetworkManager are still listed and can be connected, disconnected and deleted).
- Import: press "Import WireGuard config" and choose a
.conf, or "Import OpenVPN config" and choose an.ovpn(in an X11 session you can also drag the file straight into the window). After importing, the settings page of that VPN opens automatically. - Settings page: the big button at the top connects / disconnects; "Auto-connect"; "Send all traffic through the VPN once connected" (if off, only the network inside the VPN uses the VPN; for WireGuard, all traffic is routed only if the config's AllowedIPs contains 0.0.0.0/0); name and DNS; if OpenVPN needs a username and password, fill them in under "Account and password". The password is only saved if "Remember password" is on; otherwise you must enter it each time you connect.
- How passwords are handled: VPN and enterprise Wi-Fi passwords never appear in command arguments (you can't see them with
ps): saved ones go through the standard input of the nmcli editor, and ones used only to connect, not saved, go through a temporary file with permission 0600 (in$XDG_RUNTIME_DIR, deleted after use). An OpenVPN password containing a comma or backslash can't be remembered (an nmcli format limit); turn off "Remember password". - Missing package: OpenVPN needs
network-manager-openvpn(calledNetworkManager-openvpnon Fedora and Rocky; install only the basic one, not the-gnomeone). If it isn't installed, the OpenVPN import area becomes an "Install" button (installs with administrator permission). WireGuard only needs a kernel with the WireGuard module (all Linux 5.6 and later have it), with no extra package to install.
- Import: press "Import WireGuard config" and choose a
Host Doctor and health check
The health check has been merged into "Host Doctor" (App Menu → Host Doctor; the "Host Doctor (Health Check)" item in Settings, "Check Network" in network settings,
"Find the Cause" in Activity Monitor and "Check Battery" on the Power page all open it). Go to the "Checkup" tab and press "Check Now"; in about 20 seconds to two minutes it checks eight categories,
a status card at the top gives the conclusion and progress, and below it is one card per category: red means needs action, orange means worth attention; click in to see what was found for each item, why it matters and what to do.
Every full checkup is recorded in the history; the "Trends" tab shows the trend and forecast, the "Diagnose" tab finds out why things got slow, and the "Security" tab shows connections, logins and the firewall.
Command line: pomelo-doctor --check [category…] [--json] [--admin] (the old pomelo-system --check forwards to it).
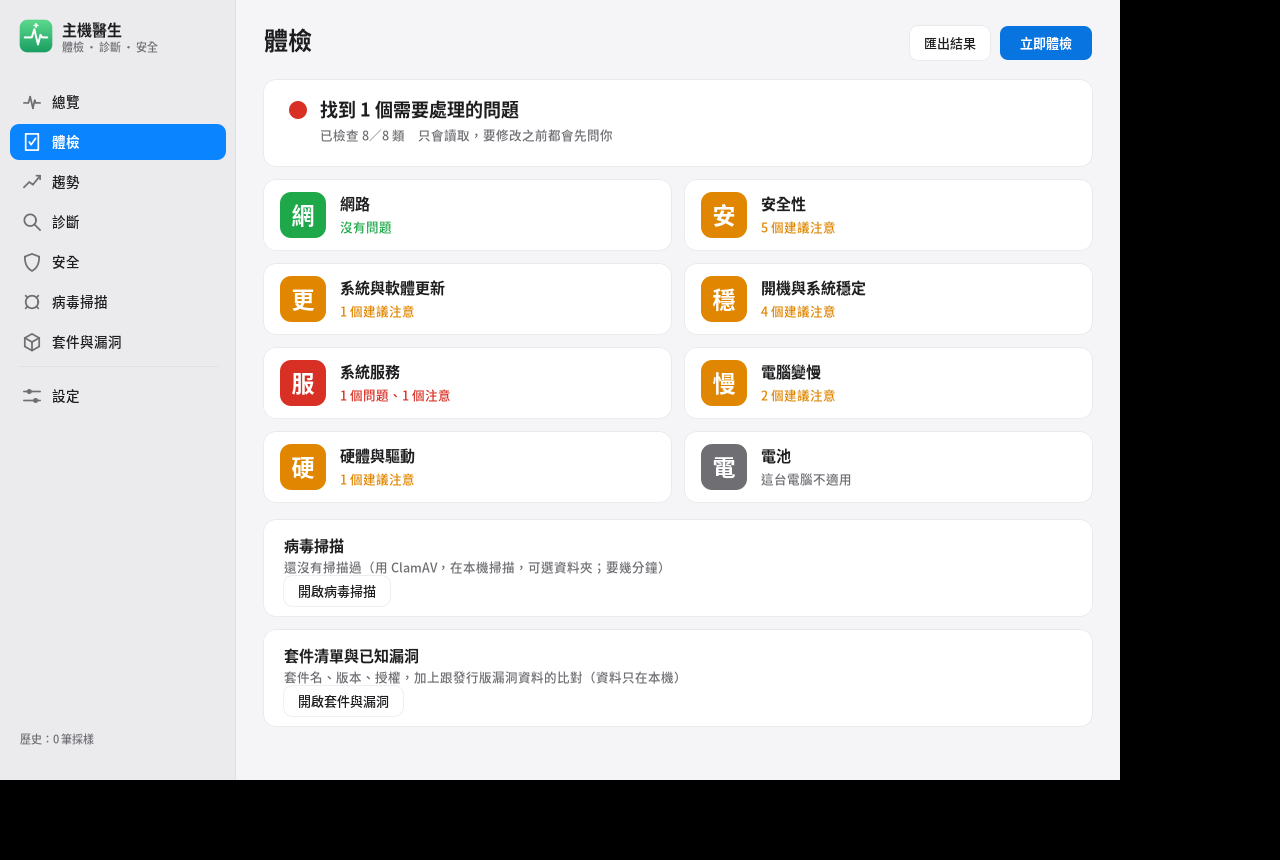
- Network: traces the path from this computer all the way to the internet (network service → Wi-Fi switch → network card → IP → router → DNS → internet) and tells you where it breaks; it also looks at whether Wi-Fi is encrypted, signal strength, channel congestion, VPN and proxy. "Check Network" in the network settings is the same check.
- Security: security updates, firewall, which services can be reached from the network (dangerous ones such as databases and the Docker management interface are marked red), SSH login settings, the docker group, automatic login, automatic screen lock, disk encryption, Secure Boot, AppArmor / SELinux, programs that run automatically at login, suspicious programs (those running from temporary folders, disguised as kernel threads, or known crypto miners), and SSH private keys without a passphrase. Click "Also check (needs administrator password)" to also check: accounts without a password, passwords using an old encryption method, sudo settings that don't ask for a password, setuid programs that belong to no package, and how many SSH logins failed in the past 24 hours. This part only reads; the result is only a conclusion (account names), and passwords are never read out.
- System & software updates: whether the system version is still supported (without support there are no security updates), how many updates there are, how long since the package list was refreshed, whether automatic security updates are on, whether any package was left half-installed, whether a restart is needed to finish updating, and firmware updates.
- Startup & system stability: services that fail to start or keep restarting, programs that crashed recently, disk read/write errors, how long startup takes and the slowest steps, whether the system log is too big, whether the disk is almost full, and whether the clock is synchronized automatically.
- System services: if SSH, Apache, Nginx, MySQL / MariaDB, PostgreSQL, Docker, Redis, MongoDB or Samba are installed, it checks whether they are running, whether the ports they should listen on are listening, and whether they keep crashing; also when a website's certificate expires and whether Docker containers keep restarting. Look here first when "a website won't open".
- Slow computer: measures for 1.5 seconds to see whether the CPU, memory or disk is overloaded and which program is responsible; whether the CPU is overheating and slowing down, whether updates or indexing are running in the background, and whether any programs were recently force-quit by the system for lack of memory. "Find the cause" in Activity Monitor is this same check.
- Hardware & drivers: this computer's CPU, memory, motherboard and BIOS; whether the graphics card is using a driver (if not, the screen is drawn by the CPU, which is slower), devices without drivers, missing firmware, no sound output found, USB that often fails to connect, and disk health.
- Battery (laptops): health (what fraction of the original capacity is left), charge cycles, charge limit. The "Power & Lock" page also has "Check Battery".
- Disk: health and cleanup are in "Storage"; clicking here opens it.
Checks only read. Items with a fix have a button on the right (for example "Turn on firewall", "Use public DNS", "Keep only the latest 500 MB" of logs); clicking it first asks "Do you want to...?" at the top of the screen and explains what will be done, and it only runs after you confirm; anything that needs administrator rights shows a password window.
Virus scan: the "Virus Scan" tab on the left of Host Doctor (the virus scan page that used to be in Settings has moved in); you can also right-click a folder in the file manager → "Scan for Viruses…", or tell Pomi "scan for viruses". It uses the open-source ClamAV, and the first time it asks whether to install it (the program is about 30 MB and the virus definitions about 230 MB; once installed they update automatically in the background). Choose to scan "Downloads", the whole home folder or an external device; scanning runs at lowered priority so it doesn't disturb the programs you're using, and uses about 1–1.5 GB of memory. Files found can be "quarantined" (moved to the quarantine area with permissions removed, and can be restored later) or permanently deleted from quarantine (with a confirmation first). ClamAV is best at finding Windows viruses, so it is suitable for scanning a USB drive or downloaded files before you give them to a Windows computer; it only runs when you press scan, it does not monitor in the background all the time, and its detection rate is lower than commercial antivirus software, so treat it as an extra layer of protection. The virus scan page shows how many days ago the definitions were updated, reminds you after more than a week, and pressing "Update Definitions" updates them right away.
Package list (SBOM): the "Packages & Vulnerabilities" tab on the left of Host Doctor (the package list page that used to be in Settings has moved in). The list shows which packages are installed on this computer — name, version, license and a one-line description —
and can be searched; "Export" saves CycloneDX 1.5 JSON (a standard format commonly used by security tools and audits) or CSV to the "Downloads" folder.
To find out whether installed packages have known vulnerabilities (CVEs), press "Download Vulnerability Data": it fetches the distribution's own published vulnerability list in full to this computer
(about 11 MB for Ubuntu, 6 MB for Debian, 6 MB for Rocky) and compares locally, without uploading your package list; press it again later to update the data,
and it reminds you after more than a week. Results fall into two kinds: Update available (red) means a fix has been released, so please install software updates; Distribution has not released a fix yet
(blue) is mostly low risk or still being evaluated, and the fix will appear in Software Update once it is out. Click a package to see each CVE's severity, description and fixed version,
and "Details" opens the distribution's vulnerability page. The security check also gains a "Known vulnerabilities" item. Terminal: pomelo-system --sbom (text),
--sbom --json (CycloneDX), --sbom --csv, --sbom --update (update vulnerability data).
You can also check in the terminal: pomelo-system --check (everything), pomelo-system --check network security (only some categories),
and add --json for output that programs can read.
Screen saver
After a period of inactivity, Pomelo covers the screen with a picture (to protect privacy and let the panel rest). Settings → Screen Saver (or the command pomelo-screensaver --settings) lets you:
- Turn it on or off, and choose "start after being idle for" (1, 2, 5, 10, 15, 30 minutes, or never).
- Pick one from the thumbnail grid: Clock (moves slowly to avoid burn-in), Photo slideshow (the "Pictures" folder or a folder you choose; supports JPEG, PNG, WebP, GIF, and broken images are skipped), Pomi, Flowing colors, Starfield, Bubbles, Text message, Plain black, or Random each time. Press "Preview" to see it full screen, and press any key to leave.
- Whether a password is needed on leaving: the default is "Follow lock time"; with "Always require password", moving the mouse first brings up the lock screen so the desktop is never exposed.
- On battery you can turn it off or switch to plain black; it does not start while a video is playing or a full-screen program is running; a tiny mouse jiggle (a shaking desk) won't wake it.
The order after being idle is: screen saver → lock screen → turn off display → sleep. The times for the first three appear on both the "Power & Lock" and "Screen Saver" pages,
and you get a hint when the settings contradict each other (for example, the display turns off earlier than the screen saver starts). Commands: pomelo-screensaver --preview --kind clock-name, --list, --lock-now.
You can also tell Pomi "start the screen saver", "change the screen saver to photos", "start the screen saver in 10 minutes".
7. Input methods
Pomelo comes with its own input methods. They work right after installation; there's no need to install fcitx or ibus.
- Switching input method/English: tap Shift once, or press Ctrl+Space. The right side of the menu bar shows the current input method (such as "注" for Zhuyin), or "EN" for English.
- Choosing characters: after typing Zhuyin, press Space or ↓ to open the candidates. Press 1–9 to pick one; you can also move the highlight with ←→ and press Enter to pick it, or click with the mouse and scroll to turn pages. When there are no candidates, Enter commits the text.
- Full-width / half-width: Shift+Space.
- Settings: "Settings → Language & Input", where you can choose the Zhuyin keyboard layout (Standard, Hsu, Eten, Pinyin…) and how many candidates to show per page.
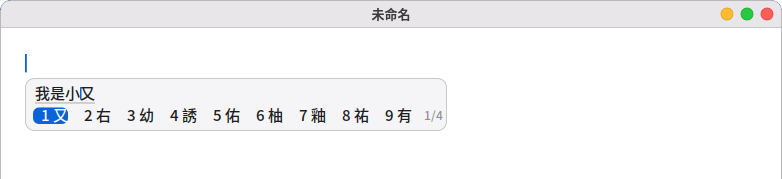
Input methods for other languages: in "Language & Input", under "Pomelo Input", one click turns each one on. You can turn on several at once and cycle through them with Ctrl+Shift+Space, or pick one from the indicator on the right of the menu bar.
- Pinyin (Simplified), Cangjie, Quick, Jyutping: the first time, the Rime engine is installed (a terminal opens and asks for your password), then the dictionaries are downloaded (Pinyin about 10 MB, Jyutping about 22 MB) and the input method is turned on automatically. Before you type for the first time, it takes a dozen seconds or so to prepare the dictionaries.
- Japanese: type romaji (such as nihongo), press Space to convert to kanji and Enter to commit; ←→ moves between segments, Shift+←→ changes a segment's length, F7 converts to katakana.
- Korean: 2-set (default), 3-set or Romaja.
- Vietnamese: Telex (default) or VNI; for example, typing "Vieetj Nam" in Telex gives "Việt Nam". Nothing extra to install.
- If you haven't chosen any yourself, one is turned on based on the interface language: Zhuyin for Traditional Chinese, Pinyin for Simplified Chinese, Cangjie and Quick for Hong Kong, and the matching input method for Japanese, Korean and Vietnamese.
Qt programs (such as VLC and VirtualBox) can type too (since 0.33, through Qt's built-in IBus plugin; no extra installation needed). With the Pomelo login screen, programs that display directly on Wayland, such as GTK, Qt, Firefox and Pomi Browser, can also type (since 0.40), and the candidate bar still follows the text cursor; password fields automatically skip conversion. With the existing login screen, GTK4 programs type through the small ibus-gtk4 package (installed together with Pomi Browser).
Limitation: Flatpak and Snap apps (for example VLC installed from a software store) have their own separate environment and can't use the Pomelo input method yet.
To type Chinese in those apps, use this instead:
Fcitx 5 (sudo apt install fcitx5 fcitx5-chewing), then switch the input method framework to Fcitx 5 in "Language & Input".
Interface language:
- Switch it in "Language & Input", and it takes effect after you log in again. There are 14 languages: Traditional Chinese, English, Simplified Chinese, Japanese, Korean, French, German, Spanish, Italian, Brazilian Portuguese, Russian, Vietnamese, Thai, Indonesian.
- The Thai interface needs a Thai font (the default Noto Sans CJK has no Thai glyphs, and without a Thai font the whole interface shows boxes): installing
pomelo-desktopsuggests one along with it (fonts-tlwg-loma-ttfon Debian / Ubuntu,google-noto-sans-thai-fontson Fedora / Rocky; Noto Sans Thai infonts-noto-corealso works); if you installed only a single package, please add one yourself. - For languages the system doesn't have yet, a terminal opens and generates them with
sudo locale-gen.
8. The Pomi assistant
Pomi is a little robot that walks around your desktop, powered by an AI running on your own computer. What you say is not sent to the internet; it only goes online to check the weather and to search in the browser (if you want it to do more, you can choose to turn on the "Online brain"; see the end of this section).
-
First use: go to "Settings → Assistant" and click "Download" to get the AI model.
- The light model is about 1.1 GB; computers with 12 GB of memory or more use the standard model by default, about 2.5 GB.
- You only need to download it once.
-
Calling Pomi: click it, press Super+Shift+Space, or type a question in Search and choose "Ask the assistant".
-
Talking to Pomi: click the microphone on the right of the bubble's input box, or press Super+Shift+V, and just say 「打開終端機」 ("open the terminal") or 「音量調到 30」 ("set the volume to 30").
- Pause for a moment (about a second) when you're done and it's sent automatically; to finish early, click the microphone again, or press Esc to cancel.
- The first time, click "Download" under "Voice Input (Microphone)" in the assistant settings (about 264 MB). After that it works fully offline: your voice is recognized only on your computer and deleted right after.
- In the settings you can click "Try It" to test the microphone, or have the text put into the input box first so you can check or edit it and press Enter to send.
- Mandarin, Cantonese, English, Japanese and Korean are supported. When a word is heard as a sound-alike (such as 「終端機」 "terminal" heard as 「中斷劑」), app names, common commands and file names in Documents, Desktop and Downloads are corrected automatically.
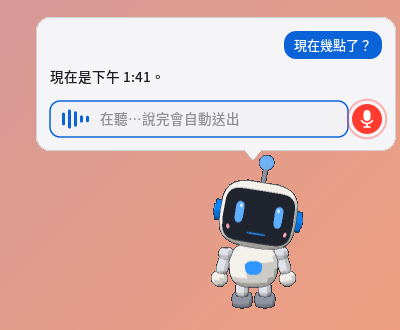
Pomi listening: the input box moves with your voice, and sends automatically after a short pause -
Computer checks: the first time Pomi opens, it offers buttons you can click directly: "Do a security check for me", "Check my computer", "What's wrong with the network?", "Why is my computer slow?"; you can also say "I can't get online", "Are there any updates", "Boot is slow", "A website won't open", "Battery health". Pomi runs the matching category of the "health check" and puts together the items that need action or attention, with suggestions; saying "open the health check" opens Host Doctor, where you press the fix buttons on the "Checkup" tab. The checks themselves are written programs, not commands the AI makes up, so the results are not guesses.
-
Quick commands: common phrases are done at once without waiting for the model. For example:
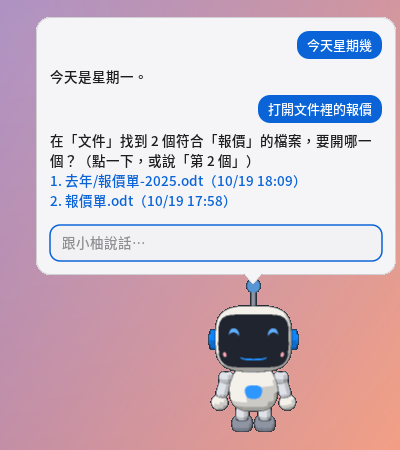
- Open programs, websites, files: "open the terminal", "open the browser and go to Yahoo", "open the quotation in Documents", "open the To-do document"
- Close or switch programs: "close the terminal", "close the browser", "switch to Firefox", "minimize the calculator" (if one program has several windows open, they all close together)
- Add text to the end of a text file: "add 'buy milk' to the end of todo.txt", "add 'pay phone bill' to the end of the to-do list"; if you only say "add text under document a", Pomi asks what to add. Saying "this file" means the file currently open in the text editor.
- Change settings: "set the volume to 30", "turn on dark mode"
- Reminders and lookups: "remind me to take a break in 10 minutes", "what day is it today", "Taipei weather"
- Greetings and simple questions: "hello", "who are you", "which model are you", "what can you do", "thank you"
- When several files match, they are listed; click one or say "number 2" to open it.
-
Complicated questions: other questions are answered by the model, in about 1–5 seconds on an ordinary computer.
-
File actions ask you first: before creating, adding text to the end of a file, copying, moving or moving to the Trash, a confirmation window always appears.
- It never overwrites an existing file and never deletes directly.
- Text can only be added to the end of plain text files (such as .txt and .md); Word and PDF cannot be changed yet. If the file has unsaved changes in the text editor, Pomi asks you to save first.
-
Style and sound: in the assistant settings you can choose:
- Six color schemes, each with a dark version.
- Eye color and sound effects.
- Reading answers aloud. The first time, an offline voice of about 90 MB must be downloaded. The Chinese voice is a female voice with a mainland accent; Japanese and Thai currently have no offline voice.
-
Online brain (optional, off by default): in the "Brain" section of "Settings → Assistant", change "Local (default)" to "Online", and Pomi can use an online AI to answer complicated questions, and can also look things up, read web pages, read text files you specify, change the wallpaper, and (only if you tick it separately) run commands.
- You need your own API key: OpenAI-compatible services (OpenAI, OpenRouter, Groq, DeepSeek, or your own Ollama and so on), Claude (Anthropic) and Google Gemini all work. Register on the provider's website, create an API key, set up payment, then paste the key into "API key" in the settings and press "Test connection" to confirm.
- Before switching to "Online", an explanation appears first and it is only enabled after you agree; you can switch back to local at any time. The questions you type and the information Pomi reads in order to answer (file names, system status, web page content…) are sent to the provider you chose; common commands such as "open the terminal" and "set the volume to 30" are still handled only on your computer. Pomi never attaches a whole file, the clipboard or a screenshot automatically; it asks you every time before reading a file.
- The key is stored only on your computer (under
~/.config/pomelo, readable only by your account). Online services usually charge by usage, and the cost is borne by your account. - Actions such as installing packages, shutting down, writing files, changing the wallpaper and running commands always bring up a confirmation window for you to press, even when an online AI requested them.
- When there is no network connection, it switches to the local model automatically (you can turn this off in settings). See "Online brain" in
docs/AI小幫手.mdfor details.
9. Screenshots and screen recording
- Super+Shift+3: the whole screen.
- Super+Shift+4: select an area.
- Super+Shift+5: toolbar (screenshot and recording).
- Super+Ctrl+Esc: stop recording.
Screenshots are saved in the "Pictures" folder and recordings in the "Videos" folder. After a screenshot, a thumbnail appears at the bottom right; click it to open it; right-click the thumbnail and choose "Edit with Paint" to add arrows, text or crop (see "Paint" in section 10).

Screen recording
The three buttons with red dots in the middle of the toolbar are for recording: "Record entire screen", "Record window", "Record selected area".
- Recording a window: click the window to record. It records the position and size of that window at the moment you click; if you drag the window elsewhere or resize it during recording, the picture does not follow (to follow it, record the whole screen, or edit afterwards).
- While recording, there is a red timer at the top right of the menu bar; click it to stop. Right-clicking the timer gives a full menu: Stop recording, Pause (Resume) recording, Show the recording folder in Files, and Discard and delete this recording. While paused the timer turns orange and stops, and the paused time is not recorded; on stopping, the segments before and after are merged automatically into one file.
- After recording, a thumbnail appears at the bottom right (with a play button in the middle); click it to play; right-click for "Open", "Show in Files" and "Delete".
- Press "Options" on the toolbar to open the settings window: save location, countdown, microphone, computer sound, mouse cursor, frames per second (15 / 30 / 60),
file format (Automatic, MP4, WebM, MKV), quality (Small file, Standard, High quality); if the computer has a camera (
/dev/video*) there is also "Show camera while recording", where you can choose one of four corners (top left, top right, bottom left, bottom right) and a size (small, medium, large), and the camera picture is overlaid on that corner of the recording. Settings are remembered. - Formats: MP4 is H.264 + AAC, WebM is VP9 + Opus (free formats), and MKV can hold anything. "Automatic" picks MP4; if the computer's ffmpeg has no H.264 encoder, it saves as WebM instead and tells you with a notification when recording ends. If the chosen format can't be used, it likewise switches to one that can rather than failing.
- When something goes wrong, a notification explains in plain language: microphone or camera not found (that source is skipped this time and the rest records as usual), not enough disk space (checked before recording; if the disk is nearly full midway, it saves the file properly first and then stops, keeping what was recorded), ffmpeg ended unexpectedly (what was recorded is kept). On errors no 0-byte or unplayable file is left behind.
Recording needs ffmpeg, which you install separately (Pomelo does not preinstall it). The first time you record it asks; press "Install" and a terminal opens to install it
(ffmpeg; the Ubuntu and Debian versions include libx264 and can save MP4).
10. Text editor, calculator, calendar, image viewer, paint, media player and PDF reader
These apps are in the launcher. Double-clicking a text file, photo, music, video or PDF in the file manager also opens them automatically.
Text editor
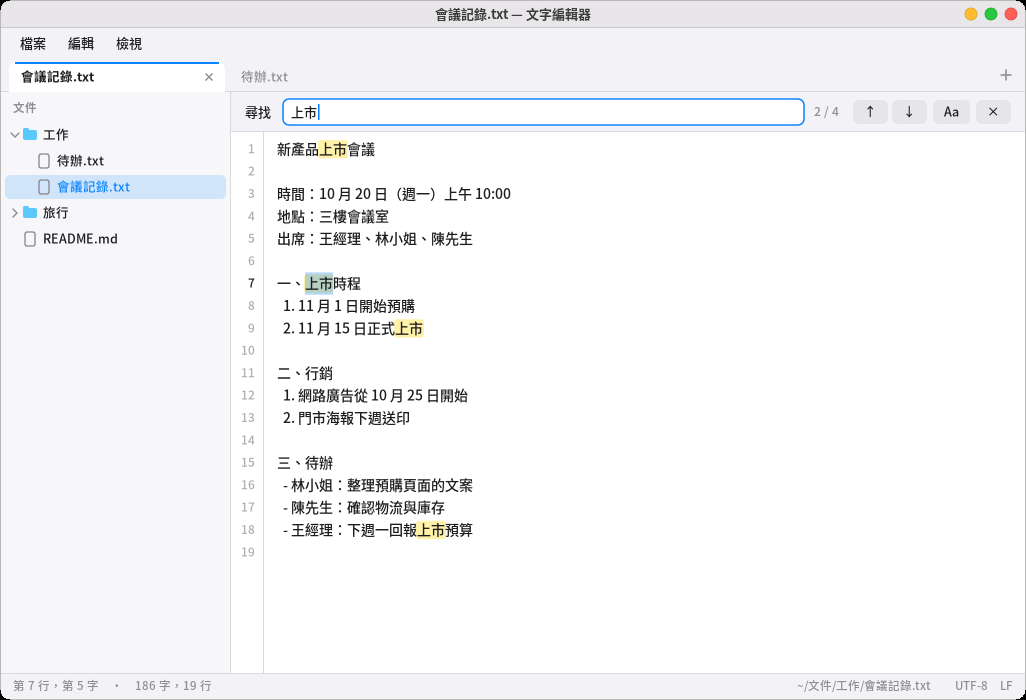
- The menu bar at the top has "File", "Edit" and "View" (you can also press Alt+F/E/V or F10, and switch menus with ←/→).
- One tab per file: Ctrl+N new tab, Ctrl+W close, Ctrl+Tab switch, Alt+1–9 jump to a tab. Text files opened from the file manager are added to the same window; for a separate window, use "File → New Window".
- The file list on the left is a folder tree; click a file to open it, or right-click to create a new file in a folder. Ctrl+B shows or hides it; drag the edge to change its width.
- Find and replace: Ctrl+F finds (every match is highlighted, with "n of total"; Aa toggles case sensitivity), F3/Shift+F3 next/previous, Ctrl+H replaces ("Replace" changes the current match, "Replace All" changes them all at once, and Ctrl+Z undoes a mistake).
- Other: Ctrl+A select all, Ctrl+L go to line, Ctrl+O open a file (Tab completes paths), Ctrl+plus/minus font size; in "View" you can turn off word wrap and line numbers, or switch to a monospace font.
- Old Big5 text files are converted to correct Chinese automatically and saved back as Big5; files with Windows line endings (CRLF) are saved as CRLF too.
- If another program changes the file (for example, Pomi adds text at the end), unmodified tabs reload automatically, and Ctrl+Z takes you back to the previous content; if you also have unsaved changes, a notice below warns you that "saving will overwrite changes made elsewhere".
Calculator
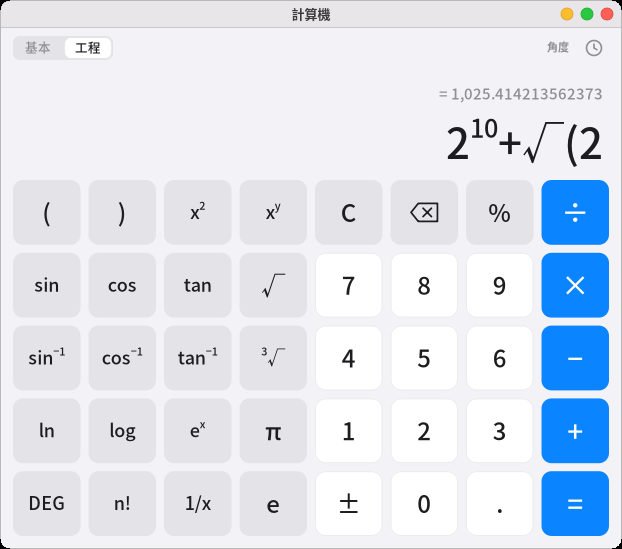
- Type a whole expression on the keyboard, such as
12*(3+4); the line above shows the result as you type, and Enter or = confirms it. - "Basic/Scientific" switch: scientific mode adds parentheses, powers, roots, trigonometric functions, logarithms, factorials and π; the top right shows whether degrees or radians are in use (click DEG/RAD to switch).
200+10%gives 220 (200 plus 10% of 200).- The clock icon at the top right is the history; click an entry to reuse its result. Ctrl+C copies the result, and Ctrl+V pastes an expression.
Calendar
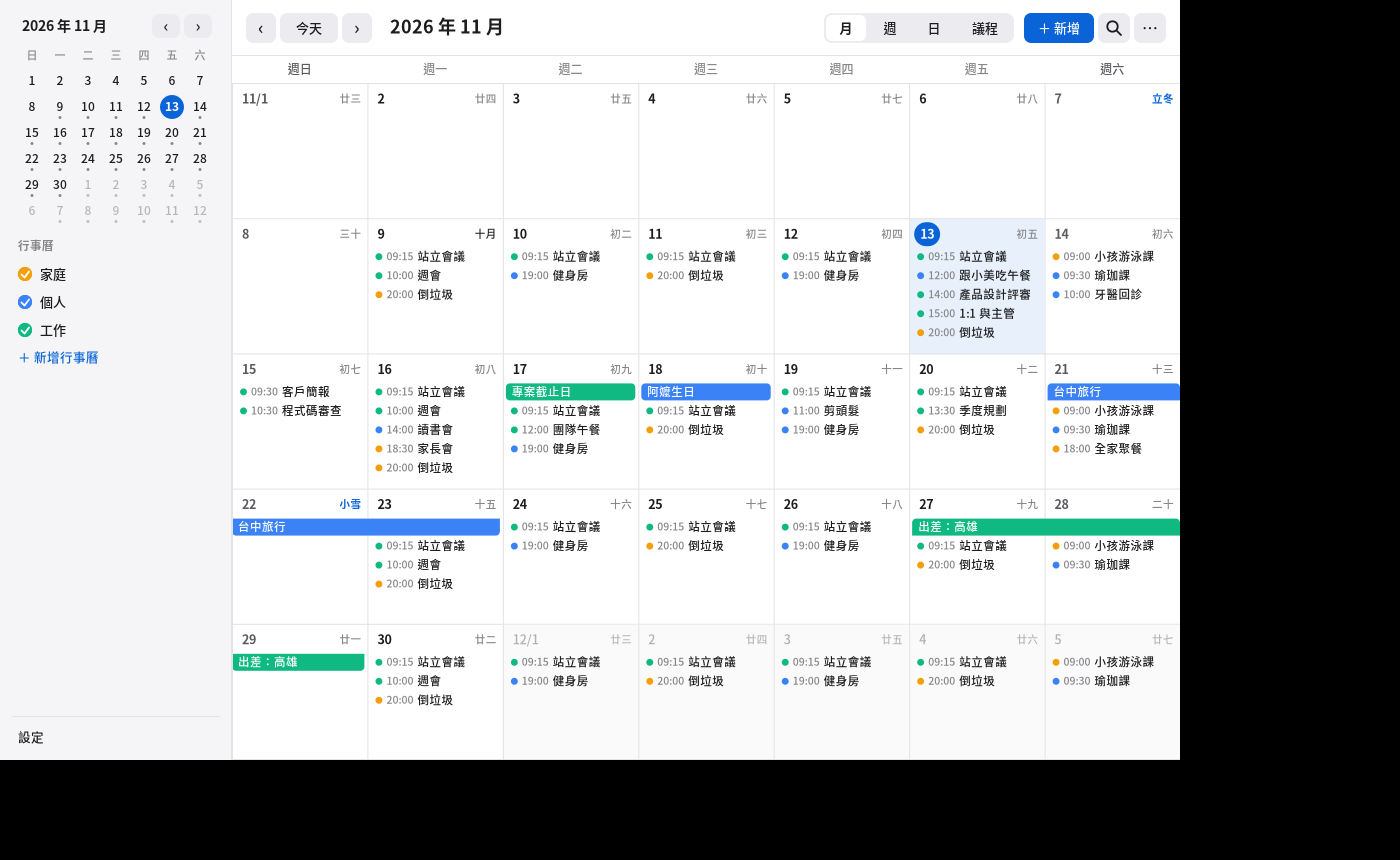
- At the top you can switch between "Month, Week, Day, Agenda" (Ctrl+1–4); "Today" and the left and right arrows change the date, and clicking a date in the mini calendar on the left jumps there; T returns to today, N adds an event, Ctrl+F searches.
- Adding an event: "+ New" at the top right, press N, double-click a date cell in month view, or drag out a stretch of time in week / day view (the edit window pops up when you release). An event can have a location, notes, all-day, time zone, repeat (daily, weekly on chosen weekdays, monthly, yearly, with an end date or count), and reminders (from a few minutes to a few days before, and you can set several).
- Existing events: double-click to edit, drag to another time or date, drag the bottom edge to change the length, right-click (Edit, Copy, Duplicate, Delete, Change calendar color). For repeating events it first asks "this one only" or "all events".
- On the left you can create several calendars (Personal, Work…), each with its own color; click the dot to show or hide it. The data is standard
.icsfiles in~/.local/share/pomelo/calendar/, and double-clicking an.icsfrom elsewhere (exported from Google or Nextcloud, or a mail attachment) in the file manager brings up an import window. - Month view marks Taiwan's public holidays, make-up holidays and make-up workdays, plus lunar dates and the 24 solar terms (can be turned off in settings); clicking the date and time at the top right of the menu bar pops up a mini calendar and that day's events.
- Reminders are handled by a background program from when you log in to the desktop, so notifications appear even when the calendar window is closed, and clicking a notification opens that event; reminders missed while the computer was asleep or off are made up once after startup.
- Assistant: "meeting tomorrow at three in the afternoon", "what do I have on today", "what's on next week". Command line:
pomelo-calendar --add "Title" --start "2026-11-20 14:00" --remind 10m,pomelo-calendar --list --json. - You can optionally sync with CalDAV and servers such as Nextcloud, Radicale, Synology and Fastmail (Settings → CalDAV). For the full description (file format, command line, holiday data sources, how sync and conflicts are handled) see
docs/行事曆.md.
Host Doctor (App Menu → Host Doctor; "Host Doctor (Health Check)" in Settings; the old health check has been merged into its "Checkup" tab)
- Checkup: item-by-item results and fix buttons for the eight categories of computer health check (network, security, updates, stability, services, performance, hardware, battery), and exporting the results.
- Virus Scan, Packages & Vulnerabilities: one tab each on the left (the virus scan and package list pages that used to be in Settings have moved in, with the same features).
- Overview: health score, risk score, how many days until the disk is predicted to fill up, and the top three things to do (with one-click fixes, always asking you before fixing); "Check Now" runs the full eight-category check.
- Trends: line charts of disk, memory, boot time and checkup score, with 7 / 30 / 90 / 180 days to choose from; red dots are clearly abnormal days, and clicking a point shows the packages added or updated, kernel changes and failed services around that day; right-click to change the metric, save as an image, or export a report. When there is less than 7 days of data or it fluctuates too much, it plainly says "not enough data yet" instead of guessing.
- Diagnose: when the computer is slow, press "Start Diagnosis" (about 1 second); it lists the most likely causes, the evidence and suggestions, and compares with how this computer normally behaves; tick "Also analyze boot" to see which service was slowest at boot.
- Security: a to-do list, network connections (who is listening, who connected in), login records (failures, brute force, sudo), the firewall (enable, disable, allow or block a port), and settings and permissions, combined into one risk score. Items that need administrator permission are only done when you press "Scan with administrator permission" (read-only).
- Settings: sampling frequency, how many days of history to keep, notifications, whether to record process names (not recorded by default), exporting HTML / PDF reports (can be anonymized). Data is stored only on this computer.
- Assistant: "the computer is so slow", "why is it so laggy", "boot got slow", "how long will the disk last", "how did this month's checkups go". Command line:
pomelo-doctor --help. - Intrusion check, Logs, Response: see the next section.
Intrusion check, logs and what to do when attacked
The three tabs on the left of Host Doctor — "Intrusion Check", "Logs" and "Response" — answer "Has my computer been broken into?" and "What do I do if it has?".
Intrusion check: press "Start Check" (about 3–5 seconds, read-only, at the lowest priority). It looks for: whether system files have been replaced, the places where a trojan could survive a reboot (schedules, services, shell startup files, ld.so.preload, PAM, sudoers, SSH keys, newly added accounts…), suspicious or hidden processes, unusual network connections, suspicious kernel modules, and strange things in the file system. The result first gives a one-line conclusion and a severity (red = high, orange = medium, blue = low), and each item expands to "Why it matters", "Evidence", "Suggested action" and buttons (mark as normal, add to timeline, view in logs). "Full check" verifies all system files (slower); "Administrator check" also looks at the parts belonging to root and other users (read-only, asks for the administrator password). A light check runs automatically every week, and notifies you if something is highly suspicious.
Note the limits of this check: it runs on this computer, so it can only say "signs found" or "no known signs found", and it cannot guarantee you haven't been broken into — a skilled intrusion (for example a kernel-level rootkit) can fool checks run on the machine itself. If you suspect an intrusion, please check again from an outside clean environment (a boot disc).
Logs: system logs, login records (auth.log / secure, wtmp, btmp), kernel messages, firewall and package records are all in one place, filterable by time, level, service and keyword; 14 kinds of security events (failed login, successful login, sudo, new account, password change, SSH key, service start / stop, kernel error, module, firewall, package, schedule…) are marked with colors and icons; click a line to see the parsed fields and the lines around it, and right-click to copy, filter by this source IP or service, add to the "Event timeline" or mark as evidence; logs can be exported (can be anonymized). The "Event timeline" puts the events you marked on one time axis and can automatically find related events from the same user, the same source IP, or within 10 minutes of each other.
Response: if you really have been broken into, this page guides you through six steps: don't shut down or delete files at first → temporarily cut the network (it asks you first) → build an evidence package (with SHA-256, can be encrypted, without password hashes and private keys) → change all passwords and keys → reinstall or restore from a clean environment → report and ask for help. This page only does two things: preserving evidence and temporarily cutting the network, and neither runs automatically.
Command line: pomelo-doctor --intrusion [--deep] [--json] [--brief] (exit code 0 = no known signs found, 1 = low or medium signs, 2 = high signs),
pomelo-doctor --logs [--since 24h] [--security] [--unit sshd] [--grep string] [--json], pomelo-doctor --evidence folder. The assistant also understands "have I been broken into" and "who logged in recently".
Image viewer
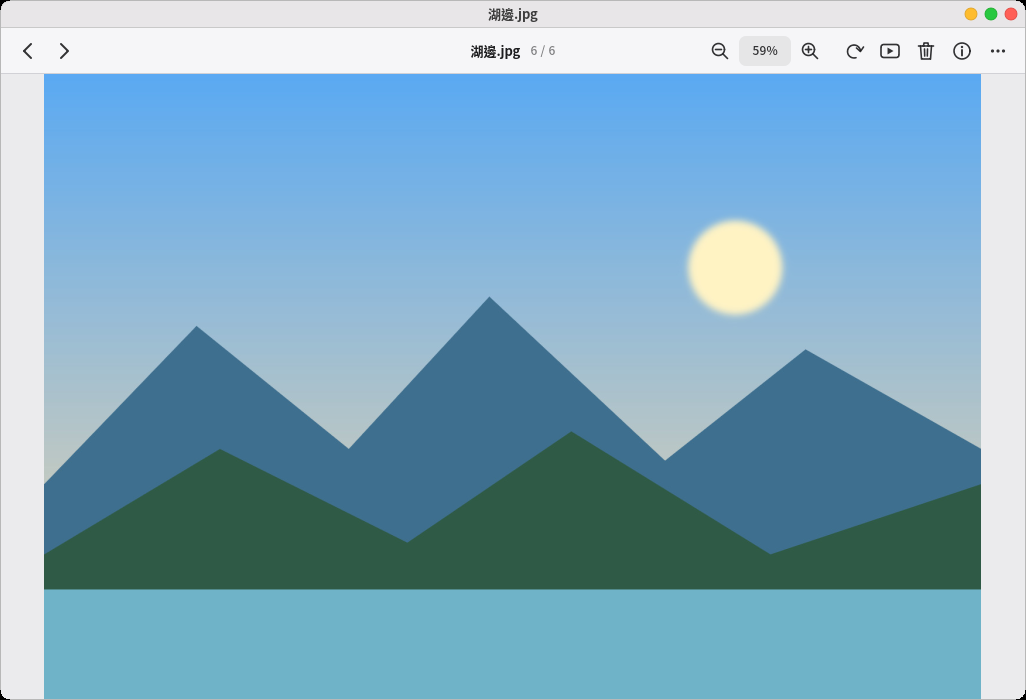
- Supports PNG, JPEG, GIF and WebP (including animations), BMP, TIFF and SVG. Portrait photos taken with phones are turned upright automatically.
- ←/→ show the previous/next image in the same folder; scroll to zoom, drag to move, and double-click to switch between "Fit to window" and "Actual size".
- F full screen, S slideshow, R rotate, I photo info (date taken, camera model, aperture and shutter).
- Delete moves the image to the Trash, and Ctrl+Z undoes it right away. The right-click menu also has "Copy Image", "Edit in Paint" and "Set as Wallpaper".
- iPhone HEIC photos and AVIF: the first time you open one, an "Install" button appears; it installs libheif (about 5 packages), and once done, go back to the window and the image shows.
- TIFF: if the system has no libtiff, an "Install" button appears (most systems already have it). Multi-page TIFFs show only the first page.
- SVG: drawn with the built-in nanosvg; ordinary icons and illustrations work fine, but text and filter effects inside an SVG are not shown.
Paint
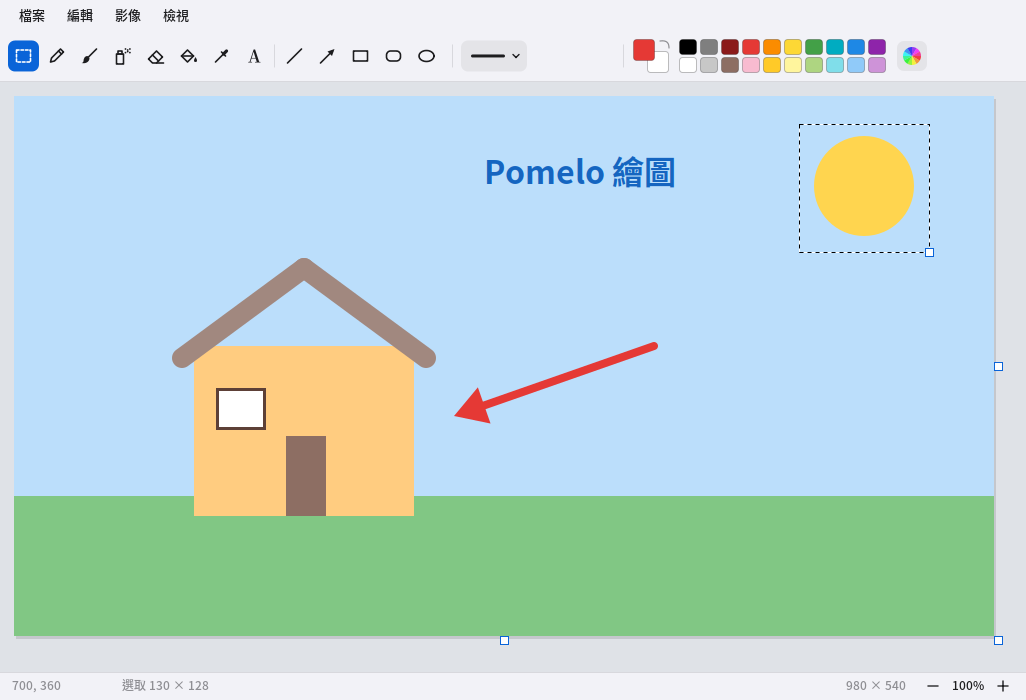
- Tools (the top row; shortcut keys in parentheses): Select (S), Pencil (P), Brush (B), Airbrush (A), Eraser (E), Paint bucket (F), Color picker (I), Text (T), Line (L), Arrow (W), Rectangle (R), Rounded rectangle, Ellipse (O).
- The left button draws with the foreground color and the right button with the background color; in the palette, left-click picks the foreground color and right-click the background color. Click the foreground or background swatch (or the color wheel at the far right) to adjust the color yourself, and the colors you adjust stay at the right of the palette. X swaps the foreground and background colors; [ and ] change the thickness.
- Hold Shift while drawing: lines and arrows lock to multiples of 45°, and rectangles and ellipses become squares and circles. Shapes can be "Outline", "Fill" or "Outline and fill".
- Text: click and start typing (you can type Chinese with the input method), press Enter for a new line, and click elsewhere to place it; choose the size and bold at the top.
- Select: after framing an area, drag to move it, and drag the square at the bottom right to resize it (hold Shift to keep the proportions); arrow keys nudge it a little at a time. Ctrl+C/X/V copy, cut and paste (you can paste images copied from other apps, such as screenshots), Delete removes, and "Image → Crop to Selection" keeps only the selected part.
- "Image" menu: resize, canvas size, rotate, flip, invert colors; when there is a selection, only the selected part changes. Dragging the square at the bottom right of the picture also changes the canvas size.
- View: Ctrl+scroll to zoom, Ctrl+0 fit to window, Ctrl+1 actual size; a pixel grid appears when zoomed in far. Middle-drag or hold Space and drag to move around.
- Opens PNG, JPEG, GIF (first frame), WebP, BMP, TIFF and SVG; saving uses the file extension to save as PNG, JPEG or BMP (saved in the "Pictures" folder by default). Ctrl+Z/Ctrl+Y undo and redo. The right-click menus of the image viewer and of the screenshot thumbnail both have "Edit in Paint".
Media player
-
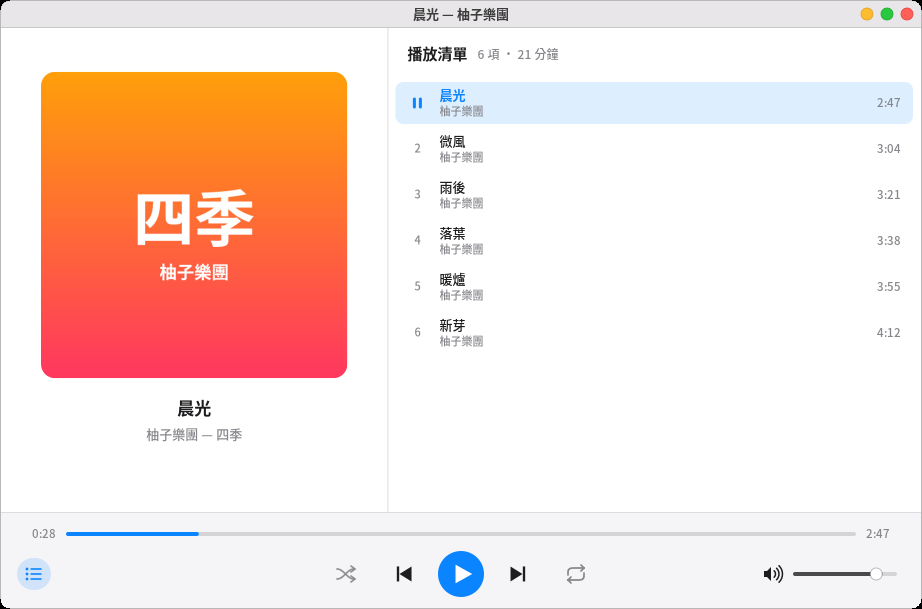
Double-click music or a video in the file manager to start playing. Right-click a folder and choose "Play with Media Player" to turn the whole folder (including subfolders) into a playlist.
-
Only one player is open at a time: opening another file hands it to the player that's already running.
-
Space play/pause, ←/→ back/forward 5 seconds (30 seconds with Shift), ↑/↓ volume, N/P next/previous track, F full screen (video), L show or hide the playlist.
-
Shuffle and repeat (whole list / this track) are at the bottom. Close and reopen it, and it continues from the last playlist and position.
-
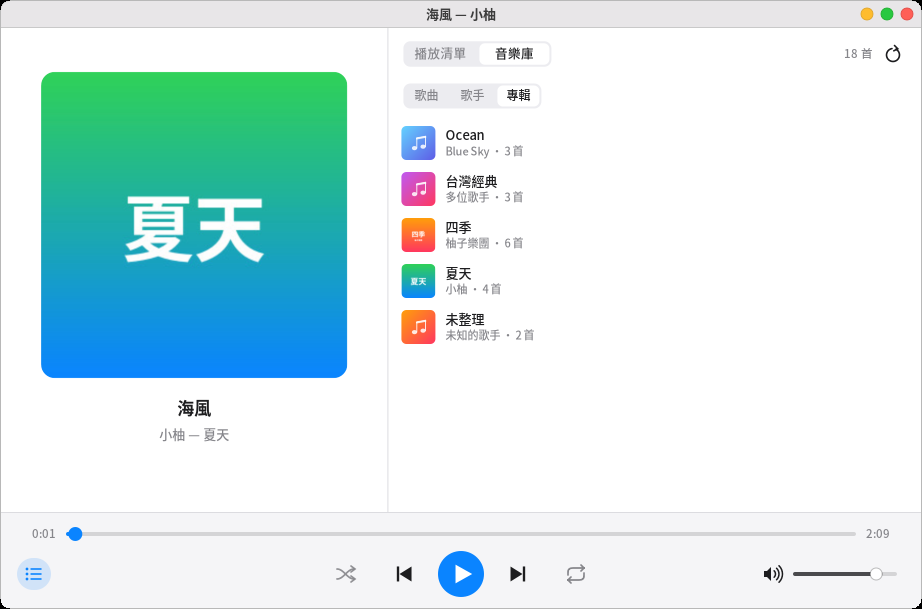
Music library: switch to "Music library" above the list on the right, and it automatically organizes the "Music" folder (including subfolders), which you can browse by "Songs", "Artists" and "Albums". Click into an artist or album to list its songs; press "Play all" or double-click a song to start playing; right-click for "Add to playlist". The first scan takes a little while, and afterwards it only rereads new or changed files; after adding new songs, press the refresh button at the top right. Album covers use
cover.jpgin the folder. -
While playing, a music note icon appears in the top menu bar; click it to pause or change songs. The play / pause, previous and next keys on the keyboard also work. You can also tell Pomi "next song", "pause the music", "play music".
-
Supported formats:
Type Extensions Needs ffmpeg? Music MP3, FLAC, Ogg (Vorbis), Opus, WAV No, plays once installed Music M4A, AAC (and rarer formats such as WMA, APE) Yes Video MP4, MKV, WebM, AVI, MOV (and M4V, OGV, FLV, 3GP, WMV, TS, MPEG) Yes Subtitles A same-name .srt; text subtitles embedded in MKV or MP4Yes (ffmpeg needs the subtitles filter; without it the video still plays, just without subtitles) Playlists can be
.m3uor.m3u8. A video's picture and sound are each decoded by their own ffmpeg process, so dragging the progress bar, pausing, full screen and volume never block each other. -
ffmpeg must be installed separately: Pomelo does not include ffmpeg in the default install (nor on the disc), because the ffmpeg license and the codecs it can decode differ between distributions. Without ffmpeg, MP3, FLAC, Ogg, Opus and WAV still play; when you open a video or an M4A, the screen explains, and pressing "Install ffmpeg" opens a terminal and runs the matching command below (you enter your password). After it is installed, press play again. For this computer:
sudo apt install ffmpeg. Debian's ffmpeg is in main, and Ubuntu's is in universe (enabled by default on the desktop edition). Debian and Ubuntu's ffmpeg has a full set of decoders, and can play H.264, HEVC, AAC, VP9, AV1, Opus, Vorbis and MP3. -
A video that can't be played does not crash the player: a broken file or one that isn't a video shows a "can't open" explanation and automatically moves to the next one; if the computer's ffmpeg lacks a certain decoder, the screen says which one (for example H.265) and what to install.
-
Right-click on the video, cover or an empty area: Play / Pause, Previous, Next, Full screen, Show or hide playlist, Shuffle, Repeat, Mute, Switch subtitles, Show in file manager. Right-click a song in the list to play it, remove it from the list, show it in the file manager, or clear the whole playlist.
-
Subtitles: if there is a same-name
.srtsubtitle file next to the video (for examplemovie.srt,movie.zh-TW.srt), or text subtitles embedded in MKV or MP4, they are shown automatically (Chinese is preferred), and old Big5 subtitles work too. Press V to cycle through the subtitles and "Off", or right-click the video to choose directly. Image subtitles such as DVD and Blu-ray are not supported yet. -
The screen does not dim or auto-lock while a video is playing.
PDF reader
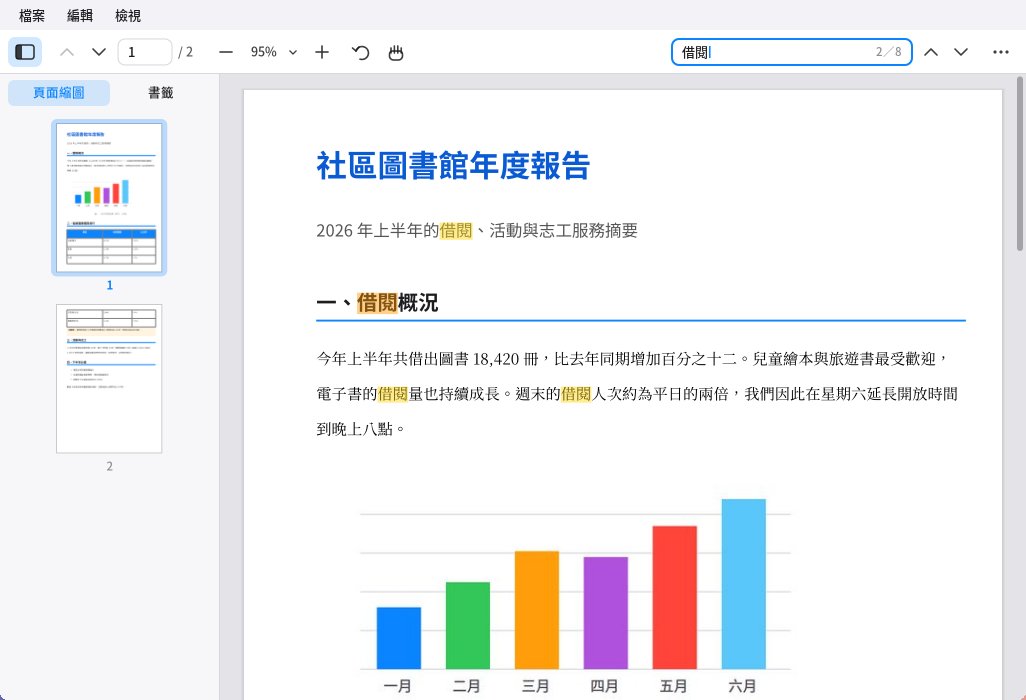
- Double-click a PDF in the file manager to open it; opening another PDF adds a new tab to the same window. The next time you open the same file, it returns to the page you were reading.
- The sidebar on the left switches between "Thumbnails" and "Bookmarks" (F4 shows or hides it); click an entry to jump there, and drag the edge to change its width.
- Toolbar at the top: previous/next page, page number (click it, type a page number and press Enter to go there), zoom out/zoom level/zoom in (click the level for "Fit Width" or "Fit Page"), rotate, hand tool and search.
- Drag with the mouse to select text; double-click selects a word and triple-click a whole line; Ctrl+C copies. Hold the middle mouse button (or use the hand tool) to drag the page.
- Ctrl+F search: matches are highlighted in yellow and the current one in orange, with "n of total" on the right; Enter or F3 for next, Shift+Enter for previous. English is case-insensitive, and full-width letters and digits are found too.
- Links in the document: links within the document jump straight there; for web addresses you're asked first whether to open them in the browser.
- Password-protected PDFs ask for the password first. Restrictions set by the author, such as "no printing" or "no copying", are respected.
- Zoom: Ctrl+scroll wheel, Ctrl+plus/minus; Ctrl+0 fit page, Ctrl+1 actual size, Ctrl+2 fit width. Ctrl+Shift+plus/minus rotates.
- Other: Ctrl+P print (needs CUPS and a printer), Ctrl+D document properties (author, creator, page size…), F11 full screen (PageDown/Space moves one page at a time).
- JPEG 2000 and JBIG2 images, common in scanned documents, need the
libopenjp2andjbig2declibraries (suggested during installation); without them, those images show as gray boxes.
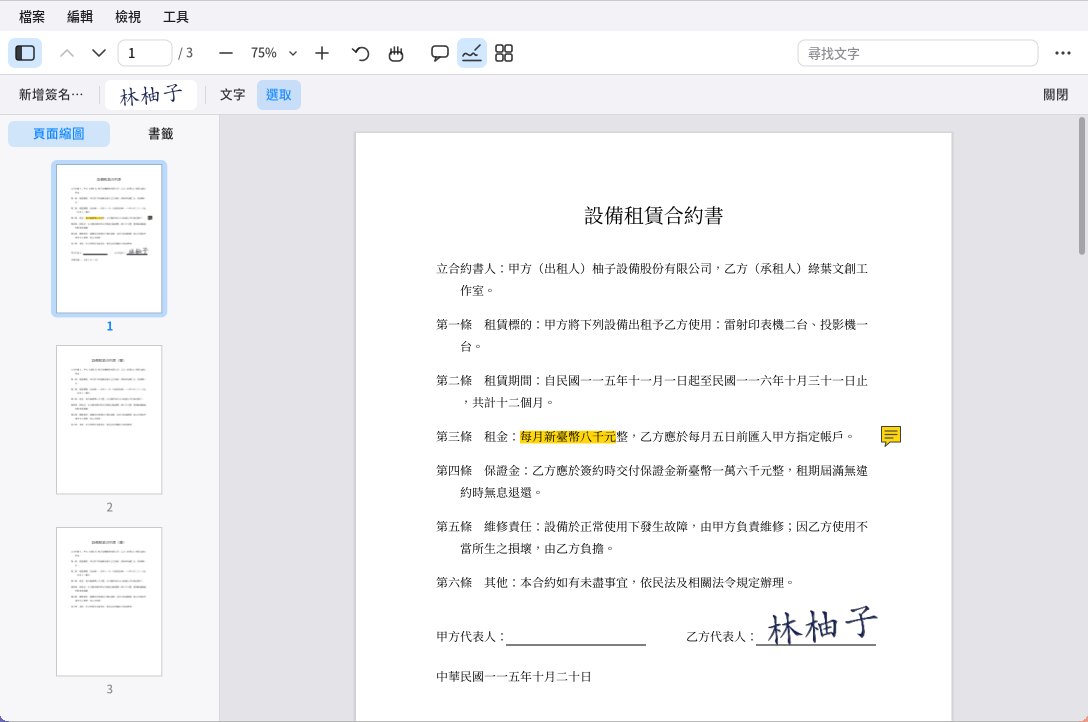
Editing PDFs: the four buttons next to the hand tool on the toolbar (Annotate, Fill & Sign, Organize Pages, Edit Content; also in the "Tools" menu) add a row of tools below. A changed document shows "•" before its tab name; remember to save with Ctrl+S (Ctrl+Shift+S saves as a new file); Ctrl+Z undoes and Ctrl+Shift+Z redoes. If you close it without saving, you're asked whether to save.
-
Annotate:
- Highlight, underline, strikethrough: choose the tool and drag over the text. You can also select text first and right-click "Highlight".
- Sticky note: click the page and write (Enter for a new line, Ctrl+Enter to finish). Click a note's icon to show its content beside it; double-click to edit it.
- Text: click the page and type directly on it (large, medium or small).
- Pen, rectangle, ellipse, line, arrow: drag on the page. Choose the color and thickness on the right.
- Click an annotation with the "Select" tool: you can drag it to move, drag the bottom-right corner to resize, press Delete to remove it, and right-click also has a menu.
-
Fill in forms: for a PDF with fillable fields (application forms, questionnaires…), the fields have a light blue box when opened, and you can just click to fill them in:
- Text fields: click to start typing (Chinese works too), Tab jumps to the next field (Shift+Tab to the previous one), Enter or clicking elsewhere writes it in, and Esc cancels. In multi-line fields, Enter makes a new line; text that is too long wraps and shrinks automatically. Fields with a character limit or one character per box follow their own rules.
- Checkboxes and radio buttons switch with one click; drop-down menus and lists show their options when clicked.
- Each field you fill in is one step that Ctrl+Z can undo; remember to save with Ctrl+S. What you filled in is also visible when you open the file in other apps (such as Adobe's reader).
- For a digitally signed document, filling in forms after signing does not invalidate the signature (the signature details say "Only annotations and forms were added").
-
Fill & Sign:
- Click "New Signature…", sign in the box with the mouse and click "Save"; or click "From Image…" to use a photo of your signature (the white background is removed automatically).
- Saved signatures appear on the toolbar; click one, then click the page to place it; after placing it, you can drag it or drag the bottom-right corner to resize it (proportions stay the same).
Right-click a signature on the toolbar to delete it. Signatures are stored in your own home folder (
~/.local/share/pomelo/signatures), and only you can see them. - "Text" lets you type into the blanks of a form.
- This only places the look of a signature on the page, and anyone can copy it; to prove "I signed this and it hasn't been changed since", use the digital signature below.
-
Digital signature (sign with a digital ID, which can prove the document hasn't been changed since it was signed):
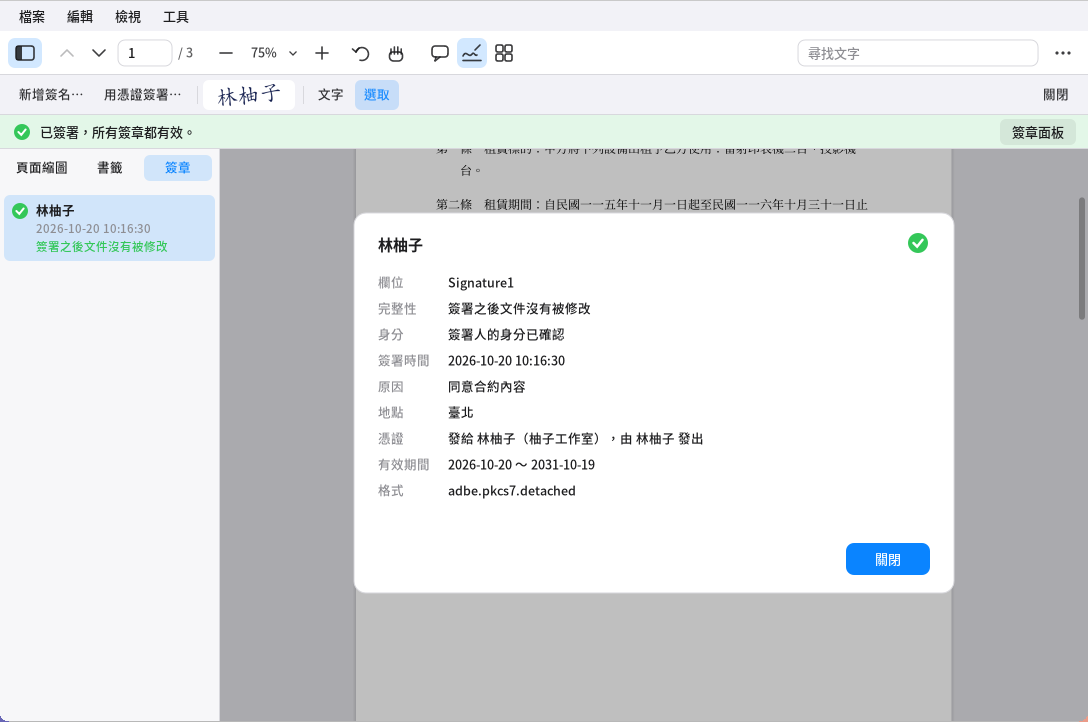
Digital signatures in the PDF reader: status bar at the top, signature panel and details on the left - "Sign with Certificate…" in "Fill & Sign" (or the "Tools" menu): choose a digital ID, enter its password and click "Next", drag out the signature area on the page (a single click uses the default size), add a reason and location (optional), and click "Sign and Save". If you have a saved handwritten signature, it's added to the appearance; the file is saved right after signing.
- If the document has an empty signature field (a dashed box saying "Click here to sign"), just click it to sign there.
- Digital IDs:
- If you don't have one yet, click "Create New…" and enter a name, email address and password (at least 6 characters). An ID you create yourself can prove the document hasn't been changed since signing, but others can't confirm it's really you (like a seal that hasn't been notarized).
- For a .p12/.pfx file issued by a company or a certificate authority, click "Import…".
- Digital IDs are stored in your own home folder (
~/.local/share/pomelo/digital-ids); the password is not remembered, and if you forget it, the ID can't be used.
- Certificates on a card reader (smart cards such as Taiwan's Citizen Digital Certificate and Business Certificate): plug in the card reader and the card, click "Read Card Reader", and the signing certificates on the card are listed;
choose one and enter the card's PIN (on the reader itself if it has a keypad). The private key never leaves the card; the card does the signing itself.
- You need the card reader driver (pcscd) and the card's PKCS#11 module: for the Citizen Digital Certificate it is the HiCOS component from the Ministry of the Interior's certification authority, and for most other cards installing opensc is enough. Pomelo looks for it by itself; if it can't find it, click "Choose Module…" and pick the .so file.
- The card locks after too many wrong PIN attempts, and you're warned when only one attempt is left.
- Timestamp: tick "Add timestamp" when signing, and a timestamp server (
http://timestamp.digicert.comby default, which you can change) certifies the time of signing, so whoever verifies it doesn't have to trust your computer's clock; even if the certificate expires later, it can prove it was valid at the time of signing. Only the hash of the signature is sent, never the document content. The signature details show the timestamp time and which server certified it. - When you open a signed document, a status bar appears at the top: green = all signatures are valid; yellow = the signature is valid, but the signer's identity can't be confirmed, or the page content was changed after signing; red = a signature is invalid (the document was tampered with after signing). Click "Signature Panel" and all signatures are listed on the left; click one to see the details: signing time, reason, who issued the certificate, and you can also "View Signed Version".
- Adding annotations, highlights or someone else's signature after signing keeps the original signature valid; but organizing pages (deleting, reordering, inserting pages) invalidates it, so the original signature is removed (before saving, you can press Ctrl+Z to undo).
- When you're sure the certificate belongs to that person, click "Trust This Certificate" in the signature details, and documents they sign afterwards will show "Identity confirmed".
-
Organize Pages: shows thumbnails of all pages. Click to select (Ctrl+click to add, Shift+click to select a range), and drag to reorder; at the top are rotate left/right, delete (or press Delete), extract (turn the selected pages into a new document), insert file (after the selected page) and insert blank page. Double-click a page to go back to the reading view and jump to that page.
-
Merge Files (Tools → Merge Files…): click "Add File…" and enter the path (Tab completes), use ↑↓ to reorder, and click "Merge" to open the result in a new tab, with one bookmark for each original file. The original files are not changed. A file with an open password has to be opened in a tab first before it can be merged.
-
Add Page Numbers (Tools → Add Page Numbers…): choose the format (for example "Page 1 of 9"), position, text size, first number, and which page to start from (useful when you don't want the cover numbered).
-
Edit Content (change the original text on a page, remove watermarks):
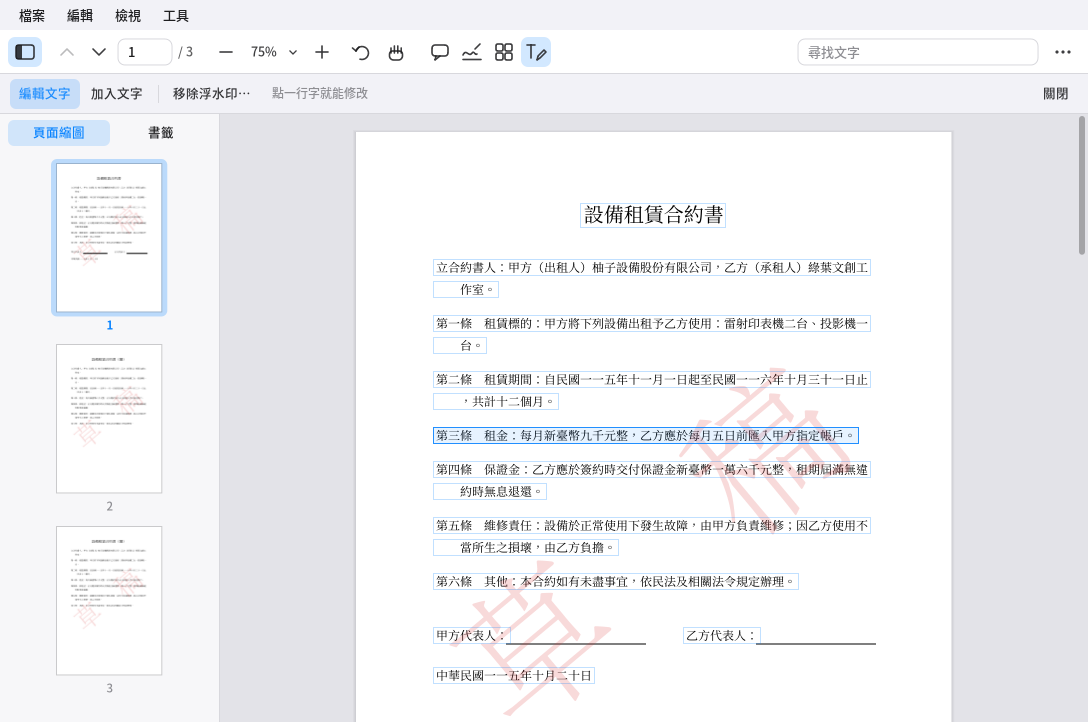
Edit Content in the PDF reader: every line of text has a box; click it to edit -
Edit text: move the mouse over the page, and every editable line of text gets a faint box. Click a line, change the text in the box that appears, and press Enter to finish; clearing all the text deletes the line. The font defaults to "Auto": the closest match to the original (Ming, Kai or Hei, and bold stays bold); you can also choose Hei, Ming, Kai or bold under the box (changing only the font is fine too). The new text goes where the old text was, and the rest of the line shifts along. Edited text can be selected, searched and copied.
-
Add text: choose a color and size, click where the text should go (the click marks the top left of the first line), type, then press Ctrl+Enter (Enter for a new line); under the box you can choose a font (Hei, Ming, Kai) and bold, which are remembered next time. Unlike "Text" in Annotate, this is written into the page content itself: it can be selected and searched, and nobody can delete it as an annotation.
-
Remove watermarks: click "Remove Watermarks…" to list everything in the document that might be a watermark (such as large slanted translucent text, the same image on every page, headers and footers) and how many pages each appears on; items that are clearly watermarks are already checked. Confirm and click "Remove".
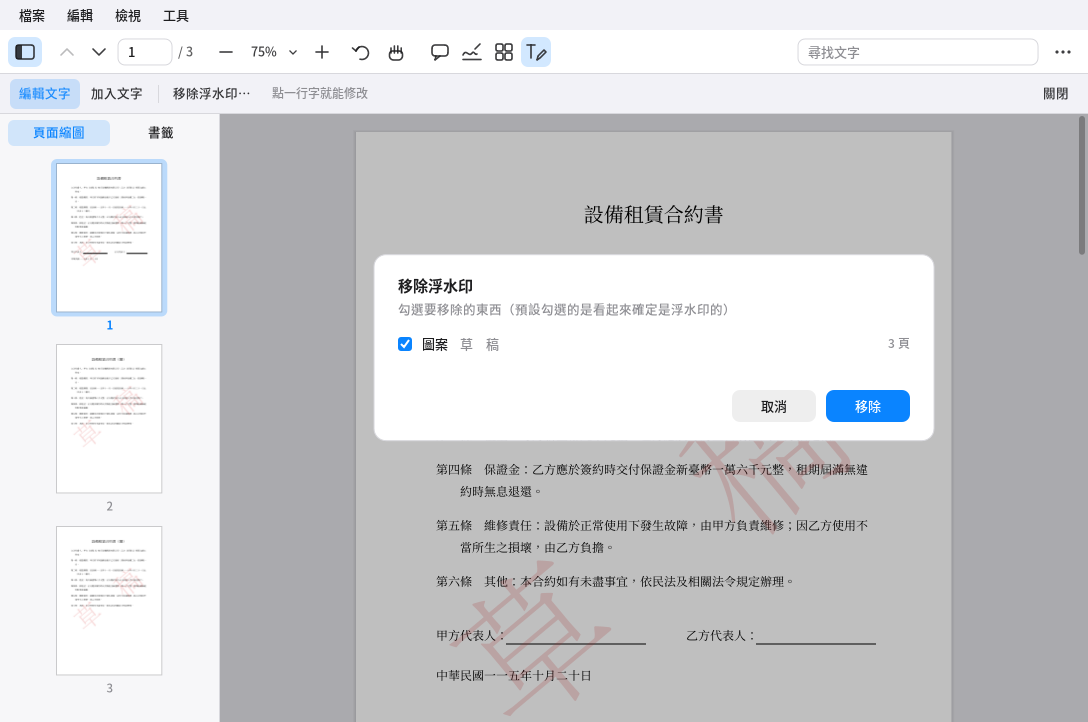
Removing watermarks in the PDF reader: check the items to remove -
If you change the content of a digitally signed document, the signature shows "Content modified after signing". Ctrl+Z undoes mistakes.
-
-
Documents with an open password keep the same password after saving; documents where the author restricted changes need the owner password before you can edit them.
-
Saving appends your changes to the end of the original file (organizing pages and merging write a new file instead), and other PDF readers open it normally and show the annotations and signatures.
11. Remote Desktop
Connect to the desktop of a Windows computer (RDP protocol), for example to work on your office or home computer remotely. The protocol itself uses the FreeRDP library, while the window and settings interface are drawn by Pomelo itself,
so you don't need to install xfreerdp separately (and it doesn't conflict with it; you can have both installed).
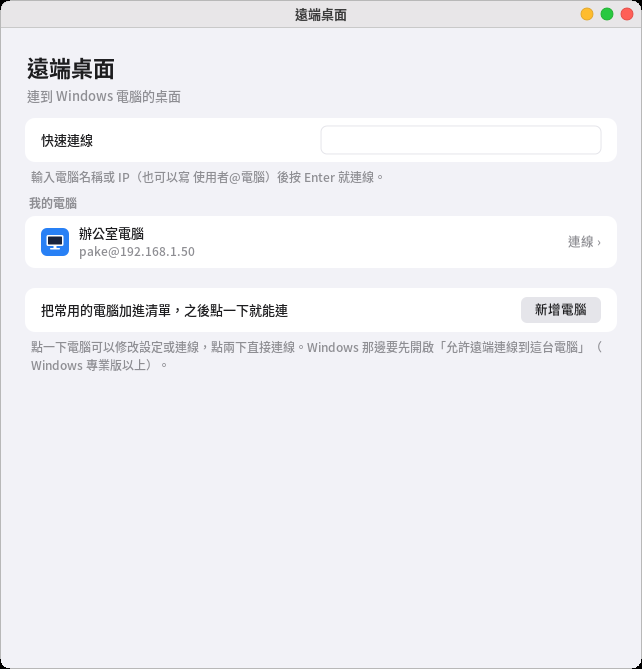
-
Quick Connect: enter a computer name or IP in the field at the top (you can also write "user@computer") and press Enter to connect; it isn't saved.
-
My Computers: add the computers you use often to the list, then click one to select it, or double-click to connect right away. Click once to change its settings. On the Windows side, first turn on "Enable Remote Desktop" in "Settings → System → Remote Desktop" (Home editions don't have this feature; only Pro and above can be connected to, but any edition can be used as a client, using Pomelo's Remote Desktop to connect to someone else's computer).
-
When adding a computer you can set:
- Screen size: "Fit window" asks Windows to change its resolution to the size of the window, and it follows as you resize the window; you can also choose "Full screen", a common fixed resolution, or "Custom…" to enter the width and height yourself. After connecting, press Ctrl+Alt+Enter to switch full screen at any time; in full screen, move the pointer to the top of the screen and a toolbar appears (windowed, Ctrl+Alt+Del, disconnect).
- Color depth: 16/24/32 bit; with poor bandwidth, a lower setting saves data.
- Network quality: Auto-detect / Modem / Low-speed broadband / High-speed broadband / LAN. It affects whether effects such as wallpaper, window drag preview, animations and themes are turned off automatically (the narrower the bandwidth, the more are turned off); it doesn't affect whether it works, only how smooth it feels.
- Sound: whether the remote computer's sound plays on this computer.
- Share clipboard: when on, copied text can be pasted on both sides (text only; images and files are not supported).
- Connect to console session: used when an administrator logs in to a remote server for maintenance (ordinary users don't need to tick it).
- Device mapping: share a folder on this computer with the remote computer; after connecting, Windows' "This PC"/File Explorer shows an extra drive, and you can copy files between the two sides; you can also share this computer's printers, and documents printed on the remote computer come out of this computer's printer.
-
Passwords are stored in the keyring (pomelo-keyring) and never written into the settings file; if there is no keyring or it is locked, you're asked for the password at every connection.
-
The first time you connect to a computer, or when it has been reinstalled or its certificate changed, you're asked whether to trust its certificate (Windows' default Remote Desktop certificates are never signed by a trusted authority, so this is normal; if the prompt says "different from last time", first make sure nobody is intercepting the connection, then choose to trust it).
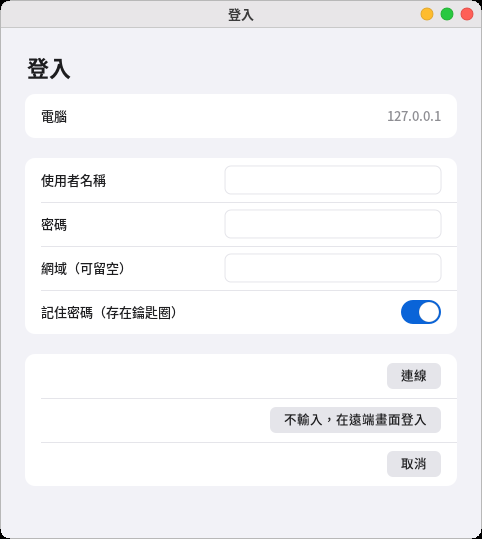
Remote Desktop sign-in: some servers (such as xrdp) don't need a username and password first; you can just click "Skip, sign in on the remote screen" -
When the connection drops (network problems, the other side logged out, or someone signed in from elsewhere and pushed you out), it tells you why, and you can click "Reconnect" right away.
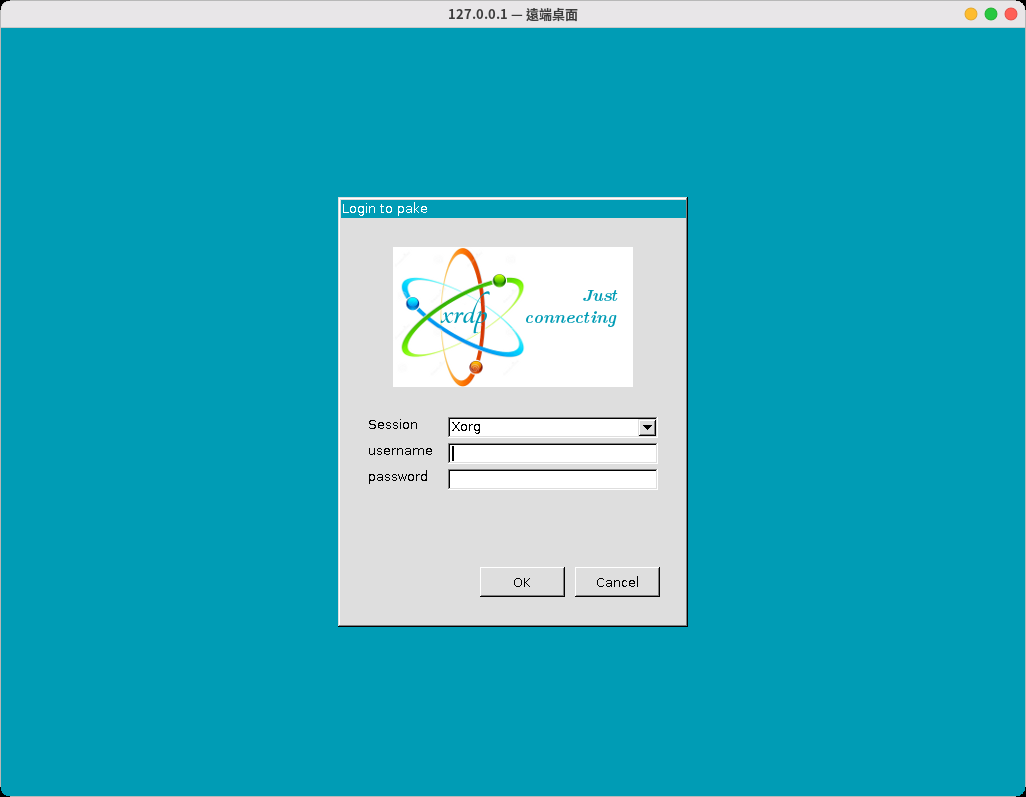
After connecting: just like using your own computer, with the keyboard and mouse passed straight through
12. Word Processor
Open, edit and save Word (.docx) and OpenDocument (.odt) documents. Double-clicking either kind of file opens it with "Word Processor" (pomelo-writer) by default. The layout engine and file format reading and writing are all written in-house, so you don't need to install LibreOffice or Microsoft Office, and files can still be opened back and forth with them.
-
Editing: type and delete directly; Ctrl+Z/Ctrl+Y undo/redo.
-
Formatting: the "Body/Heading 1/Heading 2/Heading 3" box at the far left of the toolbar sets the paragraph style (headings automatically become bold and larger), and the other buttons set bold, italic, underline, font, font size and text color; paragraphs can be aligned left, center, right or justified; you can add bulleted or numbered lists, and also insert simple tables and add or delete rows and columns.
-
Outline: the "Outline" button at the far right of the toolbar (or "Outline" in the "Insert" menu) opens a panel on the left listing all the headings in the document; click one to jump to that section, and the panel also marks which heading the cursor is currently under.
-
Images: "Image…" in the "Insert" menu can insert PNG or JPEG images, and an image takes a line of its own (it can't be mixed into a paragraph with text); click an image to select it (it's highlighted), and Backspace/Delete removes the whole image. When you open a document made by someone else in Word/LibreOffice, the images in it display properly too.
-
Page numbers: tick "Page Number" in the "Insert" menu, and every page prints its page number at the center of the footer; click again to turn it off.
-
Find and replace: Ctrl+F (find) or Ctrl+H (replace) opens a dialog where you can choose whether to match case; "Find Next" and "Find Previous" go around the whole document (including table cells), highlighting each match they find; "Replace" replaces the currently selected match and then finds the next one, and "Replace All" replaces every match in the whole document at once.
-
Page setup: "Page Setup…" in the "File" menu lets you choose the paper size (A4, US Letter, US Legal or a custom width and height), portrait/landscape, and the top, bottom, left and right margins (in centimeters).
-
Printing: "Print…" in the "File" menu (or Ctrl+P) first shows a page preview, then you choose the printer and the number of copies to print the whole document.
Printing: preview the page first, then choose the printer and copies -
File:
-
Open: "Open…" in the menu (or Ctrl+O) opens a file browser window where you can click a folder to go in and "Up" to go back, it lists only folders and .docx/.odt files, and a click on a file opens it; you can also paste a path into the location bar at the top and press Enter; double-clicking a .docx/.odt file in the launcher or file manager, or using
pomelo-writer 檔名in a terminal, also opens it directly.
Open file: click a folder to go in, click a file to open it -
Save/Save As: the file format follows the file name extension (a name ending in .docx is saved as Word format, and one ending in .odt as OpenDocument format); if you don't type an extension, the format chosen in the Save As window is used and the matching extension is added automatically.
-
-
Clipboard: shared with other Pomelo apps, so you can paste text in and out.
-
Chinese, Japanese and Korean input: uses XIM just like the text editor (see section 7), and works with pomelo-input or fcitx5.
13. Spreadsheet
Open, edit and save Excel (.xlsx) and OpenDocument (.ods) spreadsheets. Double-clicking either kind of file opens it with "Spreadsheet" (pomelo-sheet) by default. The spreadsheet model, formula engine and file format reading and writing are all written in-house, so you don't need to install LibreOffice or Microsoft Office, and files can still be opened back and forth with them.
-
Selecting and editing: click to select a cell, drag or Shift+click to select a range; double-click, press F2 or just start typing to edit that cell, Enter confirms and moves down, Tab confirms and moves right, Esc abandons the edit; the formula bar at the top also shows the contents of the current cell, and you can edit by clicking in it. Delete/Backspace clears the contents of the selected range (formatting stays). Ctrl+Z/Ctrl+Y undo/redo.
-
Formulas: a cell starting with
=is a formula. You can write cell addresses (A1;$A$1locks the row or column), ranges (A1:A10), references to other sheets (Sheet2!A1), as well as arithmetic, comparisons and string joining (&). Typing%after a number automatically stores it in percent format. About 130 functions:- Math and statistics:
SUMAVERAGECOUNTCOUNTACOUNTBLANKMINMAXMEDIANMODESTDEVSTDEV.PVARVAR.PLARGESMALLRANKPERCENTILEQUARTILEPRODUCTSUMSQSUMPRODUCTROUNDROUNDUPROUNDDOWNTRUNCCEILINGFLOORINTABSSIGNSQRTPOWEREXPLNLOGLOG10MODQUOTIENTEVENODDFACTGCDLCMPISINCOSTANASINACOSATANDEGREESRADIANSRANDRANDBETWEEN. - Conditional statistics:
SUMIFCOUNTIFAVERAGEIFSUMIFSCOUNTIFSAVERAGEIFS(conditions can be written as">3","<>a","Tom"). - Text (a Chinese character counts as one):
LENLEFTRIGHTMIDFINDSEARCHSUBSTITUTEREPLACEREPTUPPERLOWERPROPERTRIMEXACTVALUETEXTCONCATENATECONCATTEXTJOINCHARCODE.TEXT(value, "format")supports0.00,#,##0,0%,yyyy-mm-dd,hh:mm:ss. - Logic and information:
IFIFSSWITCHCHOOSEANDORNOTXORIFERRORIFNANAISNUMBERISTEXTISBLANKISERRORISNAISEVENISODDTRUEFALSE. - Lookup:
VLOOKUPHLOOKUPXLOOKUPINDEXMATCHROWCOLUMNROWSCOLUMNS. - Dates (serial numbers are the same as Excel's; use
TEXTto show them as dates):TODAYNOWDATEYEARMONTHDAYWEEKDAYHOURMINUTESECONDDAYSEDATEEOMONTHDATEDIFNETWORKDAYS.
Known limitations: when you insert or delete rows / columns, addresses referenced in other cells' formulas are not adjusted automatically; there are no array formulas.
- Math and statistics:
-
Right-click to add or delete rows and columns: right-clicking a cell gives Cut, Copy, Paste, Clear Contents, plus "Insert Row Above / Below", "Insert Column Left / Right" and "Delete Row / Column"; right-clicking a row number or column header selects the whole row or column first and then shows the menu. As many rows (columns) as you selected are inserted or deleted at once, formula references are adjusted, and Ctrl+Z undoes it.
-
Fill: the selection has a small blue square at its bottom right corner; drag it down, right, up or left and it fills by rule, with a dotted-line preview while you drag; double-click the square to fill down to where the data in the neighboring column ends. The rules:
- A single number → add 1 per cell (
1dragged becomes1 2 3 4 5...); with two or more cells selected it follows the trend (2, 4dragged becomes6, 8, 10...). Hold Ctrl and then release the mouse to copy only. - Text ending in a number counts up:
Rank 1→Rank 2,Item007→Item008(digits are kept). - Lists such as weekdays, months, quarters, Heavenly Stems and Earthly Branches, Chinese numerals (一二三...十), Mon / Jan continue and wrap around (
Friday→Saturday,Sunday,Monday...). - Formulas adjust relative references by position (
=A1+B1filled down becomes=A2+B2; anything locked with$A$1stays put). Other text is simply repeated. - Ctrl+D / Ctrl+R (Edit menu) copy the first row / column of the selection to the rest; "Data → Fill Series..." lets you enter a start value, step and stop value (for example, start at 10 and add 5 each time up to 100), down or to the right.
- A single number → add 1 per cell (
-
Sort: "Sort Smallest to Largest" and "Sort Largest to Smallest" in the "Data" menu sort the whole data area by the current column (with only one cell selected, it finds the connected data automatically, and a first row of text headings is left out of the sort); "Sort..." lets you choose which column, then which column next, each ascending or descending, and whether the first row is a header. Numbers come before text, blanks always go last, equal values keep their original order, and formulas move along with their relative references adjusted. Both sort and fill can be undone with Ctrl+Z.
-
Formatting: the toolbar sets bold, italic, underline, text color, background color, font, font size, and left / center / right alignment; formatting applies to the current selection.
-
Sheets: the sheet tabs are at the bottom of the window; click to switch and click "+" to add one; the "Sheet" menu lets you rename and delete sheets (at least one must remain), and insert or delete rows and columns at the current cell.
-
Find: Ctrl+F finds text in the current sheet and jumps to and selects the match; it only searches the current sheet, not across sheets.
-
Clipboard: copy / cut / paste a range, and pasting expands it according to the original rows and columns; formulas are pasted unchanged (since the formula text itself starts with
=..., you can tell it is a formula when pasting into or from other programs), but formatting is not kept. -
Files:
- Open: like the word processor, a graphical file browser window that lists only folders and .xlsx / .ods files;
double-click an .xlsx / .ods file in the launcher / file manager, or use
pomelo-sheet filenamein the terminal, to open it directly. - Save / Save As: the file format follows the file extension (.xlsx saves as Excel format, .ods as OpenDocument format); if you don't type an extension, the format chosen in the Save As window is used and the matching extension is added automatically.
- Open: like the word processor, a graphical file browser window that lists only folders and .xlsx / .ods files;
double-click an .xlsx / .ods file in the launcher / file manager, or use
-
Chinese / Japanese / Korean input: uses XIM like the text editor (see section 7), and works with pomelo-input or fcitx5.
14. Presentations
Open, edit and save PowerPoint (.pptx) and OpenDocument (.odp) presentations. Double-clicking either kind of file opens it with "Presentations" (pomelo-slides) by default. The presentation model and file format reading and writing are all written in-house, so you don't need to install LibreOffice or Microsoft Office, and files can still be opened back and forth with them.
-
Slides: the left side is a slide thumbnail sidebar; click to switch, drag a thumbnail to reorder, and scroll with the wheel. The toolbar's "+ New Slide" or Ctrl+M adds a slide, and you can pick a layout: Title Slide, Title and Content, Two Content, Title Only, Blank; new slides follow the current design theme. Right-click a thumbnail to add, duplicate, delete, move up / down, and also change the design theme, background color or transition; right-clicking in the slide overview does the same. At least one slide must remain when deleting.
-
Objects: the "Insert" menu adds text boxes, rectangles, ellipses, lines and images (only PNG / JPEG are recognized). Click to select an object, drag the four corner handles to resize and drag the object itself to move it; arrow keys nudge the position (Shift for bigger steps); Delete / Backspace removes the selected object. Right-click an object for Cut, Copy, Paste, Duplicate, Delete, Bring to Front / Send to Back, Color and Entrance Animation; right-click an empty part of the slide to paste, add a slide, or insert a text box or image. Keyboard: Ctrl+X / Ctrl+C / Ctrl+V cut / copy / paste, Ctrl+D duplicate (copied objects can only be pasted inside the presentation).
-
Editing text: double-click a text box to start editing and just type; Enter starts a new line, and a long line wraps automatically (English breaks at spaces, Chinese can break at any character, and punctuation never lands at the start of a line); Esc or clicking elsewhere ends editing. The toolbar sets bold, italic, underline, text color, font, font size, and left / center / right alignment.
-
Shape formatting: rectangles, ellipses and lines each have an outline color and a fill color (lines have only an outline color); you can also set the background color of the current slide.
-
Design themes: the toolbar's "Design", or "Design Theme Gallery..." in the "Design" menu, opens the gallery. The 12 themes (Simple White, Classic Blue, Midnight, Vivid Orange, Forest Green, Soft Pink, Deep Purple, Business Gray, Ocean, Geometric, Tech, Dawn) each have their own background and decorative shapes; the title slide and content slides have different layouts, with matching fonts and colors, and every theme has a preview (the lower right shows what a content slide looks like). Click one to apply it to the whole presentation: the title, subtitle and body text move to the theme's positions and take on the theme's fonts, sizes and colors (slides with images or shapes, or that you laid out yourself, only get the fonts and colors and are not moved); right-click to apply it to the current slide only. Slides you add later and shapes you insert follow the theme too. Choose "None (White)" to remove the theme. On a slide where you set a background color, that color takes priority. When saved as .pptx / .odp, the theme's background is drawn as an image placed at the very bottom of the slide, so it looks the same in PowerPoint and LibreOffice Impress; when you reopen it in Pomelo, the theme is recognized and you can keep switching.
-
Effects: "Slide Transition..." in the "Format" menu sets the animation when switching to this slide (None / Fade / Push from the side / Wipe); after selecting an object, "Object Entrance Animation..." sets the animation when this object appears (None / Fade In / Fly In from Left / Fly In from Bottom). When the slide appears, all objects on it that have an animation play together, not one after another. Transitions and entrance animations show both when presenting and in preview.
-
Speaker notes: the notes pane is at the bottom of the screen; click to type, and each slide keeps its own; "Show Notes Pane" in the "Slide" menu hides / shows this pane. When saving, the notes are saved into the .pptx / .odp as well, compatible with PowerPoint and LibreOffice Impress.
-
Slide overview: "Slide Overview" in the "Slide" menu switches to a thumbnail overview, handy for seeing the overall order and theme effect; click to select and double-click to jump back to editing; this mode itself can't drag to reorder, so to reorder, go back to editing and drag in the left thumbnail sidebar.
-
Presenting: "Start Presentation" in the "Slide" menu or F5 enters full-screen presenting; arrow keys / Space / a click go to the next slide, ←/Backspace to the previous one, Esc to leave; "Preview Presentation..." previews the effects once in a normal-size window, without taking over the whole screen. If two or more screens are detected while presenting, presenter mode starts automatically: one screen shows the slide full-screen for the audience, and the other (the one you operate from) shows the current slide thumbnail, the next slide thumbnail, notes, slide count and elapsed time, so you can read your script on stage.
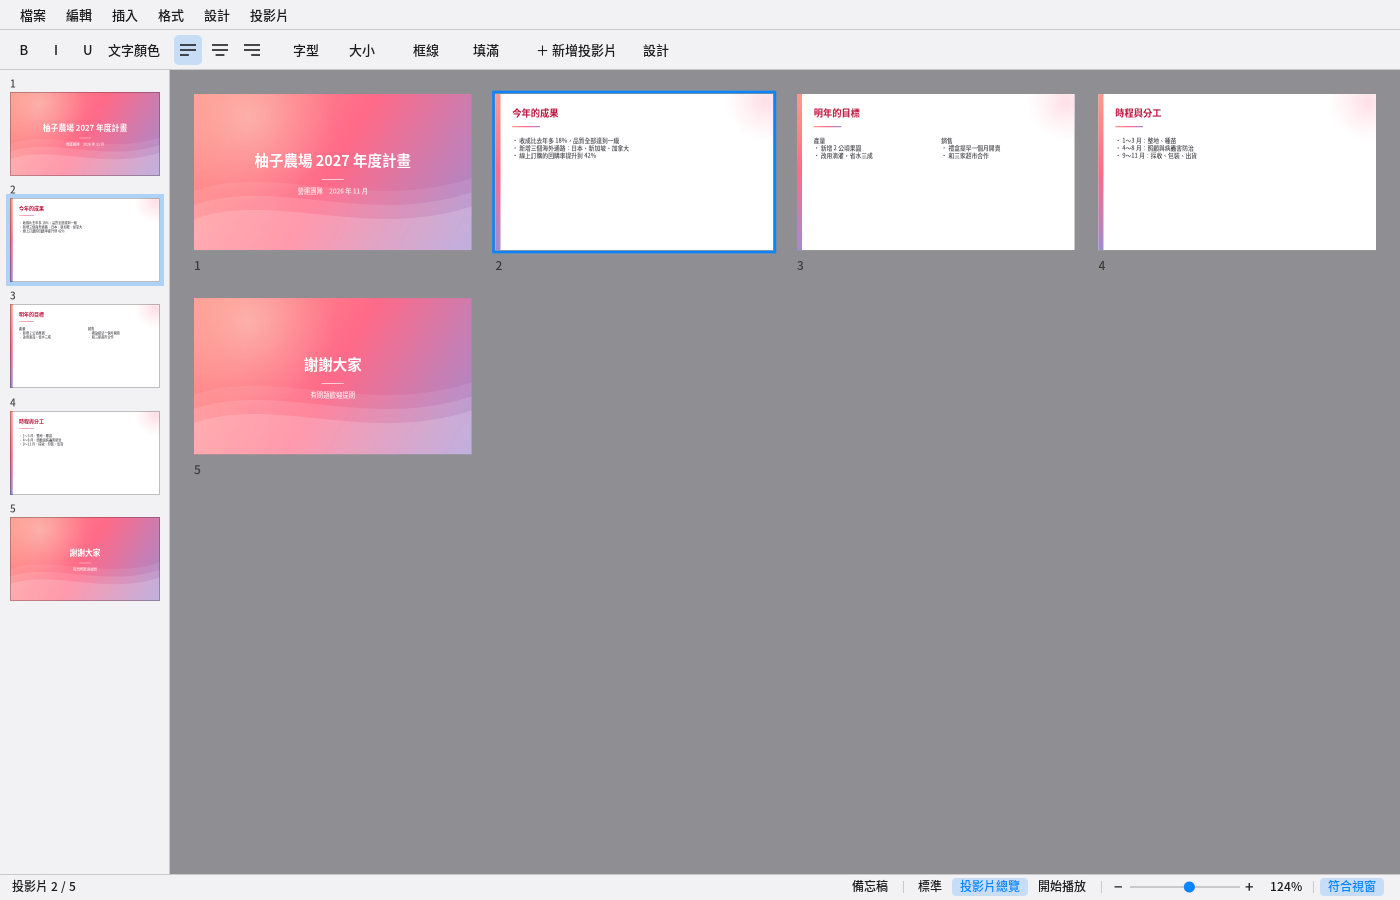
Slide Sorter mode: see all the thumbnails at once -
Files:
- Open: like the word processor, a graphical file browser window that lists only folders and .pptx / .odp files;
double-click a .pptx / .odp file in the launcher / file manager, or use
pomelo-slides filenamein the terminal, to open it directly. - Save / Save As: the file format follows the file extension (.pptx saves as PowerPoint format, .odp as OpenDocument format); if you don't type an extension, the format chosen in the Save As window is used and the matching extension is added automatically.
- Open: like the word processor, a graphical file browser window that lists only folders and .pptx / .odp files;
double-click a .pptx / .odp file in the launcher / file manager, or use
-
Known limitations: no slide master / layout to customize, no tables or charts; a text box has only one format applied to the whole box, so different text in the same box can't have different formats; shapes can't be rotated or grouped; entrance animations always play together when the slide appears and can't be stepped through by click order; in presenter mode the two-screen layout is decided automatically, and you can't choose which screen is the audience screen; design themes can't be customized (no master editing), and in other programs the theme's background is a single image whose colors can't be changed.
-
Chinese / Japanese / Korean input: uses XIM like the text editor (see section 7), and works with pomelo-input or fcitx5.
15. Pomi Browser
Pomi Browser is the web browser built into Pomelo; it opens fast and uses little memory. Page layout, JavaScript and security updates come from the system's WebKitGTK and are updated along with the system.
- Opening: Pomi Browser in the Dock, or type "browser" in the launcher or search; you can also tell Pomi "open Pomi Browser" (just saying "open the browser" opens the system's default browser). If it is already running, it simply opens another window, which appears almost instantly.
- Address bar: type a web address to go there directly (no need to type https://); any other text is searched with the search engine (Google by default; the "⋯" menu at the top right can switch it to DuckDuckGo or Bing). You can type Chinese with the Pomelo input method, including in input boxes on web pages. A padlock before the address means the connection is encrypted; a triangle means it is not, so please don't enter passwords or credit cards on that site. Click the padlock (left or right button) to see the site's certificate: who it was issued to, which organization issued it, the validity period, the certificate chain and fingerprints, and you can also copy the certificate. If you type just the address without https://, an encrypted connection is tried first, and only if the site doesn't support it does it fall back to an unencrypted connection.
- Tabs: Ctrl+T opens a new tab, Ctrl+W closes, Ctrl+Shift+T reopens the tab you just closed, Ctrl+Tab switches, Ctrl+1~9 jumps to the nth tab. The tab bar only appears with two or more tabs; middle-clicking a tab also closes it. Middle-clicking a link (or Ctrl+click) opens a new tab in the background.
- Start page: a new tab shows Pomi, a search box and the sites you visit often.
- Right-click menu: right-clicking on a page gives Back, Reload, Copy Address, Find in Page, Print, Zoom In / Out and Full Screen; after selecting text, right-click to copy it or search for it directly with the current search engine; on a link you can open it in a new tab, copy the link or download; on an image you can copy or download the image.
- Other: Ctrl+F finds in the page, Ctrl+plus / minus / 0 zooms (you can also hold Ctrl and turn the wheel), Ctrl+P prints, F11 full screen, Alt+←/→ back / forward, Ctrl+L jumps to the address bar, F5 reloads.
- Downloads: files are saved to the "Downloads" folder, and a notification appears when a download finishes. While downloading, a download button with a progress ring appears at the top right; click it to open the "Downloads" folder.
- Permissions: when a site wants to use the camera, microphone or location, or to show notifications, a question bar appears at the top of the page; click "Allow" or "Don't Allow".
- Clear browsing data: "⋯" menu → "Clear Browsing Data...", which clears history, cookies and cache (you will need to sign in to sites again).
- Saving resources: only one Pomi Browser runs at a time (opening it again just opens another window); on computers without a dedicated graphics card (including virtual machines) it automatically switches to CPU rendering, which uses even less memory.
16. Virtual Machines
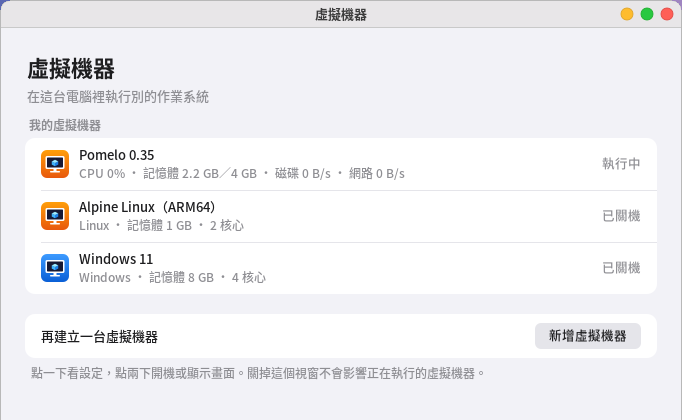
"Virtual Machines" lets you run another operating system inside this computer (for example, to try another Linux or run a Windows), without restarting and without touching this computer's system. It is built on Linux's own KVM and QEMU, and needs no extra kernel modules and no libvirt.
- First use: if QEMU isn't installed yet, an "Install" button appears when you open it; click it and a terminal window opens to install (you'll need to enter your password), installing only the parts needed to run virtual machines. (On Ubuntu / Debian, qemu-system-x86 by default also pulls in QEMU's own GTK interface and a lot more; here --no-install-recommends is used to avoid that.)
- Hardware virtualization: x86_64 virtual machines need the CPU's hardware virtualization (Intel VT-x / AMD-V, called KVM in Linux) to be fast. If it isn't on, a notice appears at the top; just turn it on in the BIOS settings. If it says "your account can't use it yet", click "Turn On" to add yourself to the kvm group, then log out and back in.
- New virtual machine: click "New Virtual Machine" and choose the operating system's installation disc (.iso). The app guesses the system and architecture from the file name,
automatically suggests memory, processor cores and disk size, and fills in a name for you. The disk file starts small and only takes up space as it is used.
If you already have a virtual disk (for example VirtualBox's .vdi, VMware's .vmdk, or .qcow2), you can turn on "Use an existing virtual disk" and use it directly.
- Windows 11 needs UEFI, Secure Boot and TPM 2.0, which are already turned on for you when you choose Windows (the first time TPM is used, you'll be asked to install swtpm); the disk uses SATA and the network card is an Intel e1000e, whose drivers are built into the Windows installation disc. If you see "Press any key to boot from CD or DVD" at startup, press any key within a few seconds.
- ARM64: choose ARM64 under "Processor architecture" to run ARM systems (the first time, you'll be asked to install qemu-system-arm). On an x86 computer this is software emulation, so it is slower (about 5 to 20 times), and suits installing servers or testing.
- Starting and the display: double-click in the list (or open the settings page and click "Start") and the display window appears. If the disk has no system installed yet it boots from the disc automatically, and once installed it boots from the disk, with no settings to change.
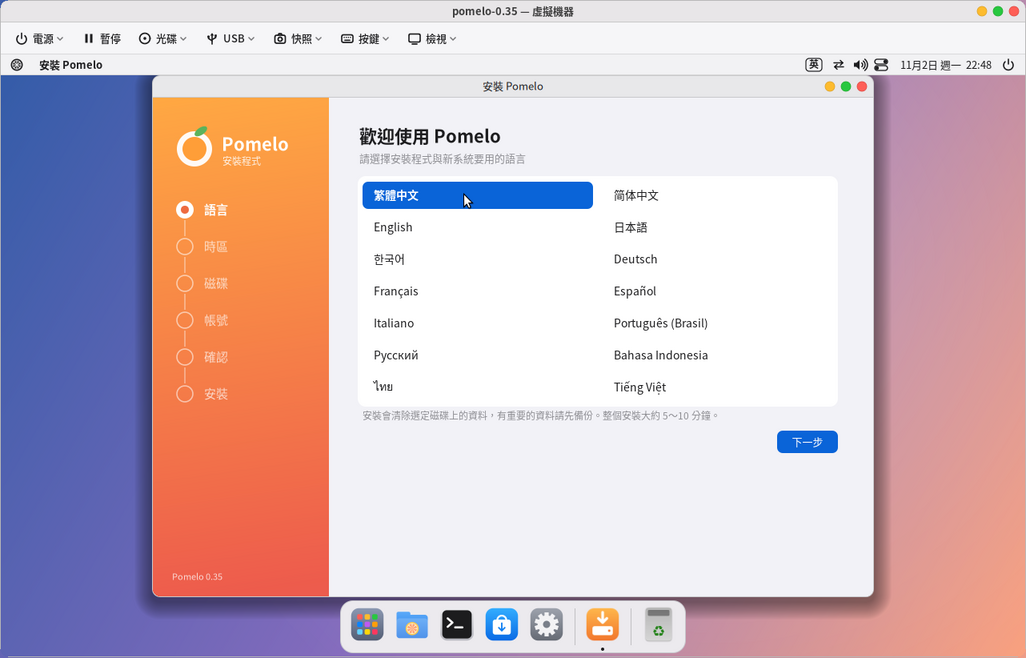
- Display window: the keyboard and mouse operate the virtual machine directly; the mouse is not "captured", and moving it out of the window returns it to this computer. The top row of buttons:
- Power: shut down (like pressing the power button, letting the virtual machine shut itself down), restart, save state and close, force off (like pulling the plug).
- Pause: freezes the virtual machine (memory is kept); click again to resume.
- Disc: swap in another disc image or eject the disc, without shutting down.
- USB: hand a USB device plugged into this computer (USB drive, external disk, phone, card reader...) to the virtual machine; click again to give it back. An external disk is first ejected on this computer; the first time you hand one to a virtual machine you'll be asked for your password (to get permission to use that device). The keyboard and mouse can be handed over too, but then this computer can't use them, so the app asks you first.
- Snapshot: saves how things are right now (including memory), so you can return to this moment at any time, for example take one before installing software or changing settings.
- Keys: sends key combinations that this computer would intercept, such as Ctrl+Alt+Del, Ctrl+Alt+F1~F7 and the Windows key.
- View: full screen (or Ctrl+Alt+Enter; in full screen, move the mouse to the top to show the toolbar), fit window to screen. With a VirtIO graphics card, the virtual machine's resolution follows the window size (most Linux virtual machines support this).
- Shortcut: Ctrl+Alt+End sends Ctrl+Alt+Del.
- Closing the display window: asks whether to shut down, cancel, or let the virtual machine keep running in the background. A virtual machine running in the background can have its display opened again later by double-clicking it in the list.
- Save state: "Power → Save state and close" saves the whole virtual machine (including open programs), and the next start continues right where it left off, just like closing and reopening a laptop lid.
- Snapshot management: at the bottom of the virtual machine's settings page, you can rename snapshots, go back to one, or delete it. A snapshot taken while powered off saves only the disk. Snapshots are stored in the disk file, which must be qcow2 format (newly created virtual machines all are).
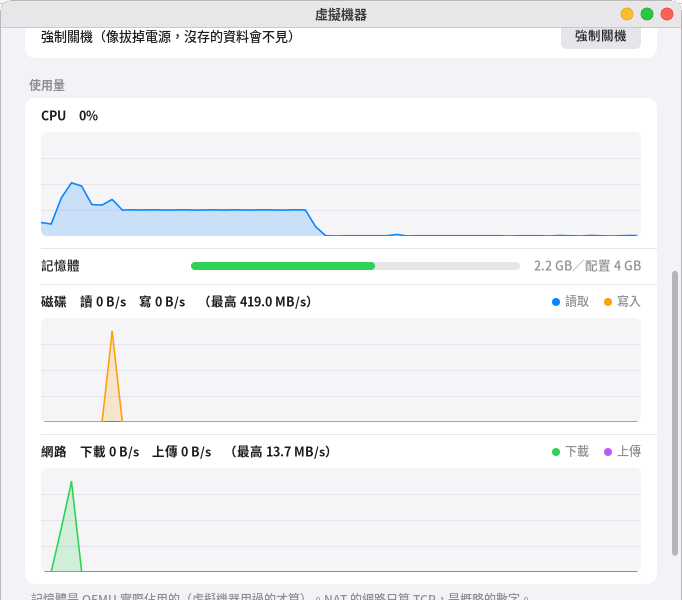
- Usage: the list shows CPU, memory, disk and network usage for each running virtual machine; click in for charts of the last minute. Memory is what QEMU actually uses; NAT network counts only TCP connections and is a rough figure.
- Settings: can only be changed while powered off (memory, processor cores, disc, boot order, graphics card, sound, network, enlarging the disk, TPM and so on), and changes are saved automatically.
- Network: "NAT" is the simplest; the virtual machine shares this computer's network to get online. To connect from this computer into the virtual machine, write in "Forwarded ports"
for example 2222:22, then connect with
ssh -p 2222 localhost(only this computer can reach it). "Bridged" makes the virtual machine look like another computer on the local network, getting an IP from the router so other computers can reach it too; it needs a bridge (such as br0), and if there isn't one, the settings page has a "Create Bridge" button (a wired network card is required, Wi-Fi can't be bridged; the network drops for a few seconds while it is created), and the first time you use it you need to click "Allow". - Sound: the virtual machine's sound plays from this computer. The default QEMU on Ubuntu / Debian has no PulseAudio module, so sound plays from the display window instead (you can only hear it while the display window is open) and there is no microphone; click "Install" on the settings page to add qemu-system-gui, after which QEMU plays the sound directly and the microphone works (GTK3 is installed with it, about 30 MB).
- Network: "NAT" is the simplest; the virtual machine shares this computer's network to get online. To connect from this computer into the virtual machine, write in "Forwarded ports"
for example 2222:22, then connect with
- Where the files are: each virtual machine has its own folder in
~/.local/share/pomelo/vm/(the disk file, UEFI settings and snapshots are all inside). At the bottom of the settings page you can open it in the file manager, or delete the whole virtual machine. - Not available yet: sharing the clipboard with the virtual machine, shared folders, drag-and-drop of files, 3D acceleration, multiple screens. To exchange files, use the network (such as ssh or Windows file sharing) or a USB drive.
- Command line:
pomelo-vm --list(list virtual machines and their status),pomelo-vm --start name,pomelo-vm --stop name(ask it to shut down),pomelo-vm --kill name(force off).
17. Containers (Docker)
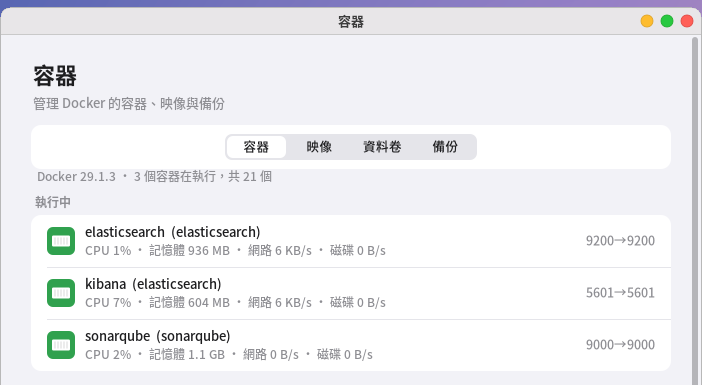
"Containers" manages Docker: containers, images, volumes and backups, with no commands to remember.
-
Installing Docker: if Docker isn't installed yet, click "Install" after opening; a terminal window opens (you'll need to enter your password). It installs the system's own docker.io (without recommended packages), sets it to start automatically at boot, and adds you to the docker group. After installing you need to log out and back in for the group membership to take effect. When Docker isn't running or your account lacks permission, a matching button also appears on screen. Note: members of the docker group can gain administrator rights over the whole computer through containers, so add only accounts you trust.
-
Containers: split into running and stopped; running ones show CPU, memory, network and disk usage and ports (local → container), and ones created with docker compose are labeled with the project after the name. Click one to go to the container's page. 100% CPU equals one processor core (same as
docker stats). -
Container page:
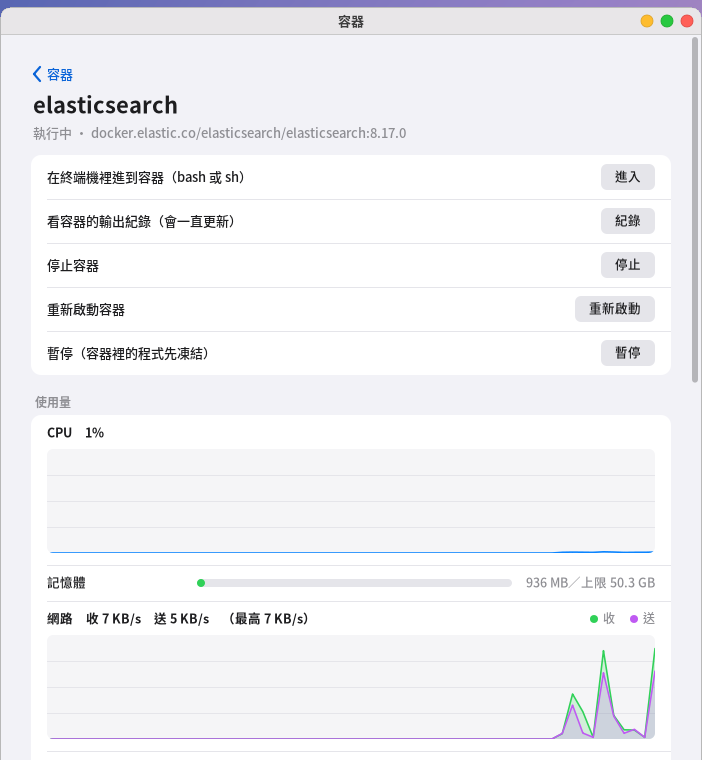
Container page: common actions at the top and usage for the last minute below - Enter: opens a terminal window inside the container (bash if it has it, otherwise sh), the same as
docker exec -it. - Logs: shows the container's output in a terminal (the last 300 lines, then it keeps following new output).
- Stop, Restart, Pause / Resume, Start; a container must be stopped before it can be deleted (volumes are kept).
- Info: image, creation and start times, IP address, ports, mounted folders and volumes; environment variables may contain passwords, so only the count is shown.
- Settings: rename, and choose whether to start automatically at boot.
- Enter: opens a terminal window inside the container (bash if it has it, otherwise sh), the same as
-
New container: at the bottom of the "Containers" tab click "New Container" and fill in the image (for example
nginx,mariadb:11), name, ports (local:container, for example8080:80), folders (local path or volume name:path inside the container, for example~/website:/usr/share/nginx/html), environment variables (separated by semicolons) and auto-start, then click "Create and Start". An image that isn't on this computer yet is downloaded first. -
Images: type a name and press Enter to download; click an image to create a container from it or delete it; "Clean Up" deletes old unnamed, unused images (usually left over after updates) and the build cache.
-
Volumes: shows which container uses each volume; unused ones can be deleted. Files inside volumes need administrator rights to see; to get them out, use a backup.
-
Backup: on the container's page click "Backup" to save the container's settings, volumes and the files in mounted folders into one folder; if "Include image in backup" (the default) is on, the container's current state (including anything changed inside the container) is saved too, and it can be copied to another computer to restore. A running container is paused briefly during backup. Backups go to the location set in the "Backups" tab (by default
docker-backupsin your home folder), which you can change to an external drive or network disk. -
Restore: in the "Backups" tab click a backup → "Restore". It recreates the container and volumes with the original settings, then puts the data back; if the name is already in use by a container,
-restoredis added. If the original port is taken by another container, the container is still restored but not started yet; start it after fixing that. -
Scheduled backups: use the command
pomelo-docker --backup container-name [folder] [--no-image]in cron or a systemd timer; to restore, usepomelo-docker --restore backup-folder.
18. Container Cluster (Kubernetes)
"Container Cluster" is an optional app (you can install and remove it in Software Center), for people who want to play with Kubernetes without studying how to set it up: the engine is k3s (a lightweight Kubernetes, Apache 2.0 licensed, downloaded the first time you create a cluster, about 70 MB), and what we built is the layer on top - setting up and managing the cluster by pointing and clicking. Underneath it is standard Kubernetes: kubectl, Helm charts and YAML written by others all work directly.
Creating a cluster (four steps)
- How many machines: "This computer only" is ready within a minute and suits learning and development; "Several computers" asks for each one's IP and SSH account and password (the account must be able to sudo; the first time uses the password, and afterwards it switches to a key), and you can add this computer too.
- Checkup and suggestions: for each machine it connects over SSH and only reads the hardware and system state (core count, memory, whether the disk is an SSD or hard disk, network speed, system version, whether the time is synced,
whether ports are in use, whether Docker or a database is running), and then gives each machine a suggested role with the reason:
- Server: the control plane (API, scheduling, cluster database). If three or more qualify, it suggests three for high availability.
- Client: worker nodes that actually run containers. When there are few machines, the Server also runs containers.
- NFS storage: the machine with the most free disk, where an NFS server is installed as shared storage (databases and uploaded files go here), and the cluster's default storage points to it; the shared disk is open only to nodes in the cluster, not the whole network.
- Advanced: Redis, database (PostgreSQL / MariaDB / MongoDB), image registry. Suggestions are only defaults, and every switch can be changed; unreasonable combinations bring a warning (for example, less than 4 GB of memory but acting as Server), and only truly impossible ones are blocked (no Server, nobody running containers, time not synced).
- Confirm: lists what is installed on which machine and which files will be changed.
- Build: shows progress and logs machine by machine: download k3s (sha256 verified), send it to each machine, install Server and Client, get the kubeconfig, wait for all nodes to be Ready, install NFS.
If it fails it stops at that step, says why, and you can retry that step. The log is also saved in
~/.local/share/pomelo/cluster/<cluster>/deploy.log.
Dashboard: at the top is the cluster's architecture diagram - the console, Servers (the control plane; with three or more drawn as an etcd ring) and Clients, each with NFS / database / Redis labels, a Ready light and CPU / memory usage bars, so you can see at a glance who does what (when you tick roles in the wizard, the planned architecture is drawn live as well). Next come the cluster light (normal / needs attention), node count and Ready, and Pod count; then six tiles: Nodes (CPU / memory gauges, NotReady marked red), Pods (status, ready, restart count; click in to see logs, follow them live, open a terminal inside the container, or delete; below it are its warning events, with common situations explained in plain words - "keeps crashing and restarting" is usually a wrong setting or being unable to reach the database, "can't pull the image" is a misspelled name or no network), Workloads (Deployment / StatefulSet / DaemonSet / Job; click to restart, change the replica count or delete), Services & URLs (clicking an Ingress address opens the browser directly), Storage (whether volumes are attached), and Events (warnings from the last two days). You can filter by namespace. It refreshes automatically every 6 seconds.
Advanced roles are really deployed: on the machine where you ticked Redis, a database (one of PostgreSQL / MariaDB / MongoDB) or an image registry, the service is pinned to that machine with a nodeSelector when you create the cluster (2 GB of disk for Redis, 8 GB for the database, 20 GB for the registry, using the default StorageClass), passwords are generated randomly and kept only in the cluster's Secret; the cluster card shows the external addresses (ports 30379 / 30432 / 30306 / 30017 / 30500 on the node IP), the in-cluster addresses (redis.pomelo-redis.svc, db.pomelo-db.svc) and connection strings. The image registry uses http: every node is already set to trust it, and for your computer's Docker to push to it you must add that address to insecure-registries.
Apps: the "Apps" tile on the dashboard. The catalog has Nginx, WordPress (with MariaDB), Gitea, MinIO, Nextcloud (with MariaDB) and Uptime Kuma;
pick one, change the name / disk size / password / host name, and deploy. "Use my image" takes an image, port, environment variables (A=1;B=2) and whether you want a disk,
and generates a Deployment + Service + Ingress for you. "Preview" shows the YAML that will be applied (all standard, so you can read it later with kubectl too).
URLs use nip.io (<name>.<Server IP>.nip.io automatically resolves to that IP), so computers on the same network can just open them; for your own domain, change the host name.
Installed apps are listed on the same page; click "Open" once the Pod is ready. To remove one: delete it under "Workloads", or in a terminal kubectl delete namespace app-<name>.
Adding and removing nodes: at the bottom of the nodes page, "Add one" takes an IP and account / password; if the check passes, it is installed as a Client and joined. Each node's "Remove" first moves its Pods away (drain), deletes it from the cluster, and then removes k3s on that machine (that machine's sudo password is needed). Clusters created by older versions didn't save the token, so the first time you add a node it asks for the Server's sudo password to read the token back.
Operations (the "Operations" tile on the dashboard):
- Alerts and notifications: a node not responding, a Pod that keeps crashing or can't pull its image, a volume not attached, or a connection certificate about to expire are all listed on this page; "new" problems pop up a desktop notification, the same problem doesn't nag you repeatedly, and several appearing at once are merged into one. If you turn on "Background watch", it checks every 5 minutes even when the window is closed (using a systemd user timer, no administrator rights needed; it won't send false notifications when a laptop changes networks and can't reach the cluster).
- Connection certificate: shows how many days are left on the kubeconfig client certificate; with less than 90 days left you can click "Renew Certificate" - it restarts the Servers one by one (k3s automatically replaces certificates that are about to expire on startup), waits until each is really back, and then fetches the kubeconfig again.
- Upgrade k3s: when there is a new stable version you can click "Upgrade": it downloads and verifies first, upgrades the Servers one at a time and then the Clients; it waits until each machine's service has really restarted and the node reports the new version and Ready before moving to the next (a three-machine high-availability cluster never loses two at once). Running Pods are not interrupted.
- Backup and restore: "Back up now" saves the cluster's resources (apps, settings, Secrets..., with fields that can't be restored cleaned out and things k3s manages itself skipped) as JSON; with NFS storage, the shared folder is packed in as well (using cpio, because tar can't read files a database is using). "Restore" first creates the namespaces and volumes, waits for the NFS volumes to bind and moves the old data into the new folders (the folder names of dynamic storage contain a random PV name, which differs after a cluster is rebuilt), and only then applies the workloads, so a database never initializes on an empty folder. A backup of a database that is being written to is only a snapshot of "one moment", so for important data please also use pg_dump or mysqldump.
- Upgrading, renewing certificates and backing up NFS need the nodes' sudo password (the same on every machine; it is kept only in memory, cleared after use, and never appears in any process's command line).
- Command line:
pomelo-cluster status(nodes, alerts, certificates),backup,backups,restore time,upgrade,renew-cert,cert,watch.
Accounts and permissions (the "Accounts and permissions" tile on the dashboard): when you want a colleague or a tool to see the cluster without giving full permissions, create an account here - a name, permission (read-only, can edit, administrator) and
scope (enter a namespace, or leave blank for the whole cluster). After creating it, click "Manage" next to the account → "Export kubeconfig", and hand the saved file to the other person, who can then connect with kubectl or Lens;
deleting the account makes its file stop working immediately. Accounts and permissions are standard Kubernetes objects (ServiceAccounts and RoleBindings in pomelo-users), which kubectl can see and you can change yourself.
An exported kubeconfig is the same as that account's password, so hand it over carefully. Command line: accounts, account-add name view|edit|admin [namespace], account-kubeconfig name, account-del name.
Overview, snapshots and clones (the first tile on the dashboard, "Overview"): see the whole cluster on one page - how many apps, Pods and containers are running in total, each machine's CPU and memory usage, then every item listed with its usage and image, "By app" (largest memory use first) or "By machine" (which Pods run on each). Click an app to see its details: which containers run in it (image, ports, resource requests and limits), live usage of each Pod, URLs and services, which volumes hold its data, plus "View logs", "Enter container (terminal)", and restart, replica count 0 / 1 / 2 / 3 (0 means paused), and delete. "Create snapshot" saves the app's settings on this computer and copies each of its volumes in full into a new volume (using an extra copy of the space); by default the app is paused first and resumed automatically after copying, so that data being written, such as a database, stays consistent. With a snapshot you can "Restore" (put the data back into the original volume), "Clone as a new app" or delete it. "Clone" makes an identical new app with a different name (with the data, or only with empty volumes): the labels, Service and volume names are all replaced with new ones, so old and new don't fight over traffic; external ports become cluster-internal on the new app, and ConfigMaps and Secrets are shared. At the bottom of the overview you can "Deploy a new app" or "Apply YAML".
GitOps (the "GitOps" tile on the dashboard): put your deployment files in a Git repository, enter the repository address, branch and folder, and click "Save and sync now" to fetch and apply them to the cluster
(a folder with kustomization.yaml uses kustomize). Once "Auto sync" is on, the background watch checks every 5 minutes and applies only when there is a new commit (a failure notifies you once).
It only adds and updates; things already removed from the repository are not deleted from the cluster. For private repositories: write the address as https://account:token@host/..., or use an SSH address (first add this computer's SSH key to the repository).
Command line: gitops-set address [branch] [folder], gitops-sync [--force], gitops-auto on|off, gitops.
Offline bundle (at the bottom of the "Operations" page): for environments without a network, first click "Create" on a computer with a network to download k3s and the system images (x86_64 and arm64) into a folder;
move the folder to the offline computer and click "Import", and from then on creating a cluster needs no network (the system images are sent to the nodes together with k3s). Command line: bundle folder, bundle-import folder.
Multiple clusters: the home page lists all clusters, each showing its number of Ready nodes (or "Can't connect" if unreachable); click one to switch.
Ask Pomi: "what's wrong with the cluster" reads out the nodes and alerts; "deploy WordPress for me" (Gitea, MinIO, Nextcloud, Nginx, Uptime Kuma) opens that app's deploy screen, where you confirm the name, URL and password.
Apply YAML: choose a .yaml file or paste a web address, which is the same as kubectl apply; to install a Helm chart, paste a HelmChart resource and it will be installed (k3s has a built-in Helm controller,
so you don't need to install helm separately). Import: if you already have a cluster (one you built yourself or a kubeconfig someone gave you) → "Import" on the home page, choose the file, and from then on manage it like one you built yourself.
Cluster card: API address, kubeconfig path, each machine's role, NFS path. Remove cluster: removes k3s and its data from every node (confirm twice); an imported cluster is only taken off the list.
Using kubectl in a terminal: "Use kubectl in a terminal" on the dashboard opens a terminal already connected to the cluster. Command line: pomelo-cluster nodes|pods|status,
pomelo-cluster apply file, pomelo-cluster probe host account.
Security and privacy: every command used for checking and installing is hard-coded in the program; a password is kept in memory only for that use, and once connected it switches to the console's SSH key
(~/.local/share/pomelo/cluster/id_ed25519); known_hosts is its own copy and never touches your ~/.ssh. Each node needs network access to pull container images.
19. Archive Manager
Compress, extract and encrypt: one program handles zip, 7z, the tar family, cpio, iso, squashfs, disk images and more ("Archive Manager" in the launcher). The file manager's right-click menu can compress and extract directly, and double-clicking an archive opens it with this program.
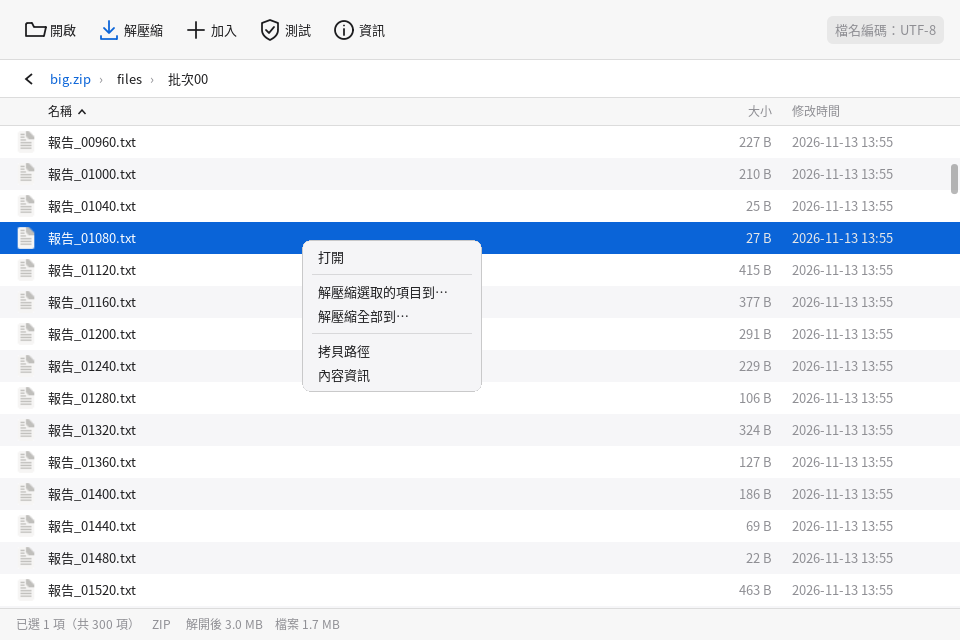
Using it in the file manager
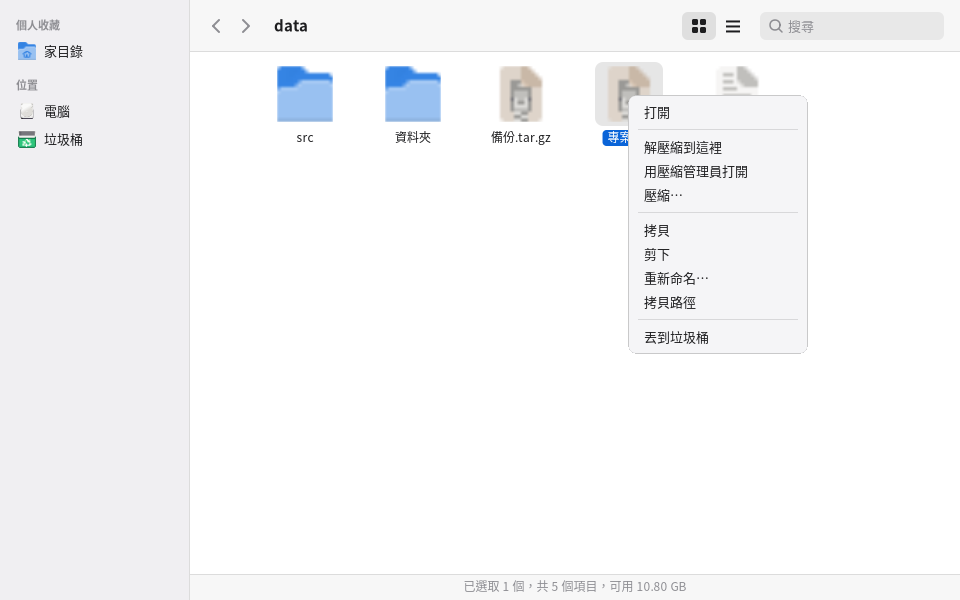
- Right-click an archive: "Extract Here" extracts next to the archive (if the archive has more than one top-level item, a folder with the same name as the archive is created automatically, so files don't get scattered everywhere), "Open with Archive Manager" (see what's inside and extract only the few you need). You can also select several archives.
- Right-click any file or folder (you can select many): "Compress…" opens the create window: fill in the name, choose where to save, the format, the compression level, and whether to use a password.
- Double-click an archive to open it with Archive Manager; double-clicking other files works as before (photos open in the image viewer, text in the editor…).
- You can also drag an archive into the Archive Manager window to browse it, or drag ordinary files and folders in to create a new archive.
- When Archive Manager is not installed, these options do not appear.
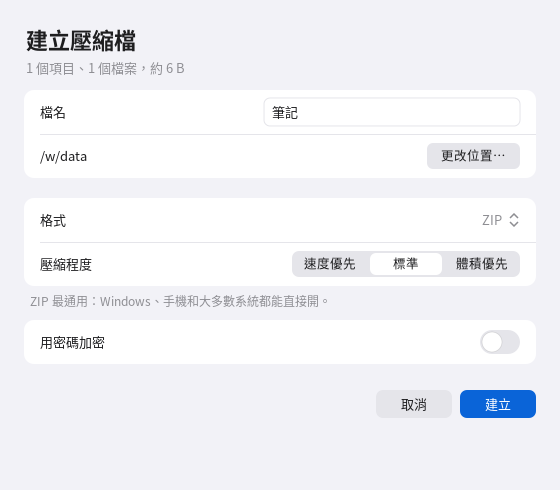
Supported formats
| Format | Read | Create | Encryption | Notes |
|---|---|---|---|---|
| zip, jar, apk, epub | ✔ | ✔ | AES-256 | The most universal; Windows and phones can open it directly; old-style ZipCrypto can also be read and written (marked as less secure); file name encoding is detected automatically (Big5, GBK, Shift-JIS, EUC-KR) |
| 7z | ✔ | ✔ | AES-256, can encrypt file names too | Unencrypted ones are read and written directly; encrypted 7z needs 7-Zip installed |
| tar, tar.gz, tar.bz2, tar.xz, tar.zst, tar.lz, tar.lz4 | ✔ | ✔ | OpenPGP (AES-256) whole-archive encryption, saved as .gpg | Keeps Linux permissions and symbolic links; encryption needs gnupg |
| cpio, ar, deb, rpm | ✔ | cpio ✔ | cpio possible (gpg) | |
| iso (ISO 9660, including Joliet, Rock Ridge) | ✔ | ✔ | ✘ | |
| squashfs | ✔ (7-Zip) | ✔ (needs squashfs-tools) | ✘ | |
| Disk images (.img of FAT, ext, NTFS) | ✔ (7-Zip) | ✘ | ✘ | See the files inside |
| Single-file compression: gz, bz2, xz, zst, lz, lzma, lz4, Z | ✔ | gz, bz2, xz, zst, lz ✔ | gpg | |
| cab, lha, xar, dmg, vhd, wim | ✔ | ✘ | ✘ | |
| .gpg, .pgp (whole-archive encrypted archives) | ✔ | Enter the password, then it is decrypted and read |
What it can actually do depends on what is installed on this computer: running pomelo-archive --formats in a terminal lists, for each format, whether it can be created and encrypted,
what is missing and how to install it; options the window can't do show the reason instead of failing silently.
Encryption
- Turn on "Encrypt with password" when creating an archive. ZIP and 7z use AES-256; 7z also has "Encrypt file names too", so without the password you can't even see which files are inside. ZIP file names are always visible (a limit of the format itself). The tar family is encrypted as a whole with OpenPGP (AES-256) into a .gpg, so file names can't be seen; either gpg or this program can open it.
- When opening an encrypted archive it asks for the password; if it is wrong you can enter it again. The password is only passed around inside the program and never appears in the command line, logs or config files, and is cleared after use.
- If you forget the password it can't be opened, and there is no way to recover it.
Security
Extraction is where malicious files most easily attack, so Archive Manager always blocks first and extracts afterwards:
..in paths, absolute paths, and symbolic links and hard links pointing outside the extraction folder are never restored (it tells you how many were skipped); setuid / setgid permissions and device files are always removed.- Suspected compression bombs (more than 1 GB after extraction with a compression ratio over 100 times, or more than 2 million items) bring a warning first, and it continues only after you confirm; if disk space is not enough it says so first.
- It extracts to a temporary folder alongside first and moves everything over only if all succeeds, so failing or canceling leaves no half-finished result; if a file with the same name exists at the destination, it asks whether to replace, keep both, skip or cancel.
Optional programs (it works without them, with a few features missing)
| Package | If not installed | How to install |
|---|---|---|
7-Zip (7zip) |
Cannot read SquashFS and disk images, cannot open encrypted 7z | sudo apt install 7zip or sudo dnf install 7zip |
| gnupg | Cannot create or open encrypted tar-family files (.gpg) | Most systems already have it; if not, sudo apt install gnupg or sudo dnf install gnupg2 |
| squashfs-tools | Cannot create SquashFS | sudo apt install squashfs-tools or sudo dnf install squashfs-tools |
Why RAR is not supported
RAR's extraction code comes with unRAR license restrictions (it can't be used to make a program that competes with RAR), so it is not free software; Pomelo is free software and doesn't want you to run into license problems without knowing it.
So whenever Archive Manager detects RAR (extension .rar, .r00, or a file starting with Rar!), it always answers "unsupported format", does not hand it to the system's libarchive or 7-Zip to read, and does not call any rar or unrar.
To open RAR, first ask the sender to resend as zip or 7z, or install and use another tool you trust yourself.
About the 7-Zip license
Archive Manager itself is GPL-3.0-or-later; 7-Zip is a separately run optional package, not part of Pomelo, and is not linked in.
The 7zip package on Ubuntu 24.04 / 26.04 and Debian 13 contains RAR extraction code restricted by unRAR (the package's own copyright file says so),
so we only list it as a "suggestion", and it is not installed automatically, nor preloaded on the install disc; the 7zip on Fedora and Rocky (EPEL) has no RAR code.
Even when installed, Archive Manager does not use it to read RAR.
Command line (for scripts)
pomelo-archive [archive]                         open the window to browse
pomelo-archive --extract-here archive…           extract next to the archive (with a progress window)
pomelo-archive --compress file-or-folder…        open the create-archive window
pomelo-archive --list archive                    list the contents
pomelo-archive --test archive                    check for damage
pomelo-archive --extract archive -C directory    extract (--only path extracts only part; --password-stdin reads the password from standard input)
pomelo-archive --create output [--format=zip|7z|tar.gz|…] [--level=1-9] [--password-stdin] file…
Exit codes: 0 success, 1 failure, 2 password needed, 3 wrong password, 4 missing external program, 5 canceled, 6 unsafe content, 7 not enough space, 8 suspected compression bomb, 9 an item with the same name exists at the destination.
Limits: RAR is not supported; no split archives (.001, .002…), damaged archives can't be repaired, and a single item can't be deleted from inside an archive; symbolic links in encrypted ZIPs are not restored; the Archive Manager window can't yet "drag out" files to the file manager (use "Extract to…"); encrypted tar-family files can't have files "added" directly; adding files rewrites the whole archive, so large ones take a while.
20. Software and updates
- Software Center ("Software Center" in the launcher):
- "Explore" recommends popular software by category.
- You can also search the whole package repository, for example by typing chrome, zoom or python.
- "Installed" lets you remove programs installed with apt.
- System updates: "Settings → General → Software Update" can check for and install all updates.
- To install security updates automatically: first run
sudo apt install unattended-upgrades, and an "Install security updates automatically" switch will appear on the same page. - You can also use the command:
sudo apt update && sudo apt upgrade
- To install security updates automatically: first run
21. Files, external devices and passwords
- File manager (the folder icon on the Dock):
- Common actions: Ctrl+C / X / V to copy, cut and paste, F2 to rename, Delete to move to the Trash, Ctrl+F to search.
- Drag and drop: drag files onto a folder, a place in the sidebar, or another file manager window. On the same disk it moves, to another disk (such as a USB drive) it copies, and holding Ctrl always copies; dragging onto the "Trash" throws it away. Hovering over a folder for one second opens it, hovering at the top or bottom edge of the list scrolls automatically, and Esc cancels.
- Drag onto the window of the image viewer, paint, text editor, PDF reader or media player to open it with that program; drag onto the terminal to type the file's path; you can also drag onto the browser to upload. Files dragged in from other programs are accepted too (dropping on a folder puts them in that folder).
- Compress and extract: right-click a file and choose "Compress…", right-click an archive and choose "Extract Here", and double-clicking an archive opens it with Archive Manager (see section 19).
- External devices: plugging in a USB drive mounts it automatically and notifies you. A ⏏ icon appears in the menu bar; click it before removing the drive.
- Storage ("Settings → General → Storage"):
- See disk usage and drive health.
- One-click cleanup: Trash, thumbnail cache, package cache, packages no longer needed, system logs.
- Keyring: keeps passwords for programs such as Chrome and VS Code, encrypted with your login password.
Firewall Manager: manage iptables with a friendly interface
"Firewall Manager" (pomelo-firewall, under "Tools" in the launcher) is a graphical front end for iptables: it reads the system's existing rules in place and writes them back in place, and does not replace or take over ufw, firewalld or Docker.
- The first time you open it, an administrator password window (polkit) appears; after you authorize, it doesn't ask again while the window stays open. The banner at the top of the overview uses green / orange / red to tell you whether the firewall is in good shape, and below are the seven most common actions: Add rule, Edit rule, Delete rule, Status, Basic rules, Import / Export, Logs.
- The "Rules" page turns every rule into plain language (for example, "Allow TCP, from 192.168.1.0/24, destination port 22 (SSH), inbound to this machine"), and you can expand it to see the equivalent iptables command. Rules it can't understand are marked "Read-only" and kept as they are; chains managed by Docker, ufw, firewalld and k3s are read-only by default.
- All changes first go into "Pending", and are written to the system only when you press "View differences and apply": it backs up automatically before writing and runs a preflight check (whether it would cut your current connection), and after applying it counts down 30 seconds and reverts automatically if you don't press "Keep" — even if this window crashes.
- Risky settings get a recommendation below first: a one-sentence title, why it matters, a suggested action and buttons, and you can choose "Don't remind me about this one".
- The "Protection" page can turn on SYN flood rate limiting, connection count limits, invalid packet dropping and automatic blocking (block an IP that connects too frequently, with longer blocks for repeat offenders); it uses only its own POMELO_* chains and can be removed in one click. A local firewall can't stop a DDoS that saturates your bandwidth; that has to be handled upstream.
- If you lock yourself out:
pomelo-firewall --reset(remove Pomelo's protection chains),--revert(restore to before the last write),--restore name;pomelo-firewall --helphas the full description.
Network Discovery: what devices are on this network, and are there any problems
"Network Discovery" (pomelo-netscan, under "Tools" in the launcher) takes inventory of a network you are authorized to manage: which devices there are, which ports are open, what system and model they run, roughly where they sit on the network, and it checks for conflicts, suspicious devices, ports that shouldn't be open, abnormal packets and overall security. It is read-only throughout, and scans only private address ranges (public addresses are always refused).
- The first time you open it, read the "Notice" and agree. On the "Scan" page confirm the range (the default is your current subnet) and press "Start scan".
- When the scan finishes, the first screen is the "Network overview": the banner at the top uses green / orange / red to tell you whether the network is normal right now, with one sentence about the most important thing; clicking a number card filters; devices with problems on the topology map are enlarged and glowing; on the right is the to-do list, and clicking one marks its path to the gateway.
- Colors are consistent: green = normal, blue = newly appeared, orange = attention, red = conflict or problem, gray = offline, purple = unknown device; each has a badge of a different shape.
- Click a device for details: a one-sentence conclusion, the evidence source for each field, and the full port table (service, purpose, risk, whether it matches the port policy). Right-click to label its location, add it to known devices, or rescan this one.
- The "Port policy" page can apply a template (office network, printer, camera, strict, relaxed) or import your own policy; ports that violate it appear in the to-do list.
- Without advanced privileges it scans in reduced mode (it can't see the two MACs of an IP conflict, LLDP, or DHCP servers). On the "Scan" page tick "Use pkexec to get advanced privileges", or ask your administrator to run
setcap cap_net_raw+ep /usr/libexec/pomelo/pomelo-netscan-helper. - Command line:
pomelo-netscan --help; for examplepomelo-netscan --assess(overall security assessment, with an exit code usable for monitoring),--conflicts,--free-ip,--topology --format png(--comparecompares with the previous scan). SNMP is used only when you supply the credentials yourself: v1 / v2c use--snmp-file, v3 uses--snmp-v3-file(passwords are not accepted as command-line arguments). - Location means "relative position on the network", not GPS: only with an SNMP switch or LLDP can it know which port a device is plugged into; without them the dotted lines on the map are only inferences. See docs/網路探索.md for details.
- On the topology map you can drag nodes (positions are remembered; right-click "Rearrange" to restore), switch to "Box select" mode to frame several devices and then batch label location / mark as known / hide / export the selection; in the location view, dragging a device onto a location box labels that location. Arrow keys pan, + / − zoom, F focuses the upstream path, / searches, Esc clears. With two or more scan records, the time slider at the top lets you view historical snapshots, and "Compare with previous scan" marks new devices with a green glow, vanished ones with gray dotted lines, and changed connections with orange lines.
- When "Packet Analyzer" is installed, device details and the right-click menu gain "Capture this device's packets…", and packet anomaly and IP conflict items gain "View in Packet Analyzer"; it only opens Packet Analyzer with the filter filled in, and capture starts only after you confirm it yourself in that window.
- Comparing service versions with published CVEs is only inferred from banners (possibly affected, unverified): distributions often backport fixes to old version numbers, so check the vendor's advisory first; if you confirm it's fine, press "Don't remind me again".
Packet Analyzer
pomelo-packets (the Settings "Network" page or "Packet Analyzer" in the launcher): opens pcap / pcapng files (double-clicking a file works too), or captures packets on a network you are authorized to manage. The first time you use it you must read and agree to the notice; by default it only produces statistics (RTP jitter, loss, MOS estimate, SIP call flow diagrams) and does not reconstruct calls into audible sound; to reconstruct, you must separately tick "I have obtained authorization" for that session, and playback and export are written to a local audit log. See docs/封包分析器.md for the full description.
22. Troubleshooting
Black screen after login, or you can't log in
- Press Ctrl+Alt+F3 and log in on the text console.
- If you're using the Pomelo login screen, run
sudo pomelo-dm-switch off, thensudo reboot. - Or choose another session on your original login screen.
The menu bar or Dock is missing or acting strangely Press Super+Shift+R to restart Pomelo; your open apps won't be closed.
Chinese shows as boxes Install Chinese fonts:
The virtual machine is very slow, or it says there is no hardware virtualization (KVM)
- "Hardware virtualization is not enabled": go to the BIOS settings and turn on Intel VT-x (Virtualization Technology) or AMD-V (SVM).
- "Your account can't use it yet": click "Enable", then log out and back in.
- When Pomelo itself is installed inside a virtual machine (such as VirtualBox or VMware), you must turn on "nested virtualization" there to get KVM.
The virtual machine won't start On the virtual machine's settings page, the reason is written under the "Start" button. Common ones are not enough memory (lower the virtual machine's memory, or close some programs), the disk file being used by another virtual machine, or the disc image not being found (it was moved or deleted; choose it again under "Disc drive").
The virtual machine has no sound Without QEMU's sound module installed, sound plays from the display window, so you can't hear it if the display window is closed (the virtual machine running in the background); click "Install" under "Display and sound" on the virtual machine's settings page to add qemu-system-gui, after which QEMU plays the sound directly. Also make sure "Sound" is turned on in the virtual machine's settings and that the system inside the virtual machine isn't muted.
A program misbehaves in a Pomelo login screen session (display, input method, window position)
Since 0.40, programs such as GTK apps and Firefox display directly on Wayland. If a program has problems in this mode, you can fall back to the old way for everything
(all programs through XWayland): open ~/.config/pomelo/settings.conf with the text editor and add a line
session.wayland = 0
Save, then log out and back in. To switch back, delete that line. Please also report to us which program it was and what happened.
If only one Pomelo program (for example the sound settings) has problems, you can make just that one fall back to XWayland by opening it in the terminal like this:
POMELO_BACKEND=x11 pomelo-sound
Containers says "Your account can't manage Docker yet" Click "Add to docker group", then log out and back in (the same applies right after Docker is first installed: log in again once).
Finding the cause of a problem
- When you log in with the Pomelo login screen, Pomelo's messages are written to
~/.xsession-errors. - With other login screens, look at
~/.xsession-errorsorjournalctl --user -b. journalctl -bshows the system log for the current boot.
23. Removal
If you're using the Pomelo login screen, removing Pomelo automatically switches back to your original login manager.
Your personal settings are in ~/.config/pomelo, the assistant's models and voices and the virtual machines (including virtual disks) are in ~/.local/share/pomelo,
and container backups are by default in ~/docker-backups. You can delete them yourself if you no longer need them.
QEMU and Docker, which are installed the first time you use virtual machines and containers, are not removed along with Pomelo, and the containers and images inside Docker are still there. If you don't need them:
sudo apt remove qemu-system-x86 qemu-utils ovmf docker.io
24. Known limitations
- Not all of Pomelo's programs are native Wayland yet: since 0.40, Settings, Control Center, notifications, the launcher, the lock screen, the menu bar, the Dock, the wallpaper, Pomi and the login screen are native, while the file manager, terminal and other programs are still shown through XWayland and will be moved over step by step in later versions; old-style XEmbed system tray icons (a program's own small window embedded in the menu bar) do not show up in a Wayland session, while newer SNI / AppIndicator icons work as usual; GTK apps and Firefox have used Wayland directly since 0.40. Different screens can't yet use different scale factors (for example 150% on a laptop and 100% on an external monitor); you can only adjust the overall text size. Programs running through XWayland are not isolated from each other (the X11 design: programs on the same X server can see each other's windows and key presses), while native Wayland programs are isolated from each other, which is one reason the remaining programs are to be made native.
- Electron programs such as Chromium and VS Code still go through XWayland (the input method protocol used by their native Wayland mode isn't supported yet).
- Screen sharing (browser video meetings) shares the whole screen at once; sharing a single window is not possible yet.
- Virtual machines can't yet: share the clipboard, share folders or drag and drop files with the virtual machine; 3D acceleration, multiple screens. ARM64 on an x86 computer is software emulation, so it is slower. Bridged networking works only with a wired network adapter. USB passthrough and bridged networking have not been fully tested on physical computers yet; please report any problems.
- Containers only manage Docker on this computer (they can't connect to Docker on another computer); docker compose projects only show the project name, and starting or updating a whole project
still needs
docker compose; when restoring a backup, if a custom network it was attached to doesn't exist on this computer, it is attached to the default bridge network instead. - The Pomi browser has no extensions or bookmark sync, and can't play streaming video that needs DRM (such as Netflix); for incompatible websites you can use Firefox instead.
- The terminal draws emoji one character at a time: emoji made of several characters, such as flags and families, are shown split apart.
- Paint has no layers: once text and shapes are placed they become part of the picture and can't be edited or moved again (if you put one in the wrong place, press Ctrl+Z to undo). It can't print, and can't save to GIF or WebP yet.
- The PDF reader can't yet: run JavaScript in forms (automatic calculation and format checking don't work); XFA dynamic forms (used by a few government forms) are not supported. Editing text works line by line without automatic wrapping, so when text grows it covers things to its right (for example the neighboring cell of a table); vertical text and text wrapped inside form objects can't be edited yet. A watermark can't be removed if it is the same image as the body (for example a scanned document). When verifying signatures it does not check whether the certificate has been revoked; timestamp servers are supported only with http:// addresses (most are). Smart card reader signing has been tested with an emulated card, and has not been tried on a physical Citizen Digital Certificate yet; please report any problems. The root certificates of Taiwan government agencies are not in the system's trust list, so documents signed with a government or Citizen Digital Certificate show "The issuing authority is not in the trust list". Text added with the annotation "Text" tool or with page numbers can't be selected or searched ("Add text" under "Edit content" can). Punctuation in vertical text is not converted to its vertical forms.
- The word processor doesn't yet support: the old binary .doc format (Word 97-2003; only .docx and .odt are supported); spell check; headers, footnotes, track changes; true justification (stretching letter spacing); images can only take a whole line to themselves and can't be mixed into a paragraph with text, and only PNG / JPEG are recognized (images or charts in other formats in a document are skipped; the text can still be edited as usual, but saving as a new file loses those images, so use "Save As" with a different file name to keep the original file); page numbers can only be turned on or off for the whole document, with no custom format or position; the browse window for opening files lists only folders and .docx / .odt files and can't see other files; print preview is only a thumbnail and can't be edited.
- The spreadsheet doesn't yet support: column width / row height can only use the defaults and can't be dragged; cell editing is single-line input; when inserting or deleting rows / columns, the addresses referenced in other cells' formulas are not adjusted automatically; pasting from the clipboard across applications does not keep formatting (formulas are kept because the text itself is "=..."); Find searches only within the current sheet; freeze panes, merged cells, pivot tables, charts, conditional formatting, printing.
25. Licenses and third-party components
Pomelo is free software, licensed under the GNU General Public License version 3 or any later version (GPL-3.0-or-later). The full text is in the LICENSE file in the package
(after installation, in /usr/share/common-licenses/GPL-3 or /usr/share/licenses/). You're free to use, modify and distribute it;
if you distribute a modified version, you must use the same license and provide the source code. This software comes with no warranty.
Developer: pake@fedora.tw; organization: https://fedora.tw (bug reports and contact). The source code is pomelo-<version>-source.tar.gz, published alongside the packages;
you can also request it by email.
The following are downloaded the first time you use the matching feature and are not included in the installation package:
- The assistant's AI model: Qwen3-VL, Apache 2.0 license.
- Talking (speech recognition): the runtime sherpa-onnx, Apache 2.0 license; the model SenseVoice-Small (Alibaba's FunASR), which may be freely used, modified and shared under the FunASR model license, with the source credited.
- Runtime: llama.cpp, MIT license.
- Offline voice:
- The speech synthesis program Piper is MIT licensed.
- The dataset license of the Chinese voice huayan is marked "unknown". If you want to use it commercially, please check it yourself first.
- Virtual machines: QEMU (GPL-2.0), UEFI firmware OVMF / EDK II (BSD-2-Clause-Patent), TPM emulator swtpm (BSD-3-Clause), installed from the system's package repositories.
- Containers: Docker Engine (Apache 2.0), installed from the system's package repositories (on Rocky 9, from Docker's official repository).
- Rime dictionaries for the input method (Pinyin, Cangjie, Quick, Jyutping): the Rime project's schemas and dictionaries (LGPL-3.0); the Jyutping dictionary is maintained by CanCLID,
mainly CC BY 4.0, with
jyut6ping3.mapsunder ODbL 1.0. They are downloaded to~/.local/share/pomelo/rime-data/.
Other components used by the interface:
- Archive Manager: reads and writes archives with the system's libarchive (mostly BSD-2-Clause); the optional external programs gnupg (GPL-3.0-or-later), squashfs-tools (GPL-2.0-or-later) and 7-Zip (LGPL-2.1-or-later and BSD-3-Clause; the packages on Ubuntu 24.04 / 26.04 and Debian 13 also contain RAR code restricted by unRAR, so it is only listed as a suggestion and not installed automatically) all run separately and are not linked into the program. RAR is not supported (see section 19).
- Icons: Yaru (CC-BY-SA 4.0) / Adwaita.
- Fonts: Noto CJK (SIL Open Font License).
- Input methods: Zhuyin uses the New Chewing engine libchewing (LGPL-2.1); other languages use the system's librime (BSD-3-Clause), Anthy (LGPL-2.1 and GPL-2), libhangul (LGPL-2.1), installed only when enabled in settings. pomelo-input ships librime's API header files (BSD-3-Clause, with the full license text included in the package).
- The assistant's Simplified-to-Traditional conversion and pronunciation tables (built into the program): taken from OpenCC (Apache 2.0) and the Unicode Unihan database (Unicode License v3), with the full license text included in the package.
- SVG (icons, image viewer, paint): nanosvg (Mikko Mononen, zlib license, source embedded in libpomelo, with the full license text included in the package).
- PDF reader: the PDF core is written by Pomelo itself; the glyph name table is taken from the Adobe Glyph List (BSD-3-Clause, with the full license text included in the package), and the predefined CJK CMaps are read from the system's poppler-data (data only).