
Pomelo 0.35 install disc (Ubuntu 24.04/26.04)
This guide walks you through installing Pomelo on a computer or virtual machine using the Pomelo install disc (or USB drive). The whole installation takes about 5 to 10 minutes.
Applies to: Pomelo 0.35 install disc (November 2026). Screenshots were taken during a real installation.
1. Choose a disc version
The Pomelo install disc comes in four versions. Pomelo itself is exactly the same in all of them; the only difference is the system underneath:
| File name | Based on | Kernel | Size | Best for |
|---|---|---|---|---|
pomelo-0.35-ubuntu24.04-amd64.iso |
Ubuntu 24.04 LTS | 6.8 | 1.3 GB | Most computers, the most stable; we recommend trying this one first |
pomelo-0.35-ubuntu26.04-amd64.iso |
Ubuntu 26.04 LTS | 7.0 | 1.4 GB | Very new computers (switch to this if 24.04 does not recognize your graphics card or Wi-Fi) |
pomelo-0.35-debian13-amd64.iso |
Debian 13 (trixie) | 6.12 | 1.0 GB | People used to Debian; uses apt just like the Ubuntu versions, with conservative, stable updates |
pomelo-0.35-fedora44-amd64.iso |
Fedora 44 | 7.2 | 1.3 GB | People used to Fedora (dnf, RPM packages); SELinux is on by default |
After downloading, you can check that the file is complete (SHA-256):
087956567c0acaacce2a57287c96efdb2f9708a2e4fe4c6c5f25e8ed11850f4d  pomelo-0.35-ubuntu24.04-amd64.iso
52abc929be84c5f4b13005fa0270fd1137002282123905b431a2c7c29837fc70  pomelo-0.35-ubuntu26.04-amd64.iso
acfa8fc3d29b5c56865e2e6ae4946b4876d4453bd34d87a795fce6a3f9a5249b  pomelo-0.35-debian13-amd64.iso
fc7721a2a05d358145eafef1d3880c21a4587f28f7ced2ede93d6839eeed4788  pomelo-0.35-fedora44-amd64.iso
The installation steps and screens are the same for all four versions (the screenshots in this guide are from the Ubuntu 24.04 version).
How the Debian version differs:
- Software is installed and updated from Debian's package repository (apt, used the same way as on the Ubuntu version). There is no Snap.
- Debian 13 gets about 3 years of security updates, followed by long-term support (LTS) until 2030.
- Firmware for graphics cards, Wi-Fi and sound cards comes from Debian's non-free-firmware repository. It is already on the disc, so no network is needed during installation.
How the Fedora version differs:
- Software is installed and updated from Fedora's package repository (dnf), and versions are newer than Ubuntu LTS.
- The SELinux security module is in Enforcing mode by default.
- Fedora releases two versions a year, and each is supported for about 13 months; Ubuntu LTS is supported for 5 years. If you do not want to upgrade for a long time, we recommend the Ubuntu version.
2. Computer requirements
- A 64-bit Intel or AMD computer
- 4 GB of memory or more recommended
- At least 12 GB of disk space (32 GB or more recommended)
- Either UEFI or legacy BIOS works; it can boot directly even with Secure Boot on, so you do not need to turn it off
- No network needed during installation
3. Prepare a bootable USB drive (or virtual machine)
Physical computer: make a bootable USB drive
Get a USB drive of 2 GB or more. Everything on it will be erased.
- Windows: Use Rufus or balenaEtcher. When Rufus asks for the write mode, choose "DD Image mode".
- Linux: First use
lsblkto find out which device your USB drive is (for example/dev/sdb), then run the command below. Typing the wrong device name will wipe another disk, so check it carefully more than once:
sudo dd if=pomelo-0.35-ubuntu24.04-amd64.iso of=/dev/sdX bs=4M status=progress conv=fsync
Virtual machine: VirtualBox
When creating the virtual machine:
| Item | Recommended |
|---|---|
| Type / Version | Linux / Ubuntu (64-bit) (for the Debian version choose Debian (64-bit); for the Fedora version choose Fedora (64-bit)) |
| Memory | 4096 MB |
| Processors | 2 or more |
| Disk | 25 GB or more (if you want to install it next to Windows with custom partitioning, add the space Windows needs on top of that) |
| System → Acceleration | Choose "KVM" as the paravirtualization interface (boots much faster) |
| Storage | SATA controller with "Use Host I/O Cache" checked; attach the Pomelo ISO to the optical drive |
| Display | Graphics controller VMSVGA, video memory 128 MB |
UEFI (System → Enable EFI) can be on or off.
4. Boot from the disc
Plug in the USB drive, and while the computer starts, press the "boot menu key" to choose to boot from the USB drive. Common keys for each brand:
| Brand | Boot menu key |
|---|---|
| ASUS | F8 or Esc |
| Acer | F12 |
| Dell | F12 |
| HP | F9 (or press Esc first) |
| Lenovo | F12 (on some laptops, the small Novo button on the side) |
| MSI / Gigabyte | F11 / F12 |
Boot menu
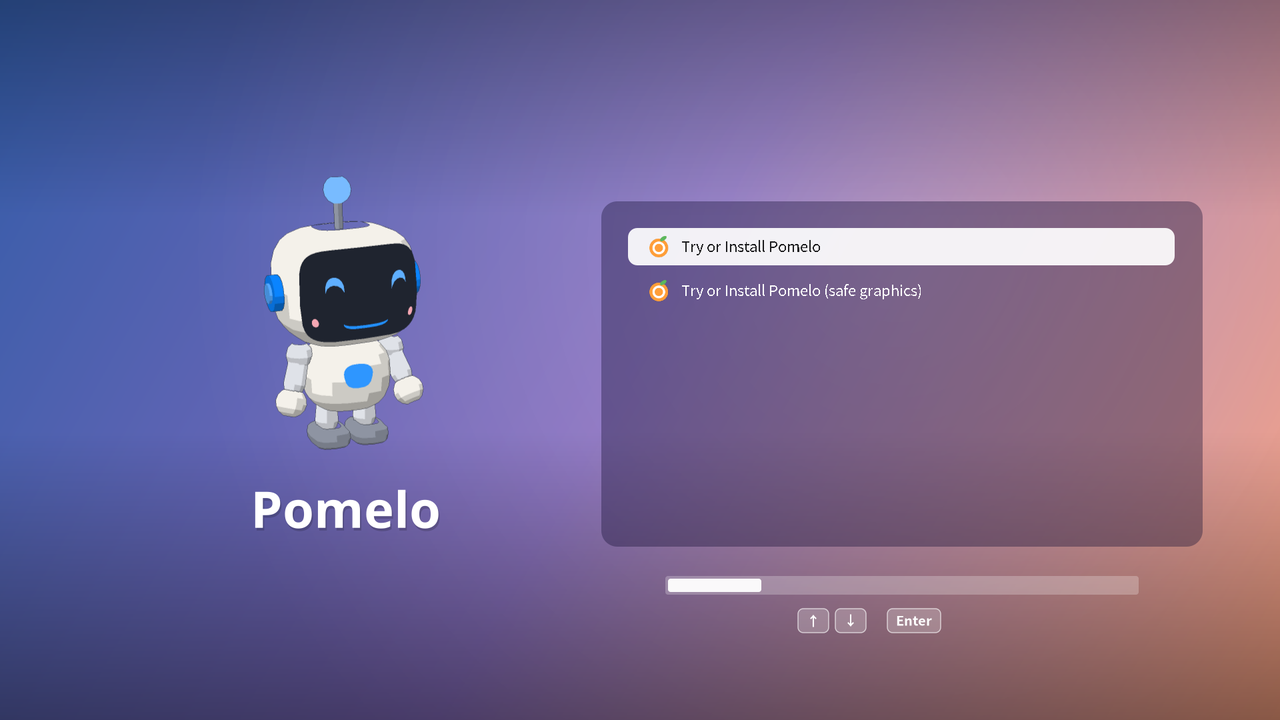
- Try or Install Pomelo: Choose this one in most cases (it is selected automatically after the progress bar below finishes, about 5 seconds).
- Try or Install Pomelo (safe graphics): If the screen goes black, flickers or looks garbled after booting, restart and choose this one instead.
Use the up and down keys to choose and press Enter to boot. When Secure Boot is on, the text in the menu is a little smaller (Secure Boot only allows the built-in font); everything else is the same.
Boot screen
While starting up, you will see Pomi keeping you company as you wait:
Try the desktop
Next you will arrive at Pomelo's trial desktop, and the installer opens automatically. If you do not want to install right away, you can close the installer and try things out first; when you are ready to install, open "Install Pomelo" from the applications menu (the leftmost icon in the Dock). Changes you make while trying it out are not saved.
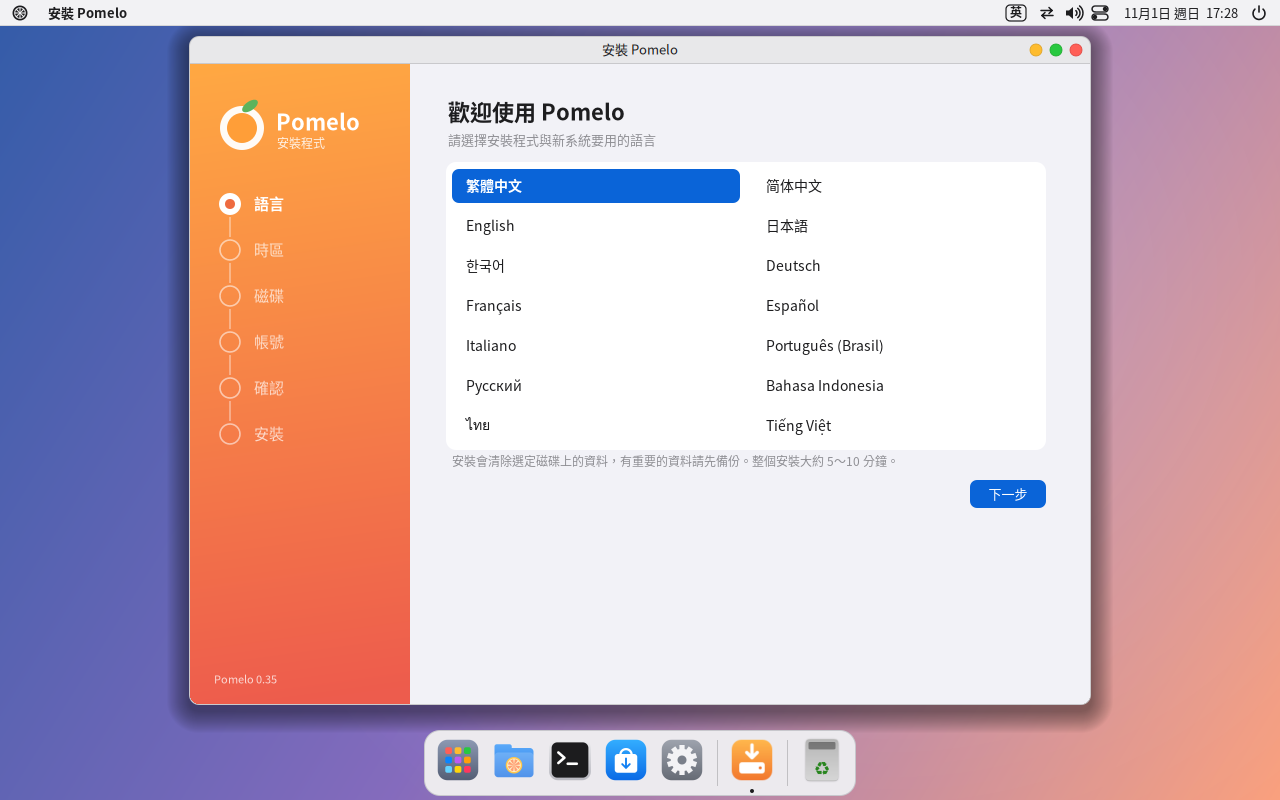
5. Installation steps
The installer lists all the steps on the left, and you can click back to any step you have finished to change it. Nothing on your disk is touched until you press "Erase disk and install" (or "Start installation") on the last step.
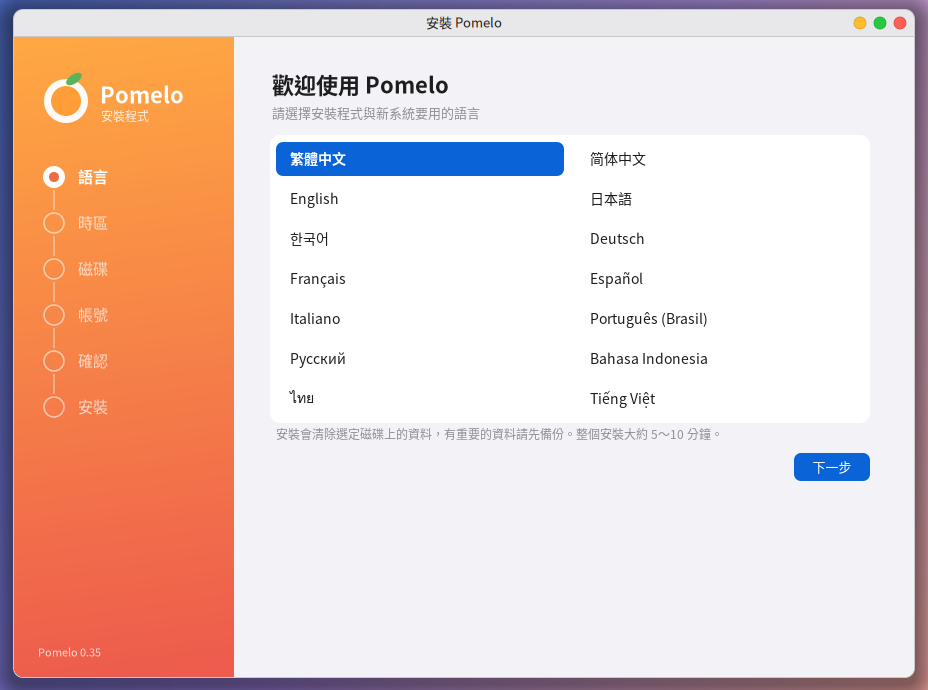
5.1 Language
Choose the language for the installer and the new system. As soon as you click, the whole screen switches to that language. There are 14 languages in total.
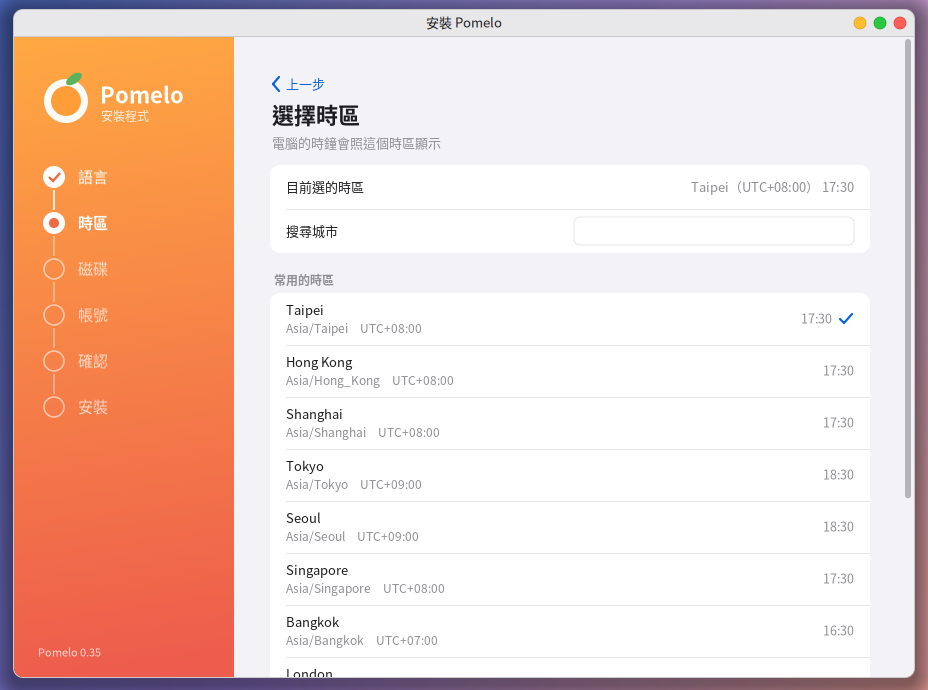
5.2 Time zone
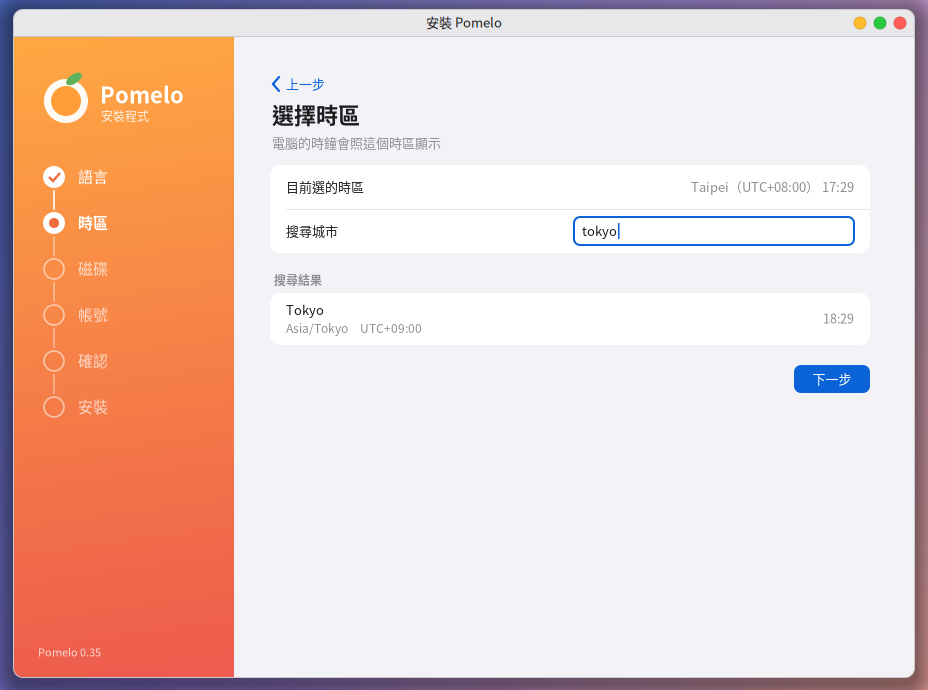
The default is the time zone that matches your language (for example, Taipei for Traditional Chinese). To change it, click one of the common time zones, or type an English city name (such as Tokyo or London) into "Search city".
5.3 Disk
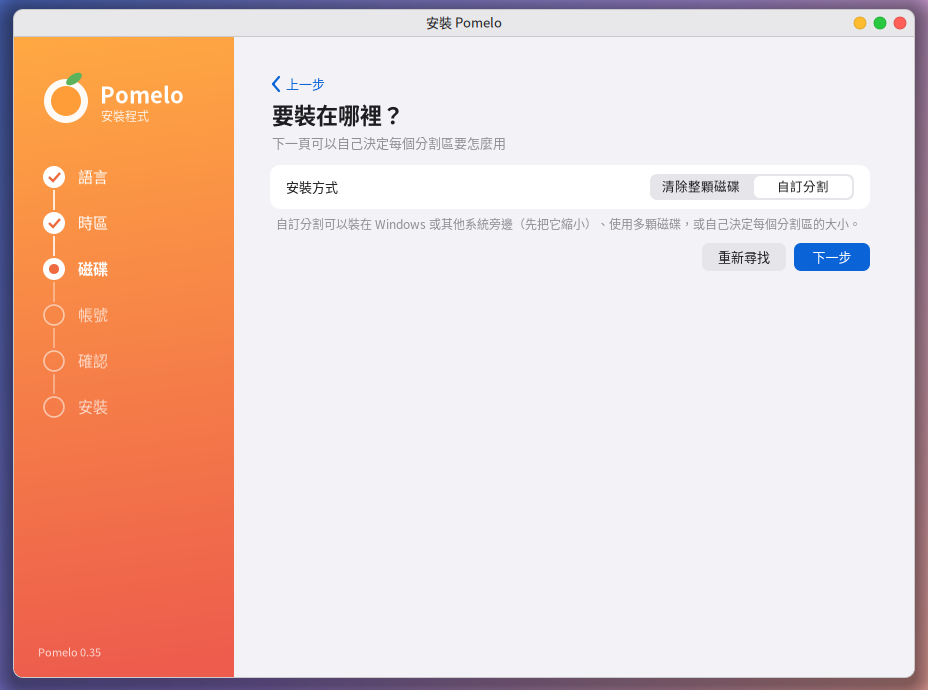
First choose the "Installation method":
- Erase entire disk: Pomelo uses the whole disk, and all existing data on it (including Windows) will be erased. Use this for a new computer, a virtual machine, or when you want to replace everything with Pomelo.
- Custom partitioning: Install next to Windows or another system, use several disks, or decide the partitions yourself. See Section 6.
When you choose "Erase entire disk", the disks you can install to (at least 12 GB) are listed below, with a note on what each one currently contains (for example, "may contain Windows"). Pick one and press "Next". The install disc (USB drive) itself does not appear in the list.

5.4 Account
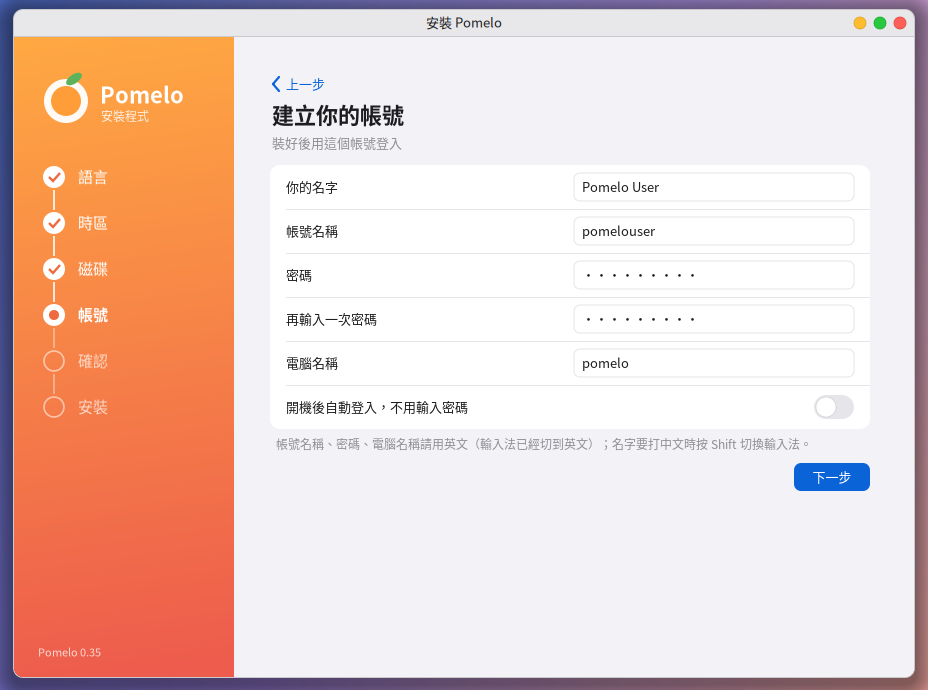
- Your name: Shown on the login screen. You can use any language.
- Username: The name you log in with. It is filled in automatically from your name in lowercase English letters, and you can change it yourself.
- Password, Computer name: Please use English letters, numbers and symbols.
- Log in automatically at startup: If turned on, the computer goes straight to the desktop at startup without asking for a password (not recommended for shared computers).
The input method starts out set to English; when you need to type your name in Chinese, press Shift once to switch to Zhuyin.
5.5 Review
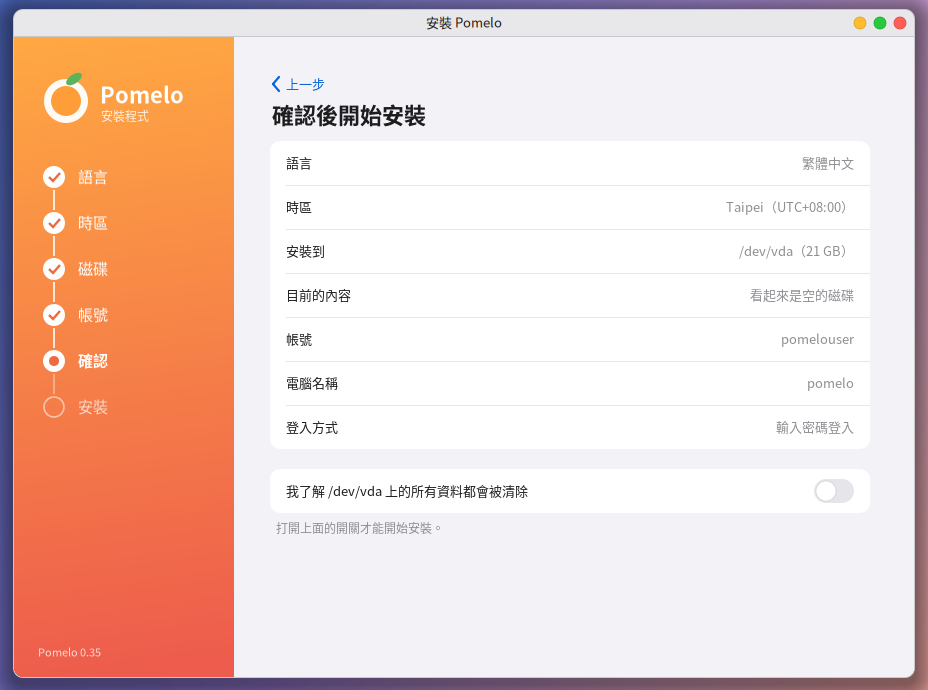
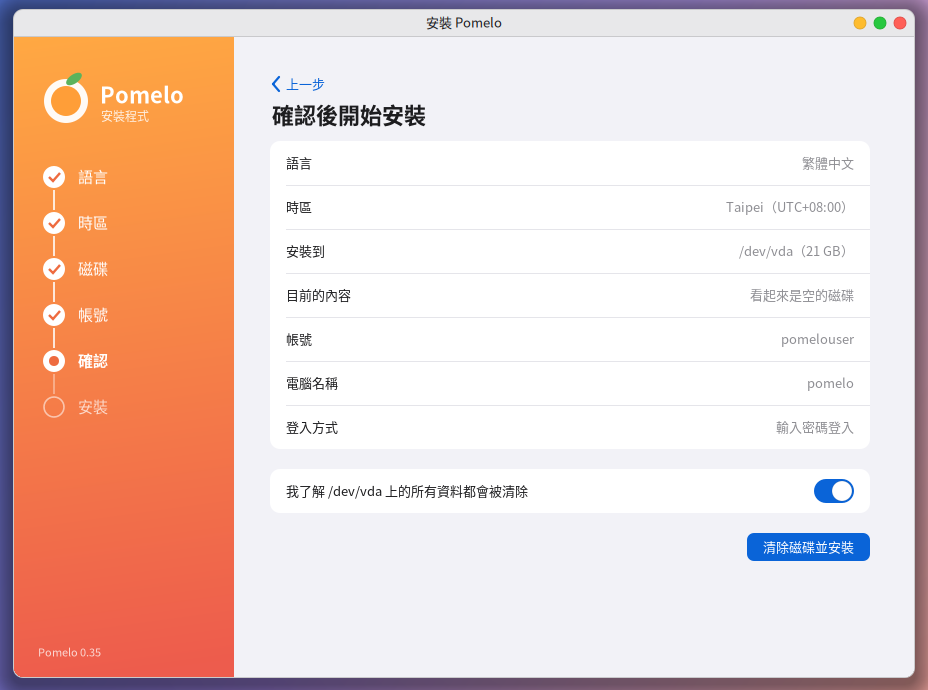
The review page lists all your settings. Once everything looks right, turn on the switch that says you understand everything will be erased, and only then does the button to start the installation appear.
5.6 Installing
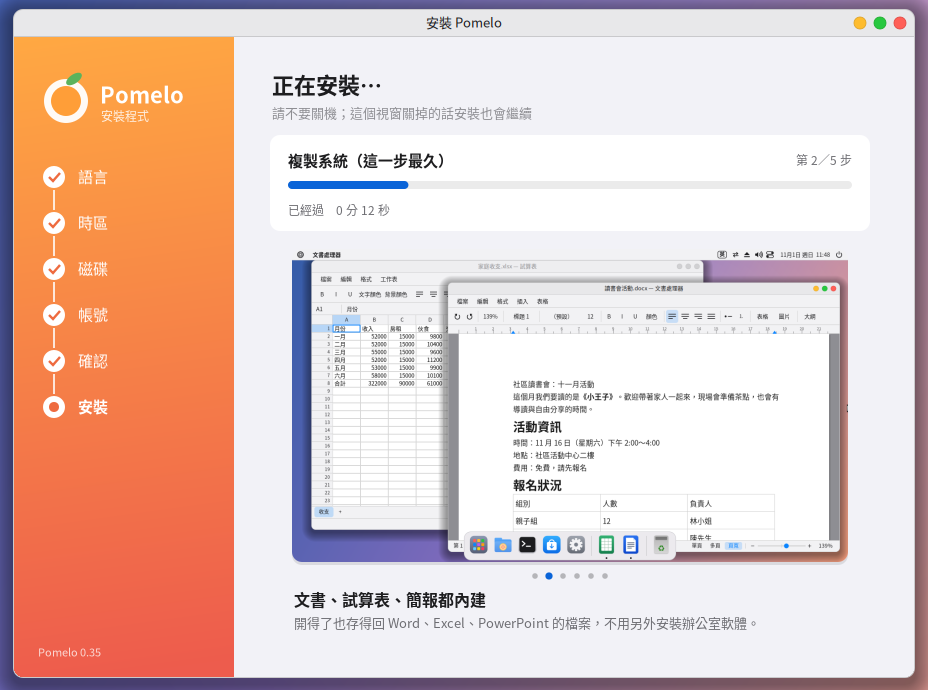
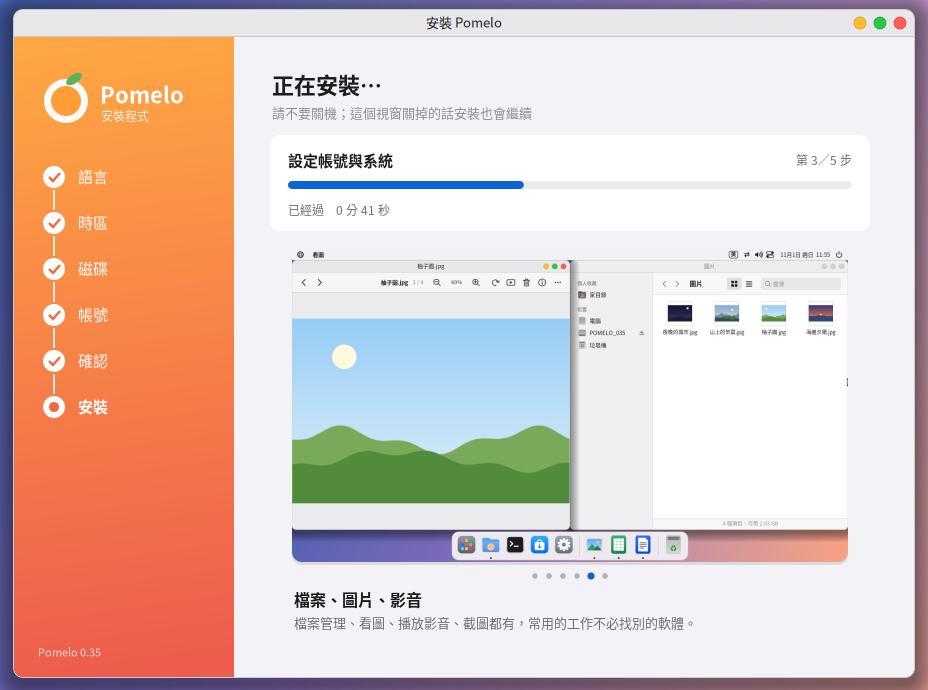
The top shows which step you are on and how much time has passed, and the bottom takes turns introducing Pomelo's features (click the picture to see the next one). Please do not turn off the computer during installation; even if you accidentally close this window, the installation will keep going.
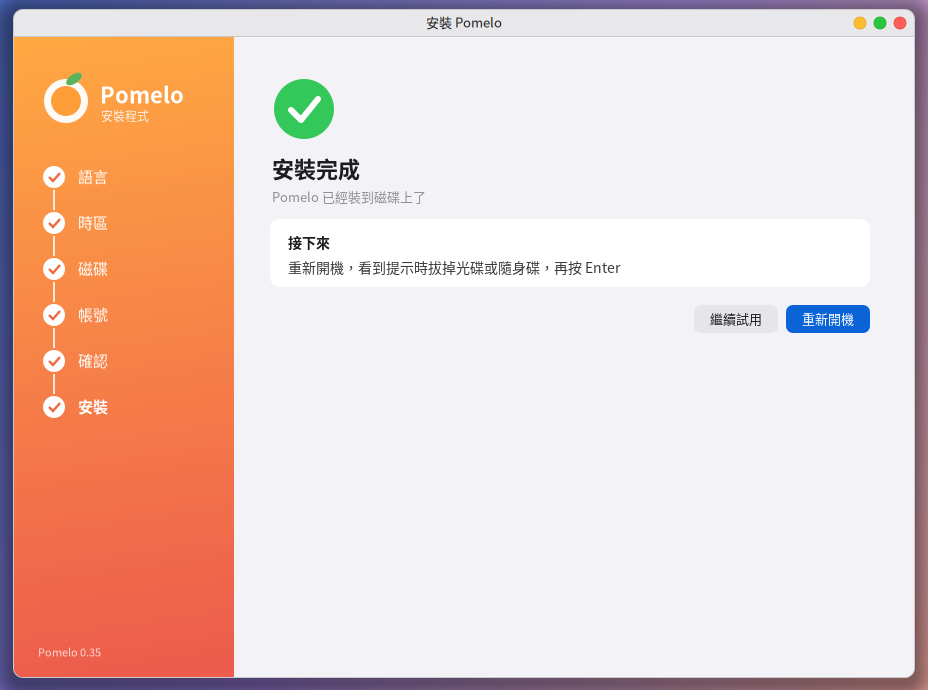
5.7 Done
Press "Restart", remove the USB drive (or eject the virtual machine's disc) when prompted, then press Enter. The Debian and Fedora versions do not show this prompt: with the Debian version, the disc is ejected automatically when booted from a disc; if you use a USB drive, just remove it when the screen goes black and the computer restarts.
6. Install next to Windows (dual boot)
With "Custom partitioning", you can shrink Windows and install Pomelo in the freed-up space, then choose which system to start each time you boot.
Before you begin (important)
- Back up your important files. Shrinking a partition is usually safe, but there is still some risk.
- Shut Windows down completely: in Windows, hold Shift while clicking "Shut down". If "Fast Startup" is on or the computer was hibernated, Pomelo will detect it and refuse to shrink the partition, to protect your data.
- A BitLocker-encrypted disk cannot be shrunk: first turn off BitLocker (decrypt) in Windows.
- We suggest running a disk check in Windows and deleting files you do not need, to free up enough space.
Steps
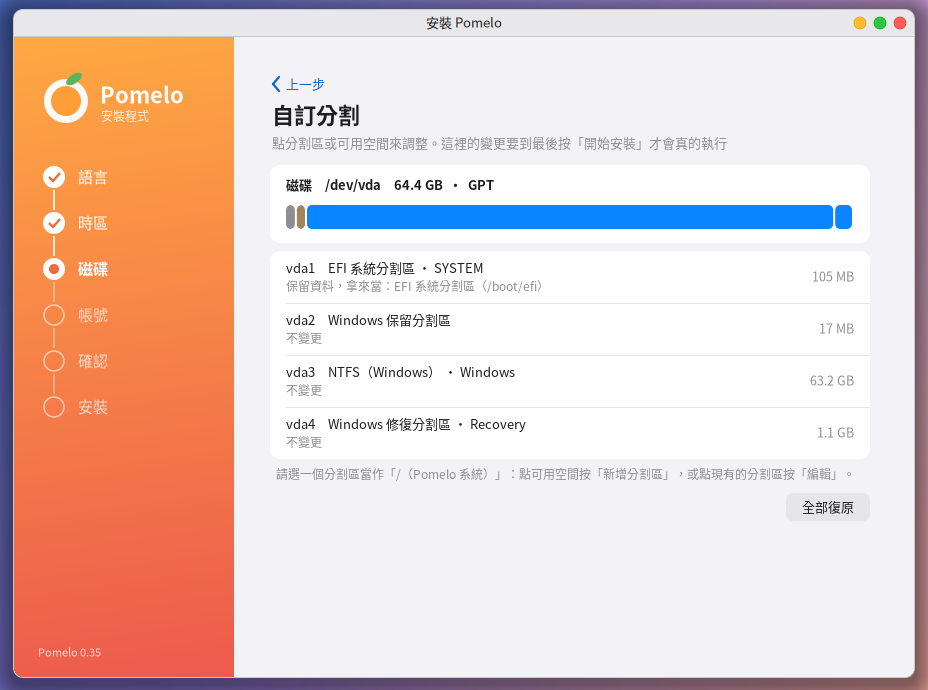
① Look carefully at your current disks: Each disk has a bar on top drawn in proportion to its size (blue is Windows, gray is the small system partitions, light gray is free space), and the partitions are listed row by row below. This computer boots with UEFI, so the existing Windows "EFI system partition" will be shared automatically (its data is kept and it is not formatted).
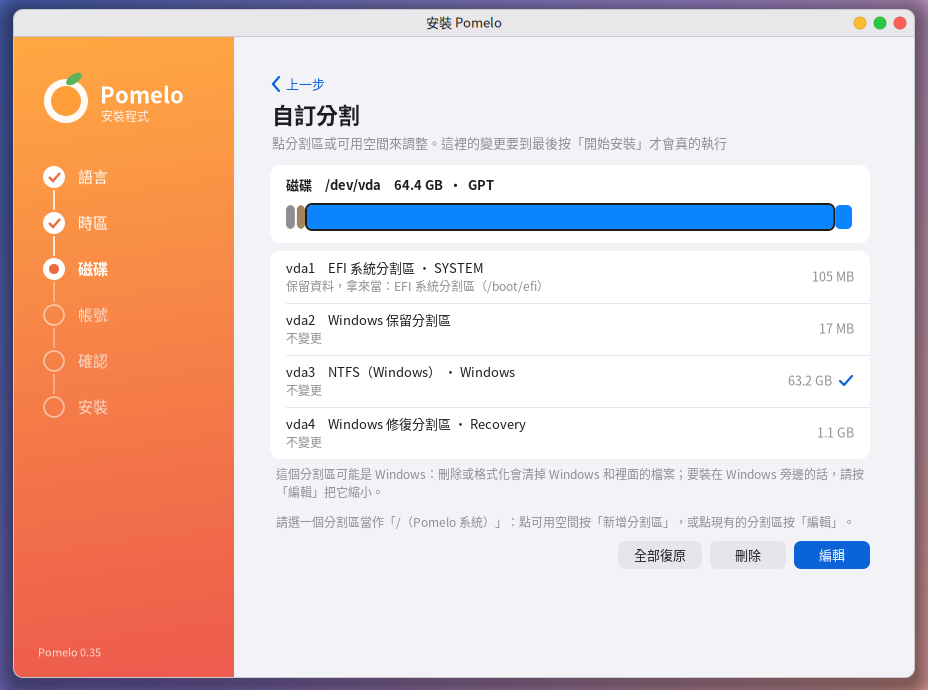
② Click the Windows partition (NTFS) and press "Edit":
③ Shrink it: Drag the "Size" slider or type a number (in GB). The "Range" runs from the smallest size it can shrink to up to its current size; the minimum already leaves some room for Windows. We recommend leaving Windows at least 20 GB, so that it can still install updates later.
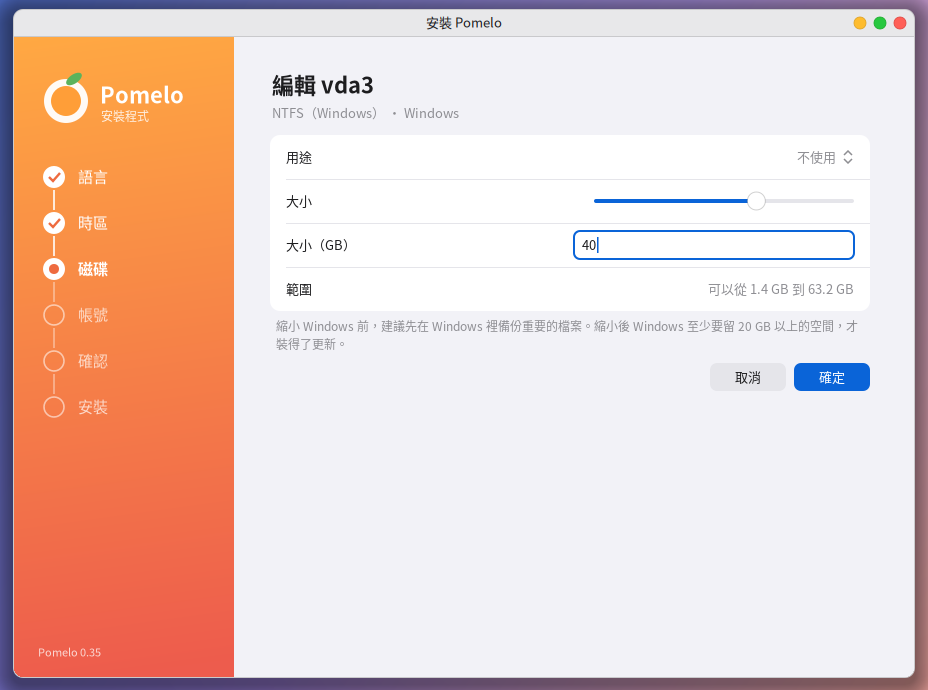
④ Press "OK": The space you freed becomes "Free space".
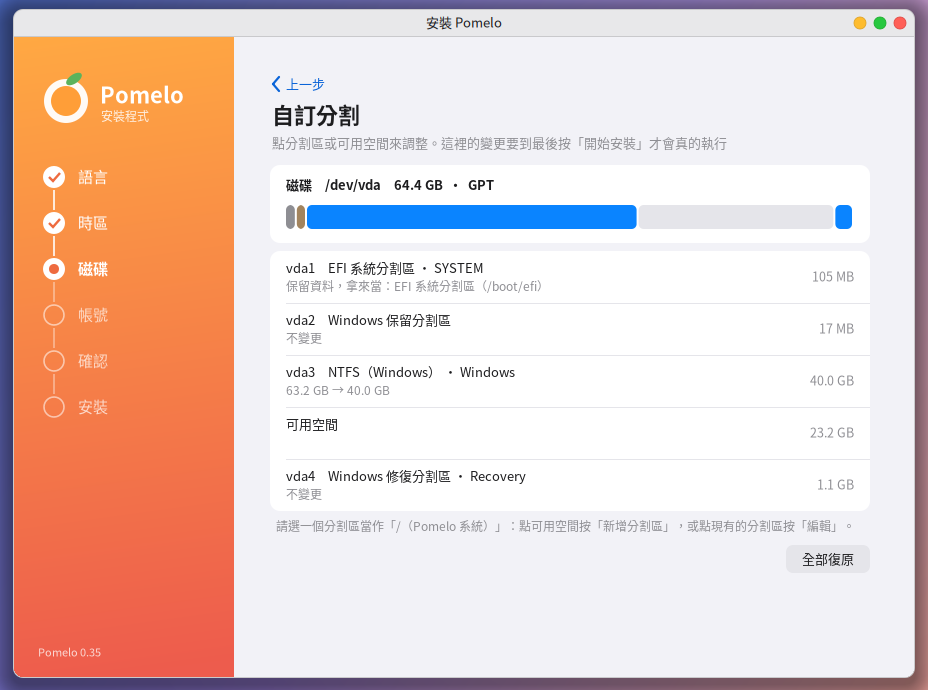
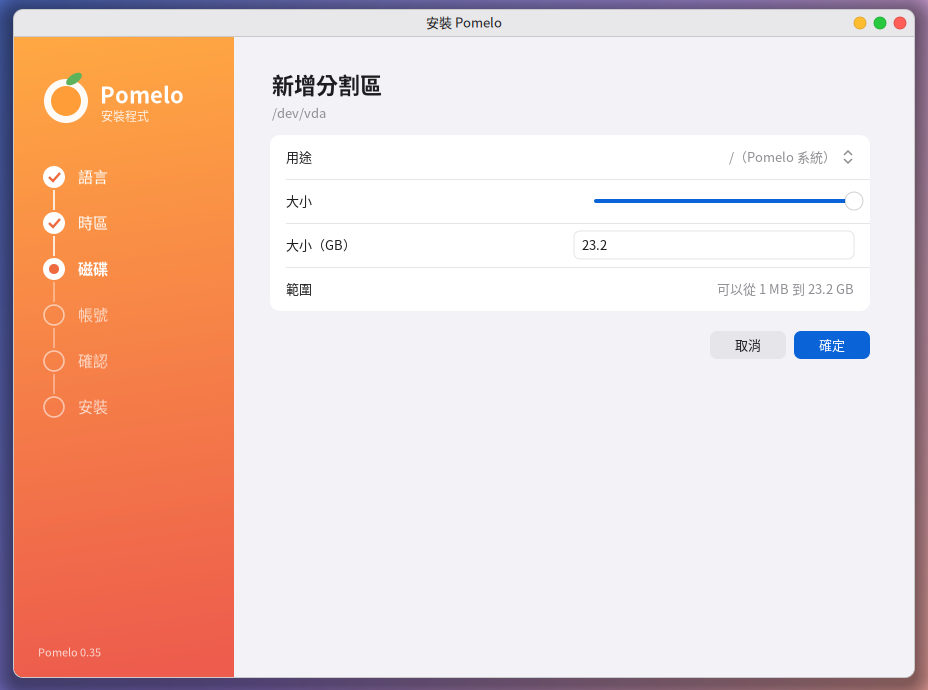
⑤ Click "Free space" and press "Add partition": For the purpose choose "/ (Pomelo system)"; the size defaults to the whole free space (Pomelo needs at least 12 GB).
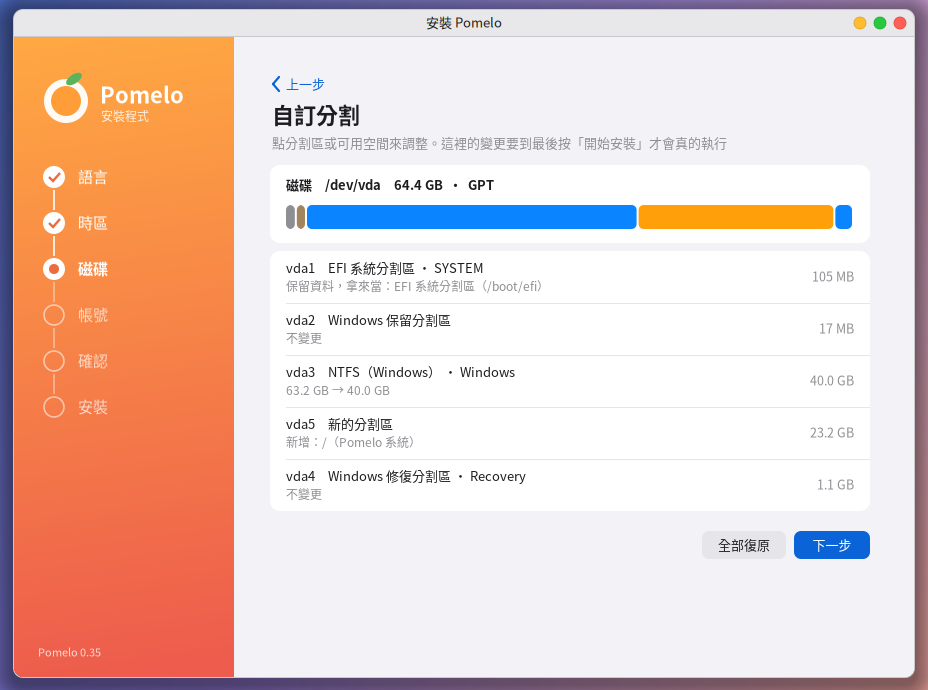
⑥ Check the bar: Orange is the Pomelo partition to be added. The "Next" button appears only when nothing is missing; if something is missing (for example, you have not chosen a partition for Pomelo yet), a note below explains what is still needed.
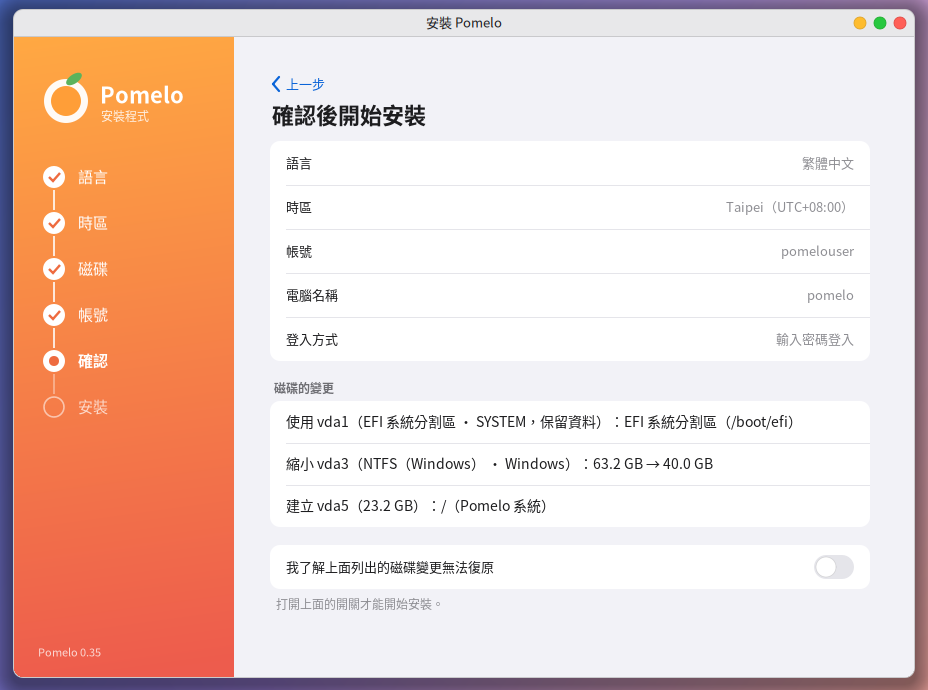
⑦ The review page lists every change that will be made to the disks, one by one. When it all looks right, turn on the switch and press "Start installation":
Other things you can do
- Delete partitions, or create a new partition table (click the disk name; use GPT for new computers, and MBR only for older computers that can only boot with BIOS).
- Add /home (keeps your personal data in a separate partition, which makes reinstalling the system easier later) or swap space.
- "Undo all" returns every change on the screen to its original state.
- When booting with legacy BIOS on a GPT disk, a 1 MB "BIOS boot partition" is needed, and the installer will remind you.
Boot menu
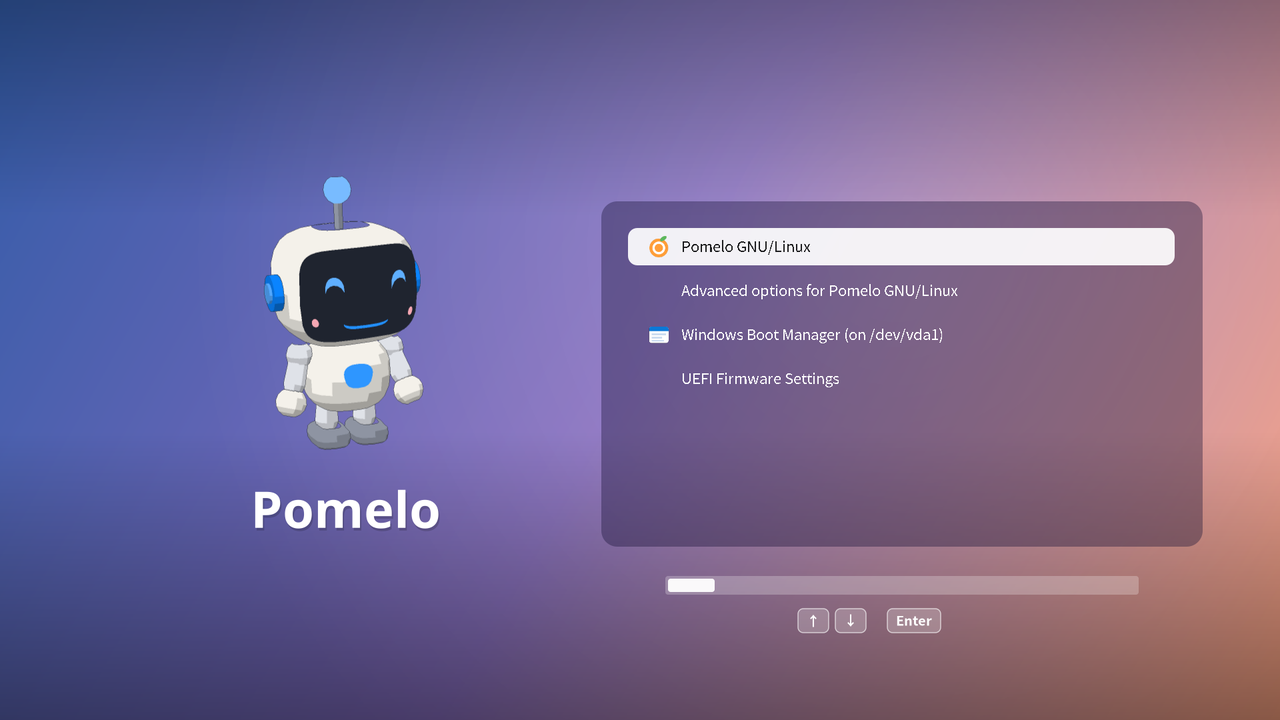
After installation, a menu appears at startup, and when the progress bar below finishes (10 seconds) it starts Pomelo automatically; to start Windows, use the up and down keys to choose "Windows Boot Manager" and press Enter.
Pomelo automatically switches to the same clock setting as Windows, so the time will not be off by 8 hours when you switch between the two.
7. After installation
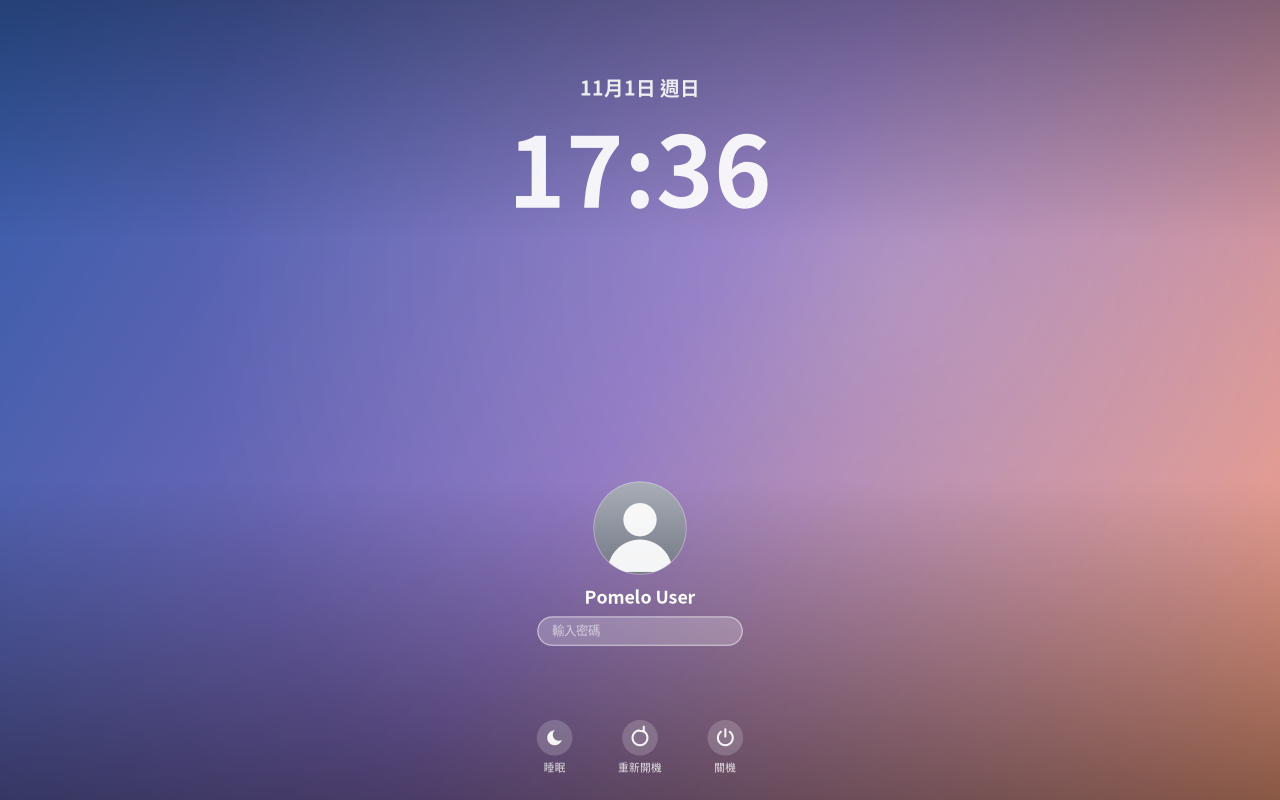
After startup, the login screen appears (or you go straight to the desktop if you turned on automatic login):
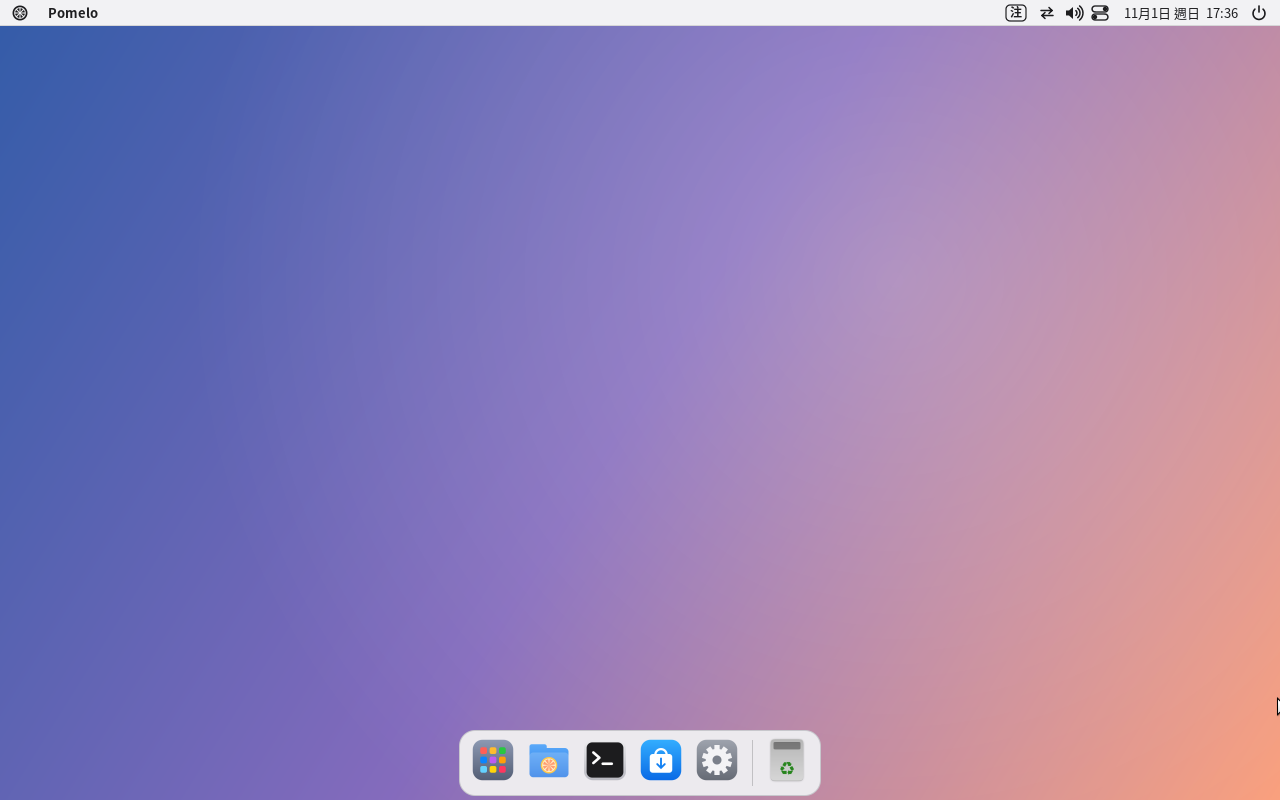
- Network: Plug in a network cable and it connects automatically; for Wi-Fi, connect from the menu bar at the top right.
- Input methods: Press Shift to switch between Chinese and English; the menu bar shows "注" or "英". You can add other input methods (Pinyin, Cangjie, Japanese, Korean, and so on) in "System Settings → Language & Input Methods".
- Software updates: In "System Settings → Software Update".
- Language: To change the language later, go to "System Settings → Language & Input Methods".
8. Troubleshooting
The screen goes black, flickers or looks garbled after booting Restart, and in the boot menu choose "Try or Install Pomelo (safe graphics)".
The installer cannot find a disk On some laptops the disk mode is set to "Intel RST/RAID", so Linux cannot see the disk. Go into the BIOS settings and change the SATA mode to "AHCI" (before changing it, Windows may need some preparation, so look it up first). Also, disks smaller than 12 GB are not listed.
When shrinking Windows, it says "Windows is hibernating" Go back to Windows and shut down completely by holding Shift while clicking "Shut down"; or in the Windows Command Prompt (as administrator) run powercfg /h off to turn off hibernation and Fast Startup.
After installing, the computer boots straight into Windows and Pomelo does not appear Go to the boot order in your BIOS settings and move the entry named "ubuntu" to the top (Pomelo's boot loader is registered in the firmware under the name ubuntu).
Installation failed The failure page shows the last messages. The full logs are in the trial system at /tmp/pomelo-installer.log and /tmp/pomelo-install.log; if the installation succeeded, there is also a copy at /var/log/pomelo-install.log in the installed system. Please attach these files when reporting a problem.
The graphical installer will not open From the applications menu, open "Install Pomelo (text mode)" to install with a text interface (it only supports erasing the entire disk).
After installing from a disc made before 2026-11-01, the wired network does not work Earlier discs were missing one setting. Run the following line in the terminal and it will connect automatically:
sudo touch /etc/NetworkManager/conf.d/10-globally-managed-devices.conf && sudo systemctl restart NetworkManager
Booting is very slow in VirtualBox Follow the table in Section 3: 2 or more processors, KVM as the paravirtualization interface, and Host I/O Cache checked.